While multiple ways exist to connect and engage with customers, email notifications remain among the top choices for ease, cost-efficiency, and reliability. Whether sending confirmation or reminder mail for insurance premiums, credit card bill payments, or order confirmations, it remains the go-to choice for businesses.
Java programming is the preferred choice for email notifications because of its portability, security, reliability, and customization ability. Using Java to send email is essential for businesses looking to streamline their communication processes.
In this post, we will explain the following three ways to send email notifications to provide you with a detailed overview of each method:
JavaMail API
SMTP Protocol with Simple Java Email
Third-party multichannel notification infrastructure, like Fyno (Fastest way ⚡)
Let’s begin.
Method I: Using JavaMail API
JavaMail API is an open-source, versatile, platform-independent, and protocol-independent framework. It’s free and allows customisation. The API supports various protocols, such as SMTP, POP3, and IMAP, making it versatile for different use cases.
Alternatively, Jakarta Mail offers similar functionality with detailed guidance on sending emails, including features like sending to multiple recipients and attaching files.
How it works
The JavaMail API enables developers to send emails from Java applications by utilizing classes and methods that handle email message creation, addressing, sending, and receiving.
The session object is crucial in managing email-related information, especially when dealing with different SMTP servers and authentication protocols like TLS and SSL. It abstracts the complexities of email protocols, providing a straightforward way to integrate email functionalities into your applications.
Step-by-step guide on setting up and using JavaMail API
Add dependencies: Ensure you have the necessary JavaMail libraries in your project. You can include them via Maven or manually download the jars.
<dependency>
    <groupId>com.sun.mail</groupId>
    <artifactId>javax.mail</artifactId>
    <version>1.6.2</version>
</dependency>
Setup mail properties: Configure the mail properties such as SMTP host, port, and authentication details.
Properties props = new Properties();
		props.put("mail.smtp.host", "smtp.gmail.com"); //SMTP Host
		props.put("mail.smtp.port", "587"); //TLS Port
		props.put("mail.smtp.auth", "true"); //enable authentication
		props.put("mail.smtp.starttls.enable", "true"); //enable STARTTLS
Create a session: Establish a mail session using the properties and an authenticator.
Session session = Session.getInstance(props, new javax.mail.Authenticator() {
    protected PasswordAuthentication getPasswordAuthentication() {
        return new PasswordAuthentication("username", "password");
    }
});
Compose the message: Create a message object and set its content, subject, and recipients.
Message message = new MimeMessage(session);
message.setFrom(new InternetAddress("from@example.com"));
message.setRecipients(Message.RecipientType.TO, InternetAddress.parse("to@example.com"));
message.setSubject("Testing Subject");
message.setText("Hello, this is a test email!");
Send the email: Utilize the Transport class to send the email.
Transport.send(message);
Advantages:
Well-structured
Large community support
Offers multiple options to read, compose, and send emails.
Free of cost
Limitations:
Doesn’t support all types of email features, like image attachments or HTML messages. Additionally, handling complex 'message body' and 'email body' content, such as HTML and images, can be challenging.
Performance suffers owing to the time taken to compile and interpret code.
It consumes significant Java heap space and creates storage issues.
Method II: SMTP server protocol with simple Java email
Simple Java Email is another widely used method by developers to send email notifications, designed to overcome some of the critical limitations of JavaMail API.
How it works
The Simple Java Mail library provides a straightforward and robust solution for sending emails using the SMTP protocol. Unlike the traditional JavaMail API, Simple Java Mail abstracts many complexities, making it easier for developers to send emails without dealing with low-level details like MimeMessage handling and authentication setups. The library also supports sending emails to multiple recipients using methods like setRecipients and addRecipients, which allow you to specify multiple email addresses efficiently.
To begin with Simple Java Mail, you must configure your SMTP server settings. This involves specifying the server host, port, and authentication details such as username and password. The library supports various authentication methods, including plain SMTP, SMTPS (SSL), and TLS, ensuring secure email transmissions.
Here’s a step-by-step guide on setting up and using Simple Java Mail:
Configuration: First, set up your SMTP server configuration. For instance, using Mailtrap for testing purposes, you would configure the server host, port, username, and password.
Email composition: Create an email object using the EmailBuilder class. You can set the recipient addresses, subject, and content (plain text or HTML).
Sending email: Finally, use the Mailer class to send the email. The Mailer instance is created with the configured SMTP server settings.
Example code
    // Create the email
    Email email = EmailBuilder.startingBlank()
            .from("Sender Name", "sender@example.com")
            .to("Recipient Name", "recipient@example.com")
            .withSubject("Test Email")
            .withPlainText("This is a test email.")
            .buildEmail();

    // Create the mailer
    Mailer mailer = MailerBuilder
            .withSMTPServer("smtp.mailtrap.io", 2525, "username", "password")
            .buildMailer();

    // Send the email
    mailer.sendMail(email);
}
With its clean and straightforward API, the Simple Java Email library eliminates the need to deal with low-level APIs, like Mime Message, and inner classes like javax.mail API. Some other benefits include:
Supports image and HTML attachments.
Simple and lightweight compared to other available libraries.
Allows developers to control valid combinations and logical decision paths tightly.
Additionally, integrating the Simple Java Mail library into any Java application is straightforward and efficient.
Limitations:
Unlike JavaMail API, Simple Java Email has a smaller community of users. Its limited documentation makes it challenging for developers to use the Simple Java Email library effectively. Moreover, it lacks advanced features and capabilities to meet modern-day business needs, including the ability to send mail with attachments and images.
Method III: Third-party multichannel notification infrastructure
Modern-day communication needs are different and more complex. It demands a new approach to address the present-day notification communication requirements.
A multi-channel notification infrastructure provider, like Fyno, enables users to send cross-channel notifications via a single unified API, like Emails, SMS, and Push Notifications. Fyno can streamline your notification flow by creating all the relevant channels and providers with a single API without coding.
Key features & benefits:
Packed with an impressive array of features, Fyno's full-stack notification infrastructure management platform allows you to seamlessly handle the entire communication flow —from integration, routing, template management, and creating event automation, with a single API across providers and channels.
Here are some key benefits that Fyno offers, including
Extensive integration options: 40+ CSPs and 6+ communication channels.
No tech dependency: End-to-end notification management without involving the engineering team, saving their productive time.
Routing: Create and implement smart cross-channel flow across providers without tech dependency.
In-App SDK: Offers a fully loaded developer-ready in-app layer for all web and mobile applications.
Granular template management: Easy drag & drop editor to design templates for your content, offering better template control.
Powerful workspace: Manage various projects with distinct integrations, workflows, and templates in each workspace.
Unified analytics: Easily track, measure, and make data-driven informed decisions. Fyno gives you a unified view of cross-channel analytics across vendors in one place to help you understand what is working for you.
Smart automation: Automatically sync, refresh, and create notification triggers, allowing you to spend more time on pressing needs.
Quick scalability: Fyno puts the scalability on autopilot.
Fyno has been designed and developed using the “developer-first” approach. It does all the heavy lifting, enabling engineering teams to focus without worrying about notifications.
Here's the step-by-step process to get you started with Fyno's super user-friendly platform.
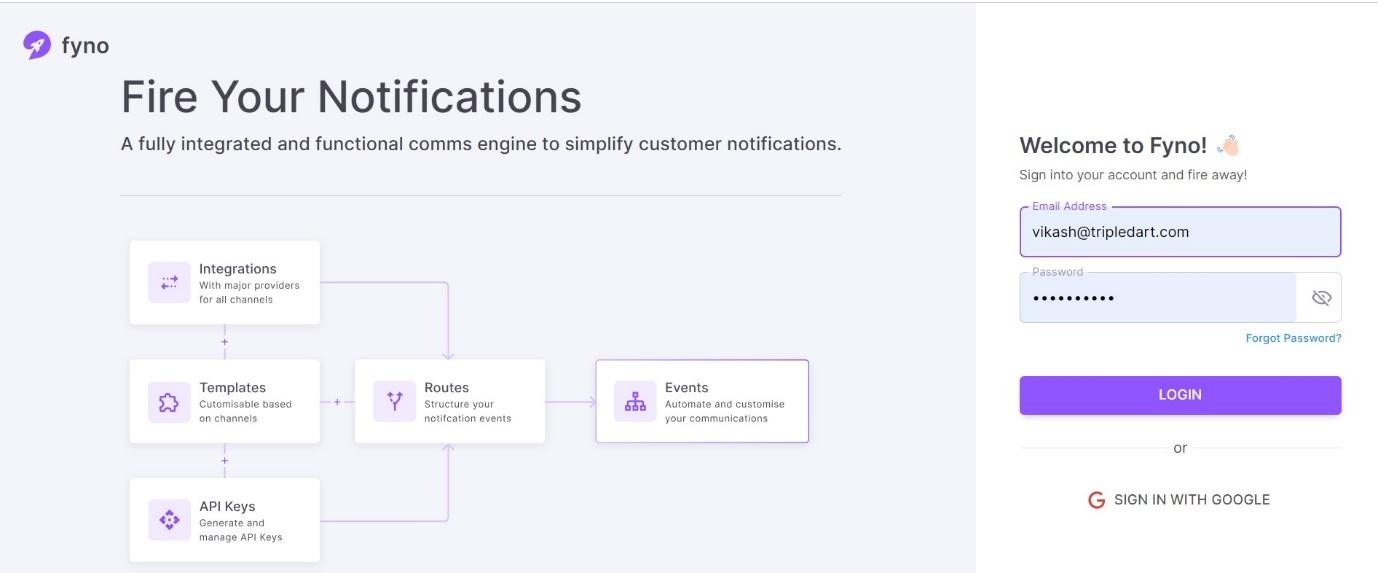
Step I: Log in to the Fyno account.
Once you land on the “Welcome to Fyno” page, enter your Email Address and Password.
Get access and try Fyno today :)
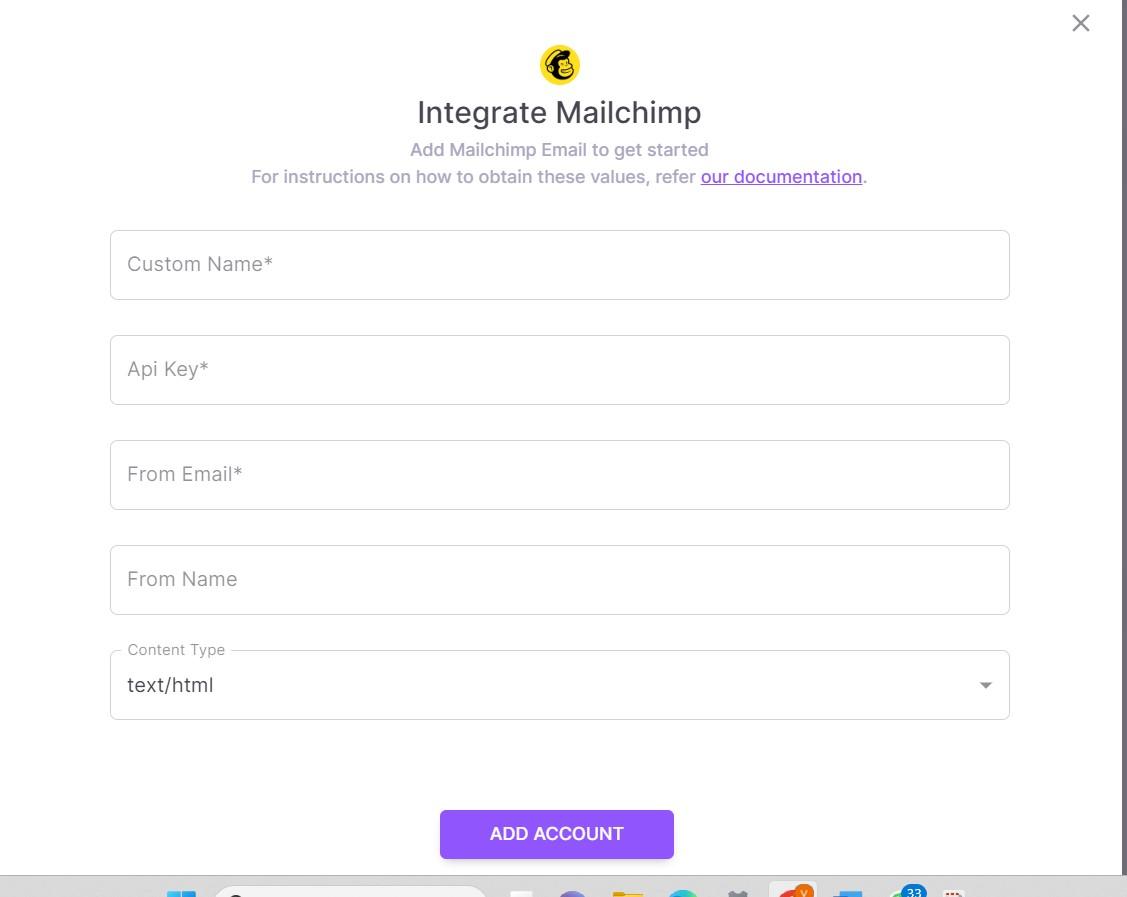
Step II: Integrate with email(s).
Fyno provides a ready-to-integrate provider list to integrate with emails, including Gmail, Mailchimp (Mandrill), Mailgun, Netcore, Outlook, Postmark, and SendGrid.
Once you log in, click on integration and select the right email channel, like Gmail Outlook.
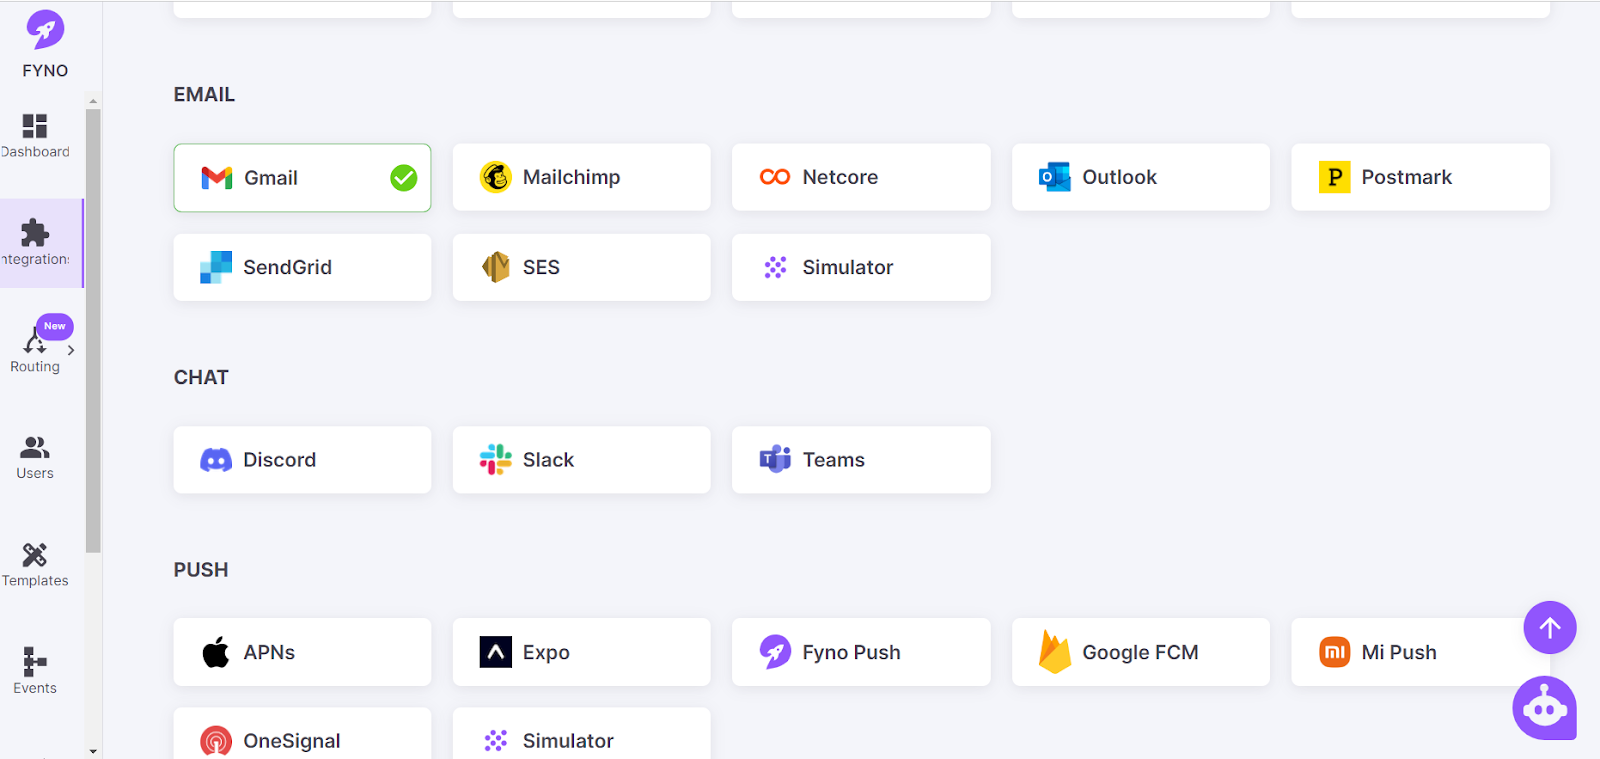
You need to enter a few basic details, such as your Account name, Email ID, App Key/Access Key, and other details, and then click “Add Account.” Your preferred email channel/service provider will be integrated.
Step III: Create & load template
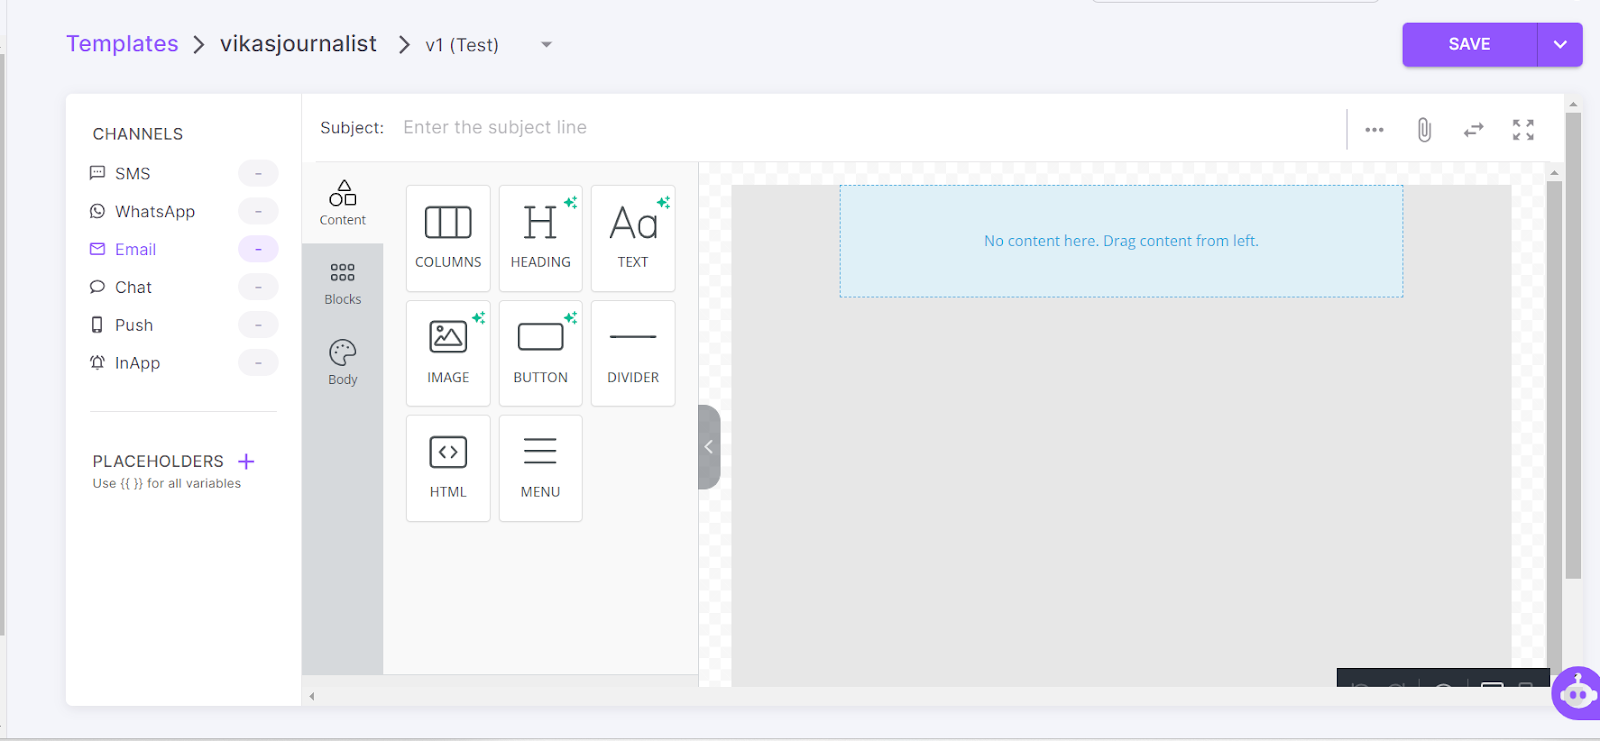
Fyno allows you to create and store all your messaging content in one place. You can customize everything—the number of columns, headings, text, buttons, dividers, images, or a host of other things—without coding.
To create a template, head to the “Templates” tab, click on “Create,” and then click on “Drag & Drop Editor.”
Now, select the “Email” icon/tab.
Finally, click the “Save” button.
Step IV: Create smart flow (Routing)
Create rules and logic in a few clicks, drags & drops with Fyno.
Head to the “Routing” tab,
Choose “Single Channel”, and
Click the “Create” button.
The following page pops up:
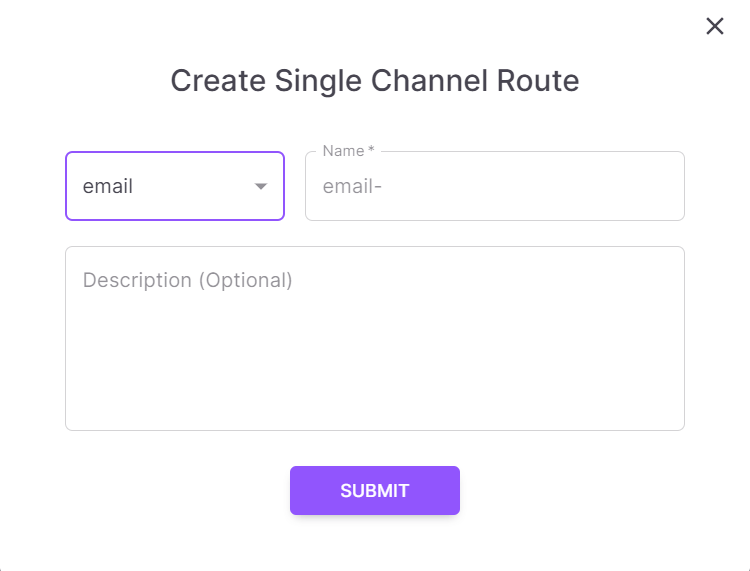
Now, add a few basic details in the relevant fields, and click the “Submit” button. You're now ready to create your communication flow and add conditions and actions to build logic.
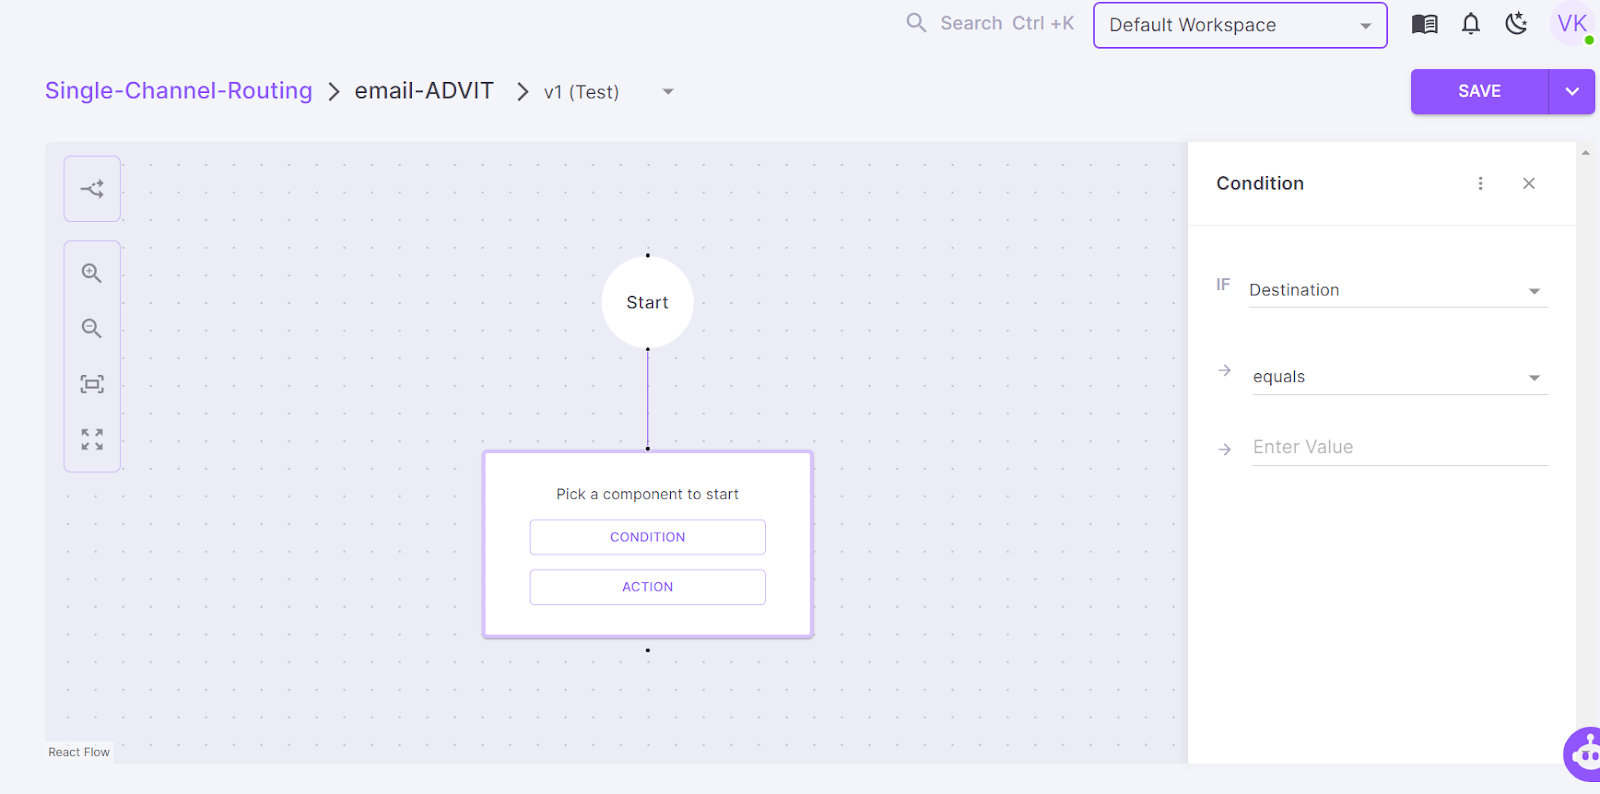
Following the process, you can create your communication flow in minutes and apply multiple conditional logics by clicking “Condition,” as shown in the left pane of the above screenshot.
Similarly, by clicking “Action,” you can quickly add and enable multiple features like the pattern of sending – normal round-robin, distribution of the volume of emails across configured service providers, and failover mechanism.
Once you are over, click the “Save” button. To learn more about this step, click here.
Step V: Create a notification event.
It is the stage where you combine templates, providers, routes, and channels to fire notifications.
Visit the “Event” tab and click the “Create” button at the top right.
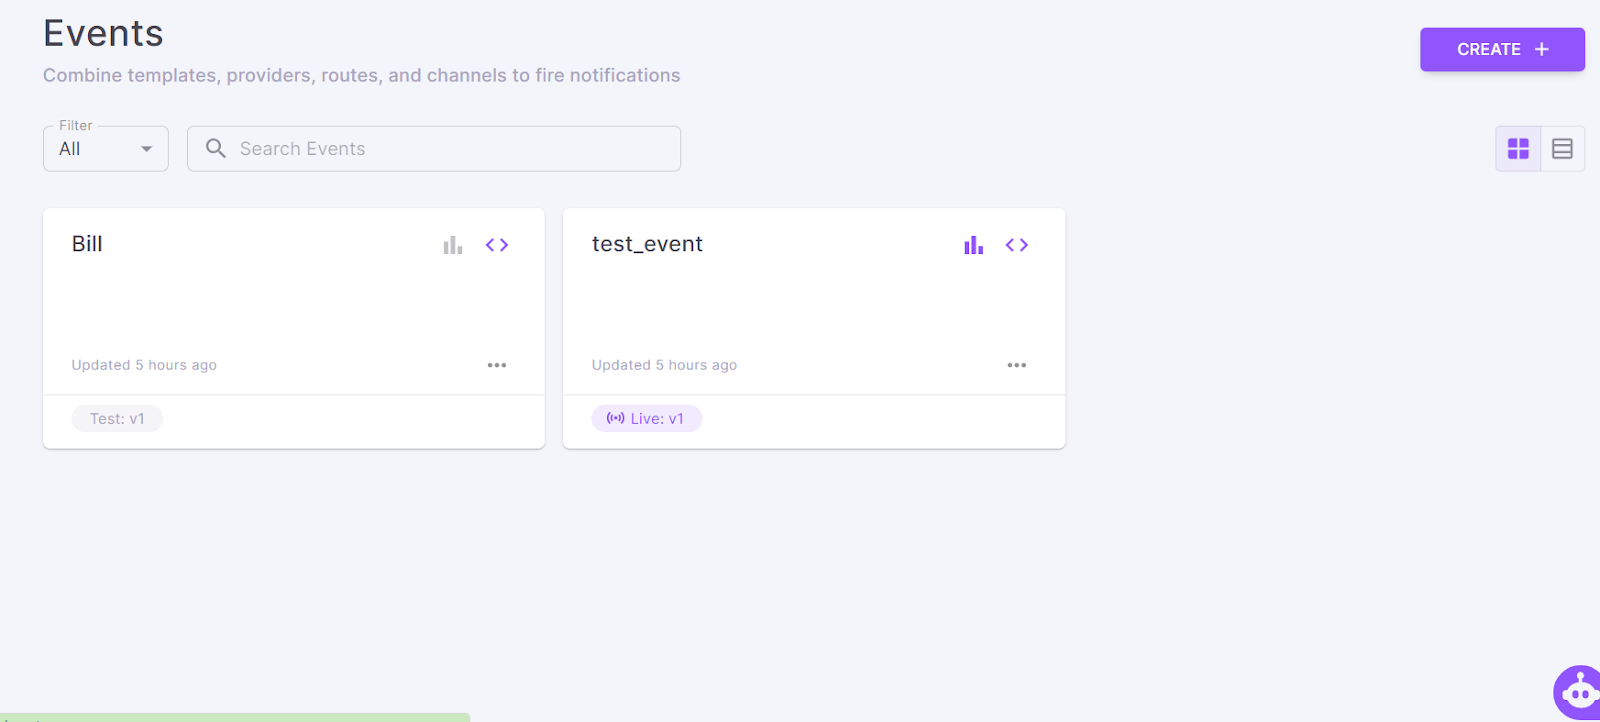
To learn more about the process, click here.
Once you're done, “Save” the event.
Step VI: Trigger a notification event.
Once your Event is created, saved, and promoted live, you can trigger the Event. To know the steps in detail, click here.
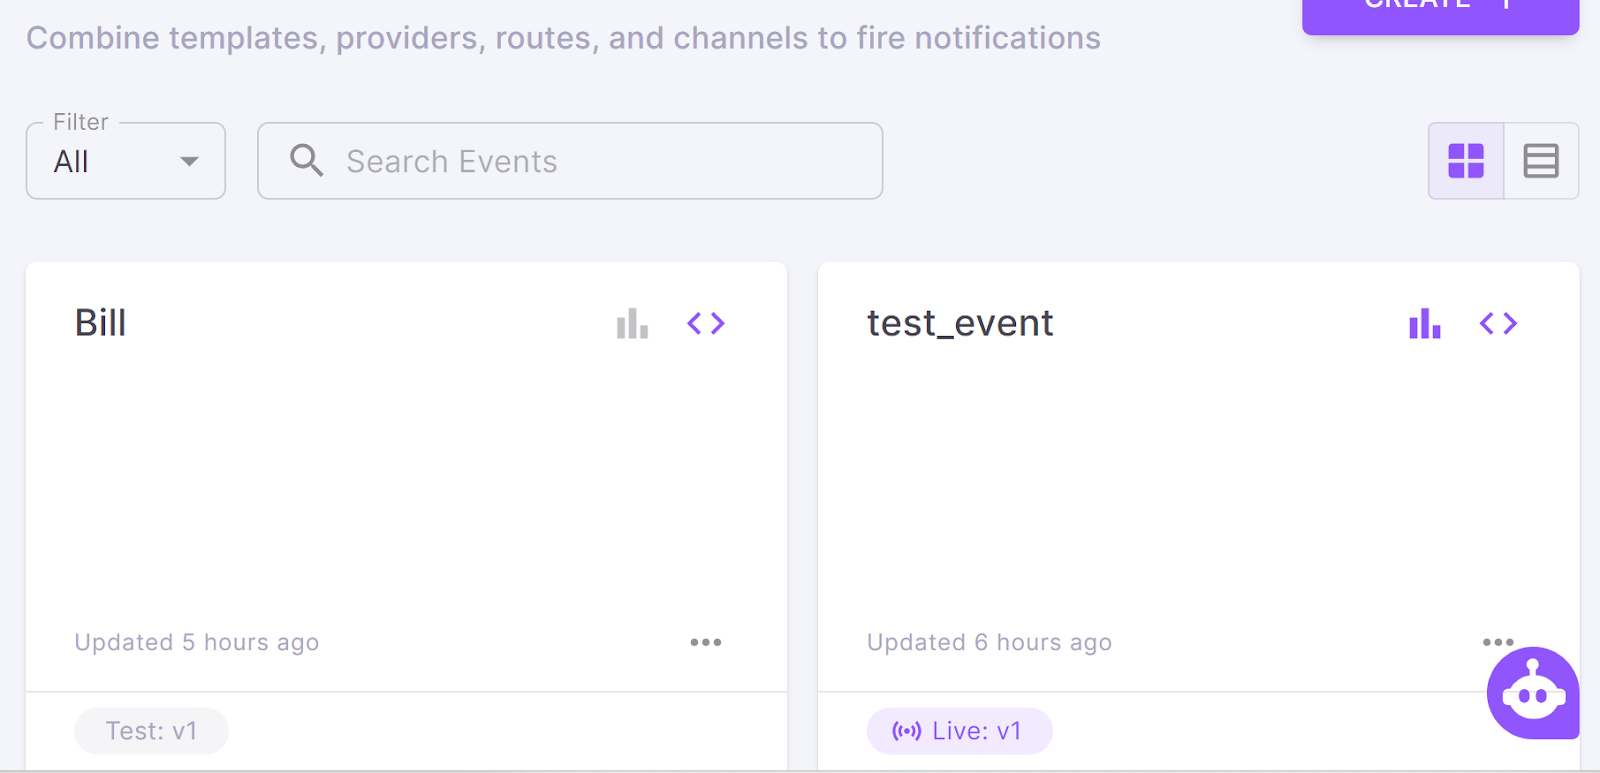
At the end of the step, you have the single unified code for the entire Event that can be viewed by clicking the “<>” icon.
Step VII: Check event analytics and logs.
With Fyno, you get granular level channel-wise and vendor-wise analytics on a unified dashboard.
You can view “Event Analytics” by clicking on the bar icon. Here, you can use unified analytics to gain actionable insights about channel performance, measure channel usage, and check provider usage.
To access the log details, click the “Logs” tab at the end of the menu bar. It provides a detailed understanding of the notification, such as the time taken, details sent, the response received, and the final status.
Closing remarks
As a business grows, notification API management becomes messier as more providers/channels are added. Overall, managing the communication stack becomes challenging. That's where a notification infrastructure management software system, like Fyno, comes in handy.
Some key value propositions that Fyno offers include:
Flexible, no-code capability: A more efficient, standard, and better notification system reduces developer dependency, providing DIY flexibility to product teams.
Go live faster: You can run your campaigns in minutes, not months.
Better control over data: Your business-critical data will be hosted on your infra, so you never have to worry about control and data security.
Support any communication template: Control content with better and more efficient template management.
Ensure 100% deliverability: Ensure your notifications are never disrupted by provider or channel issues with our failover protocols.
Real-time analytics/audit log: Get detailed insights on channels, providers, templates, segments, message types (including OTP), open rates, and more through a user-friendly dashboard customized to your notification objectives.
Want to learn more about Fyno? Schedule a demo with us now!
FAQs
1. What is the JavaMail API and how does it help in sending email notifications?
The JavaMail API is an open-source, platform-independent framework that enables Java applications to send and receive emails using protocols like SMTP, POP3, and IMAP. It simplifies email handling by providing classes and methods to create, address, and send email messages.
2. How do I set up and use the JavaMail API for sending emails?
To use the JavaMail API, you must add the necessary dependencies, configure mail properties, create a mail session, compose the message, and then use the Transport class to send the email.
3. What are the advantages of using the Simple Java Mail library over the JavaMail API?
The Simple Java Mail library offers a more straightforward and robust solution for sending emails by abstracting many complexities. It supports image and HTML attachments, is lightweight, and provides a clean API, making it easier to use than the JavaMail API.
4. How can I configure and use Simple Java Mail for sending emails?
To use Simple Java Mail, you must set up your SMTP server configuration, create an email object using the EmailBuilder class, and then send the email using the Mailer class.
5. What is a third-party multichannel notification infrastructure, and how does it work?
A third-party multichannel notification infrastructure, like Fyno, allows you to send cross-channel notifications (emails, SMS, push notifications) using a single unified API. It streamlines notification management by integrating various channels and providers, offering features like template management and smart routing.
6. How do I get started with Fyno for sending email notifications?
To get started with Fyno, you need to log in to your Fyno account, integrate your email provider, create and load email templates, set up smart routing rules, create notification events, and finally, trigger and monitor these events.
Or you could talk to us :)

