Create Cohorts
To create a one-time or recurring campaign, you need to create a cohort as first step.
What is a Cohort?
A Cohort is a collection or a segment of users created on a set of filters or a database query. This allows you to segment users based on any criteria and send targeted messages to them.
A few examples of filters include filtering by specific status, location, or sign-up timestamp. There are countless other possibilities that you can explore by using different combinations of filters or writing your own query.
How to create a cohort?
Let’s have a look at how to create a cohort.
Filters and Query Builder
Filters and Query allow you to get the segment of users for certain conditions or factors.
Filters Builder
A powerful visual builder using which you can apply a set of filters to the schema data to get the desired output. This builder consists of the following major components:
Rule
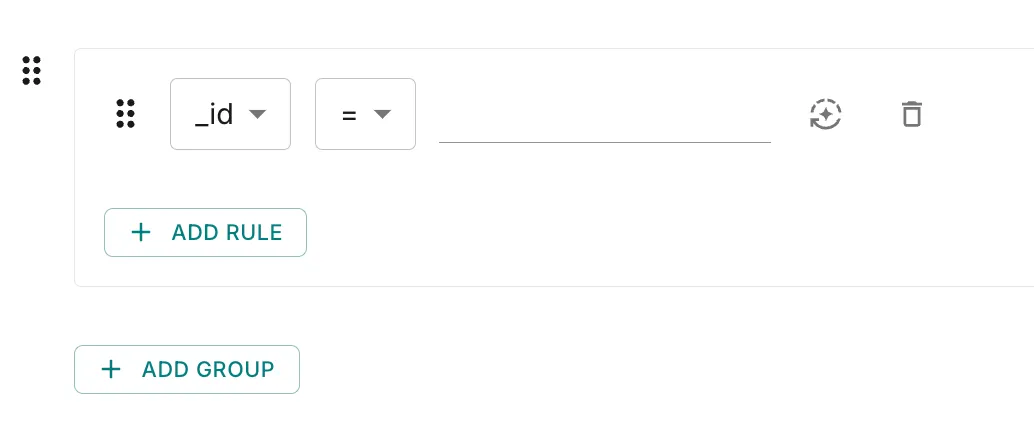
It is the most important component as it consists of the single condition or the filter that needs to be applied.
A rule is created by combining 3 things:
The “Key” is the column name or the object key from your schema. It is present as a dropdown menu with a list of column names or object keys from your schema.
The “Operator” is the operation or check that is to be performed between the key and the value. It is present as a dropdown menu with a pre-defined list of operators.
The “Value” is the data value that you input. The data type of this field will depend on the “Key” selected and will change as you change the selected “Key”.
Example of a rule:
Distinct Values
Use the highlighted icon to instantly see all unique values in your selected column. This automatic detection saves time, especially when working with large datasets, by showing you all possible filter values in a convenient dropdown menu.
Group
A group is a collection of rules that can be used to organize filters and create complex filters by combining multiple groups with different combinators.
Combinators
Determine how 2 rules or groups will combine together in order to form a complete condition or a filter. It can have 2 values:
- AND: The “AND” combinator evaluates to true if both of its rules or groups are true. If at least one of the it is false, the entire combined condition evaluates to false. The “AND” operator can be thought of as representing the intersection of conditions.
- OR: The “OR” operator evaluates to true if at least one of its rules or groups is true. If both are false, the entire combined condition evaluates to false. The “OR” operator can be thought of as representing the union of conditions.
Query Builder
A simple code editor to write or paste your db queries and run it directly on the schema data to get the desired output. This editor gives you more freedom as you can write as complex a query as you can and also helps you reuse what you have already written someplace else.
It’s essential to use the appropriate query when working with different databases. For instance, MongoDB requires a JSON-formatted Aggregation Pipeline query which looks like this:
Generate a query with Fyno AI
Don’t know how to write a database query? Describe the set of users you want in plain English, and Fyno AI converts it into a query that runs on your schema data.
For example, if your user table has created_at and language columns, you could type:
Fyno AI generates the query in the right format for your database:
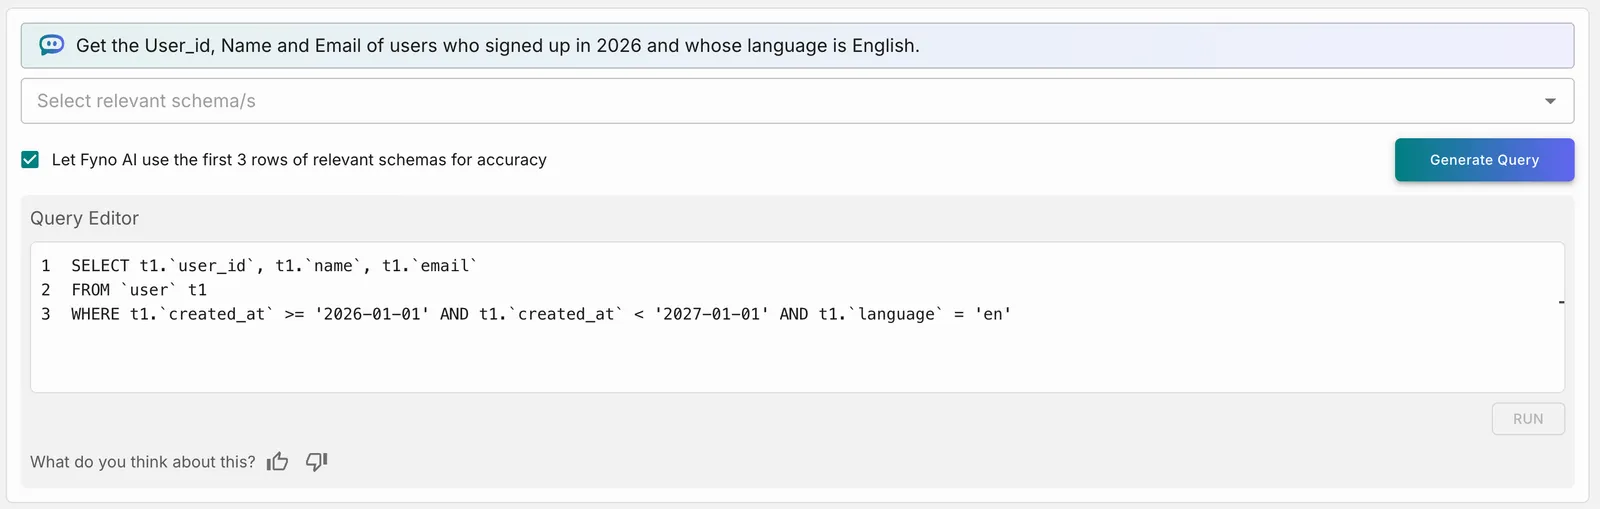
Here’s the query for this prompt in each supported database:
The query returns the User_id, Name and Email of each matching user. Notice how Fyno AI interprets the prompt: “signed up in 2026” becomes a date range on created_at, and “English” becomes the language code en as stored in the data. The table and column names in your query come from the schemas you select, so yours will differ.
How to download cohort data?
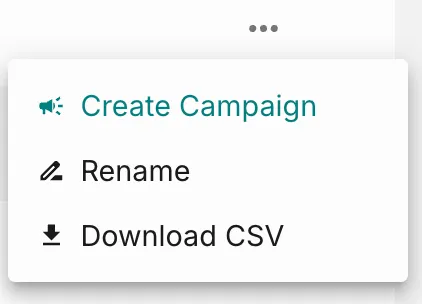
To download cohort data, go to cohorts page and click ellipsis present at the end of each cohort. You will see the below options.
Click Download CSV option to download the cohort data.