Fyno’s Quick-Start Guide
Fyno’s Quick-Start Guide
Get started with Fyno, your all-in-one Customer Communications Management (CCM) platform. Our solution offers superior message deliverability, cost reduction, effortless template management, data transformation through workflows and centralized analytics across all channels and service providers through a single dashboard.
In this guide, we’ll show you how to get started with Fyno in under few minutes.
Configure your integrations
Let’s begin by setting up your channel and provider integrations :
-
Go to your existing communication providers/platforms and get the authentication keys (API credentials).
-
Now head over to the integrations tab on the Fyno platform, click on your provider and add the credentials to activate your provider/channel. If you use a provider/channel that is not already available, let us know and we will make it available within 5 business days
You’ve essentially finished your channel and provider integration. Wasn’t it a breeze? No more effort for API integrations.
Access our detailed documentation here to dive deeper
Create/Load your Templates
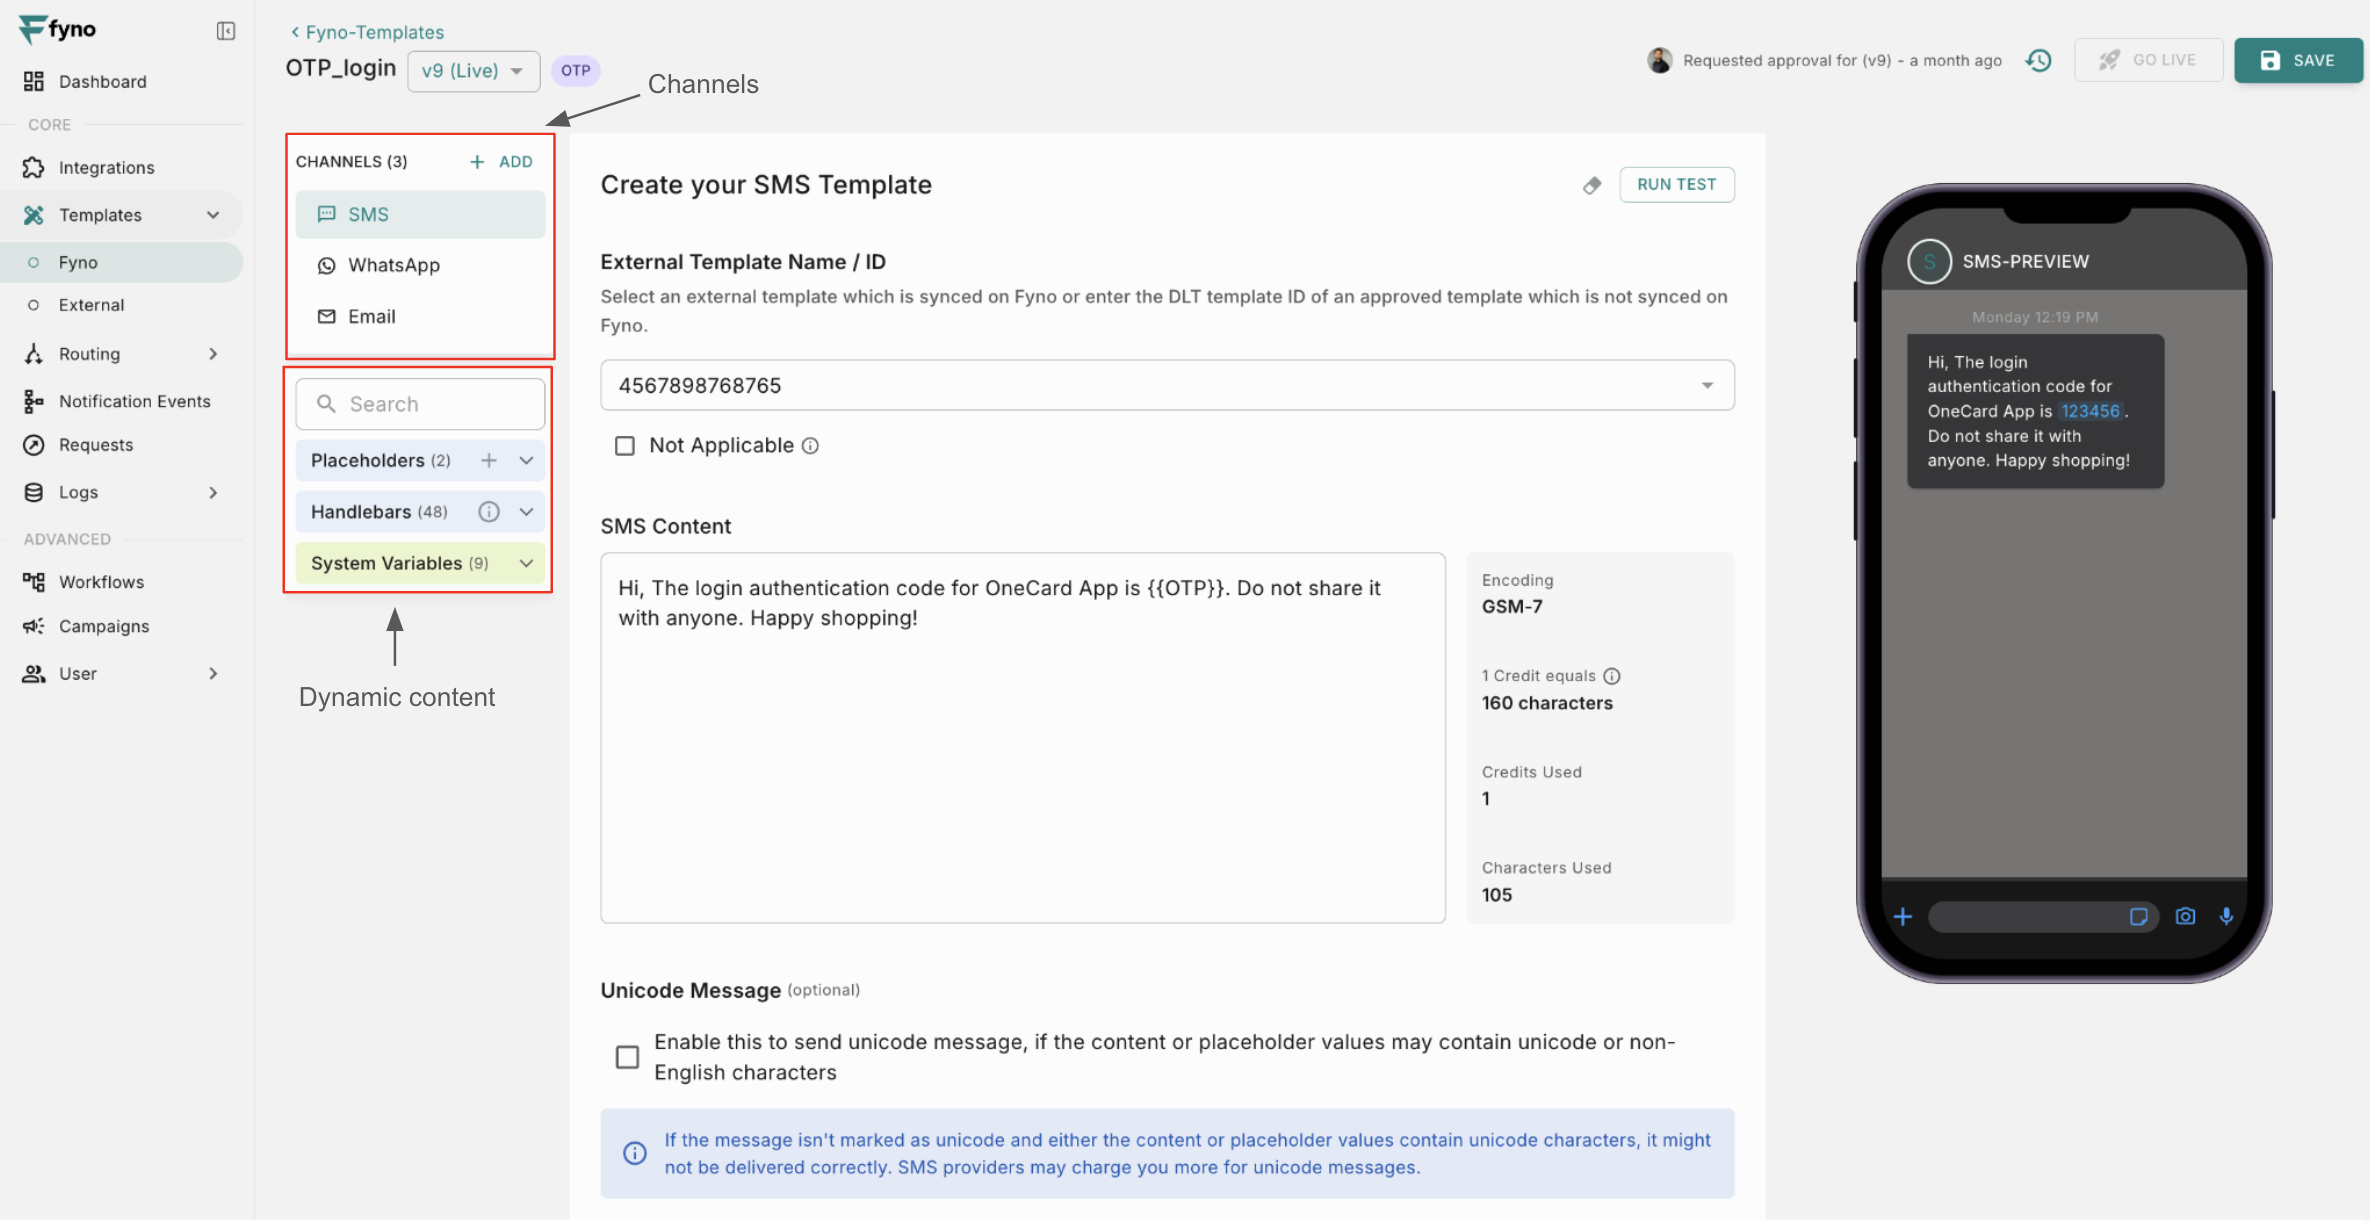
- Templates are a one-stop shop for all your messaging content.
- We have a “What You See is What You Get” (WYSISYG) template editor to create and edit your templates on the fly.
- You can create simple static templates or make them dynamic with placeholders. Placeholders can be used to send replaceable data points. Fyno uses
{{ }}as placeholders. - Templates are stored based on the Channel Type. Example: You can create rich templates on Email and Whatsapp, whereas, templates on SMS can only contain alpha-numeric values.
- You can test your templates using ‘Run Test’ option. This will ensure your templates are working as expected before moving to the next step.
- In order to ease your troubles in getting started, you can help us with your existing templates and we can pre-load them onto your account.
 Access our detailed documentation here to dive deeper.
Create API Key
In order to fire your communication through Fyno, you will need to set up an API key. Go to Workspace settings(bottom left corner) -> API Keys to create an API key
Any API Key generated from your account works for both the Live and Test versions!
You can create any number of API keys for your account. Just remember to tag them with an appropriate name so that you can use them with ease.
Create Notification Event
Once the API key is created, go to the “Notification Event” in the left nav and create your first notification event.
- Select the template from the dropdown.
- Select the Rule as ‘Single Channel Route or Provider’.
- Select the channels and providers you want to use to send the message
- Click ‘Save’ to create a test version or ‘Go Live’ to create a live version.
- Click on the ’<> CODE’ to view the cURL command, where you will get a payload. This is your unified code for all your channels and providers.
- To test the notification event created, click ‘Test’.
- Provide the destination and placeholders data and click ‘Fire Notification’.
Want to get a deeper understanding - Click here
Troubleshoot
With Fyno all set and active, your notifications will now seamlessly flow across channels to your customers.
But wait, how do you observe your notification performance? Say 👋 to Analytics and Logs.
Analytics
One of the most powerful outcomes of using Fyno is getting a single view of all your channel and provider usage. No more logging into provider/channel platforms and looking at data in silos.
Use Fyno’s unified analytics to:
- Measure channel and service provider usage
- Compare engagement data across different channels.
- Know which provider is giving you better delivery and faster responses
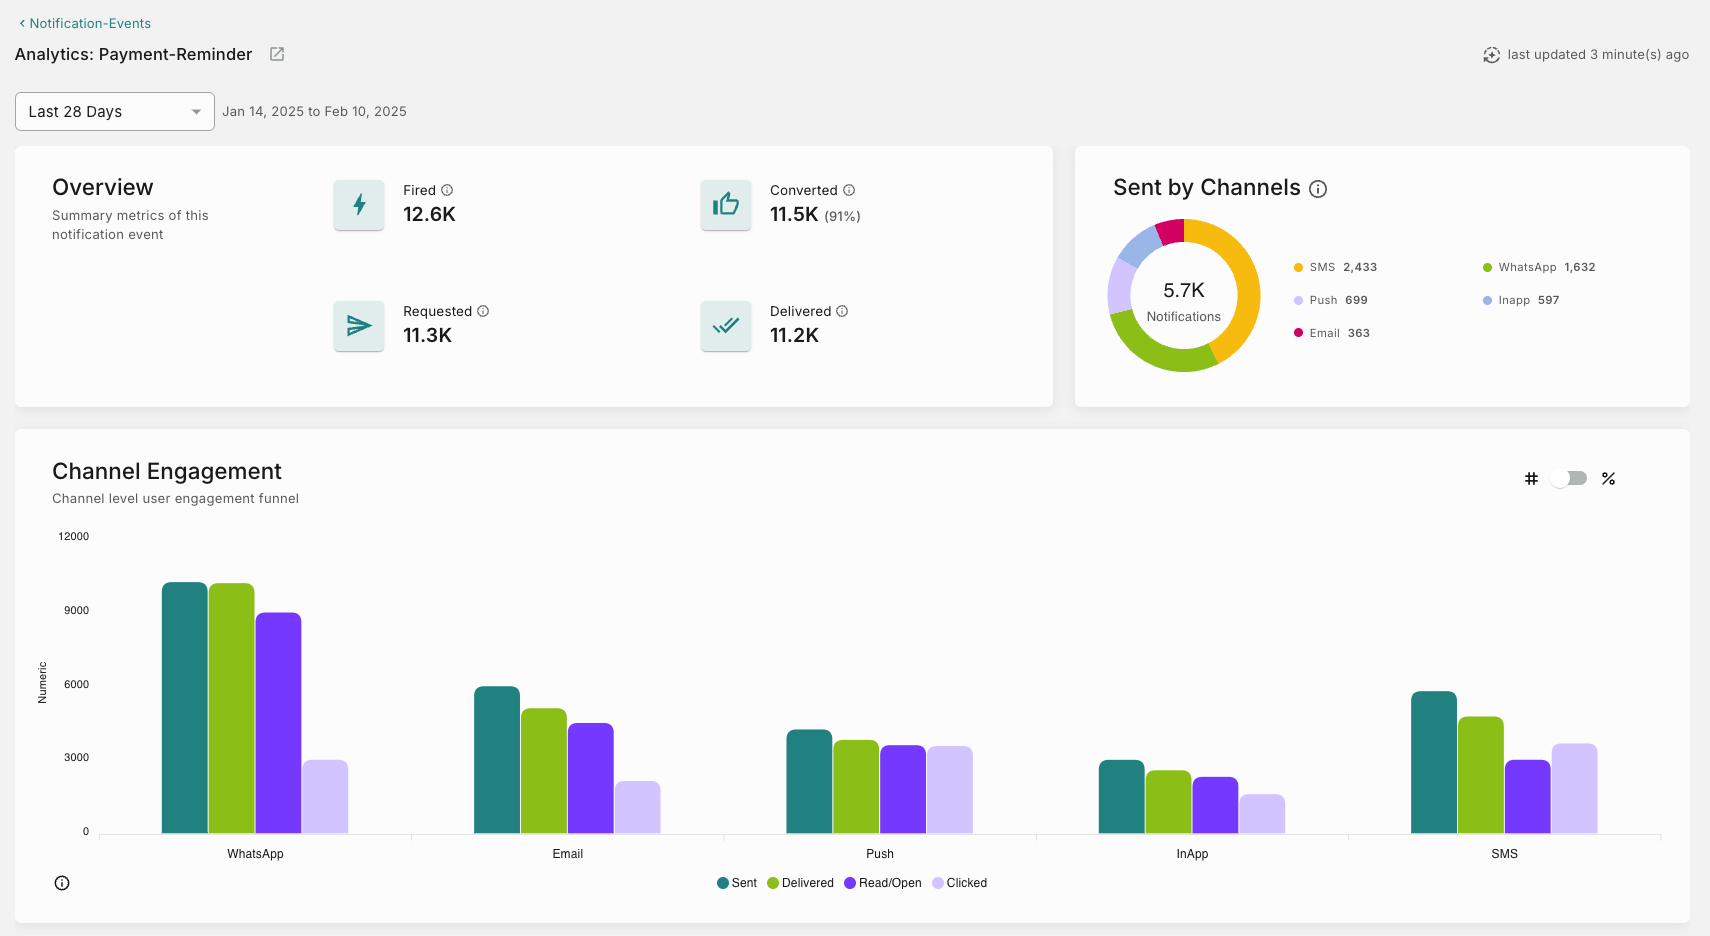
You can get deeper analytics like delivery and open rates for each notification event from your Notification Event Analytics section.
Logs
Our detailed logs give you the complete trace route of your message for quick and easy troubleshooting. We give you data up to milli-seconds.
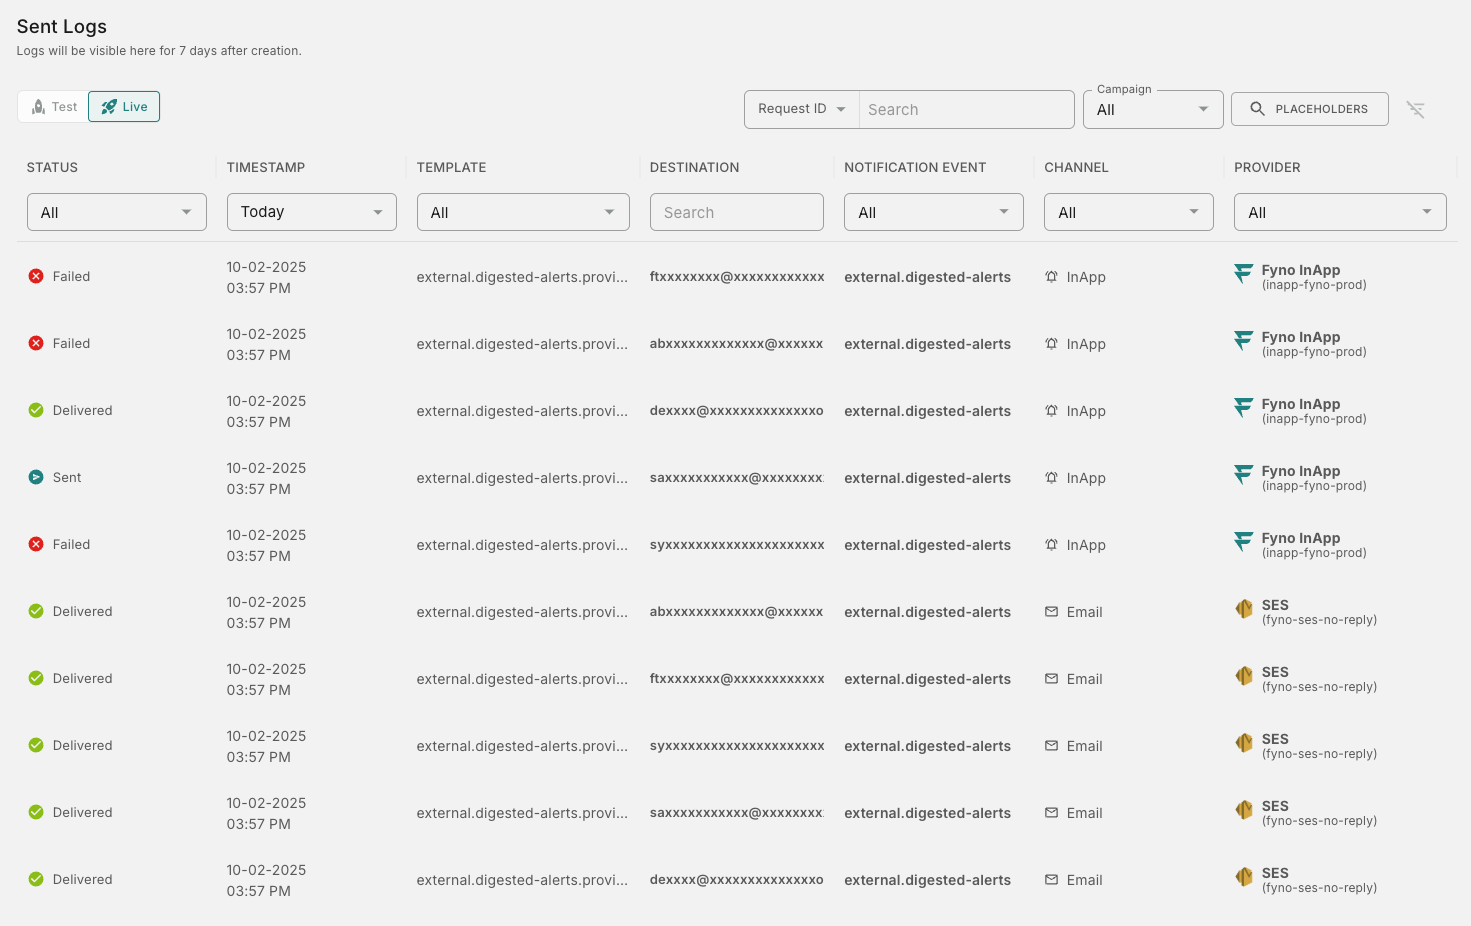
You can check the status of every message right from the delivery attempt to the eventual status of whether it was read/ opened. If something goes wrong, you can troubleshoot within seconds.
This brings us to the end of Fyno’s Quick Start guide. We hope that you were able to set it up with little to no snags and are on your way to automating your notifications with us!