How to Receive Delivery Reports (DLR)
How to Receive Delivery Reports (DLR)
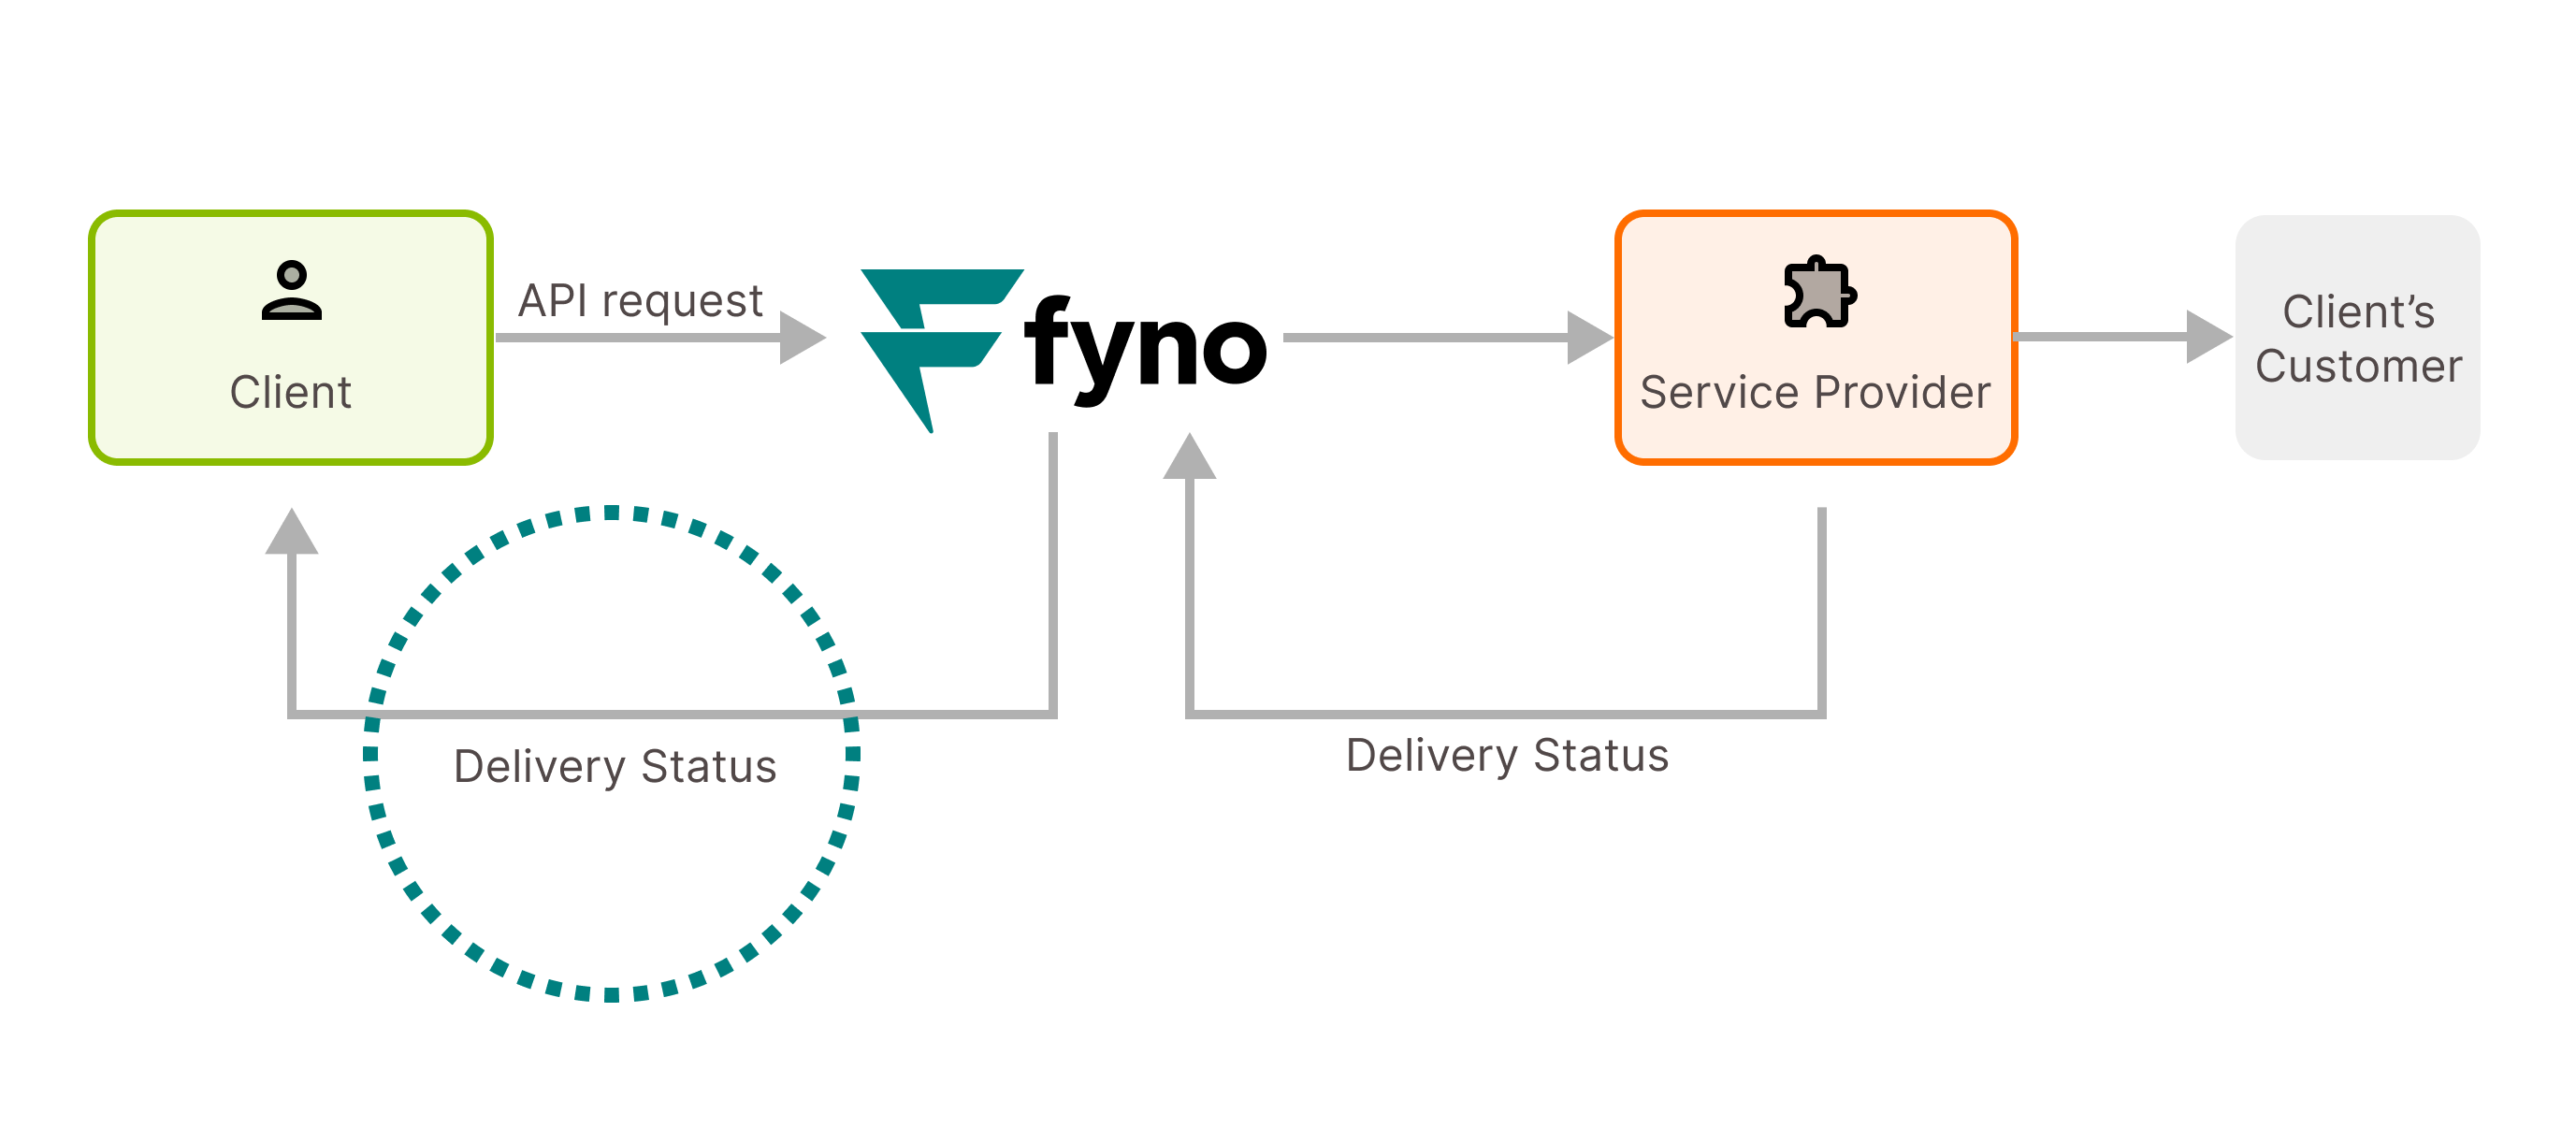
This tutorial will guide you through setting up delivery status reports from Fyno to your system, as shown in the highlighted section below.
To receive delivery reports in your system, you need to follow the below steps
- Add an Allowlist URL/SQS and get it verified.
- Configure the delivery data points you want to receive
- Configure the Allowlist URL/SQS to receive delivery report
- Through API
- Through Campaign
- Through Workflow
1. Add an Allowlist URL and get it verified
Allowlist (also commonly called as Webhooks) is a list of URLs or SQS that you would need to add to the Fyno platform and verify before you use it on the application and in your workflows.
You need to add Allowlist URL or SQS in 2 cases.
- When you want to receive a delivery report from Fyno to your system
- When you want to call your API from Fyno’s Workflow
The need for an Allowlist
Allowlists were designed for Fyno’s app users to ensure security for the information that is being plugged into the system, by having verified URLs/SQS and thus help avoid unnecessary security hassles.
Types of Allowlist
You can add Allowlists as:
2. Configure the delivery data points you want to receive
A Delivery Webhook is nothing but an Allowlist URL that can receive updates from Fyno regarding the delivery status of the notifications sent out and easily share the delivery details with you, to any verified endpoint, pre-decided by you.
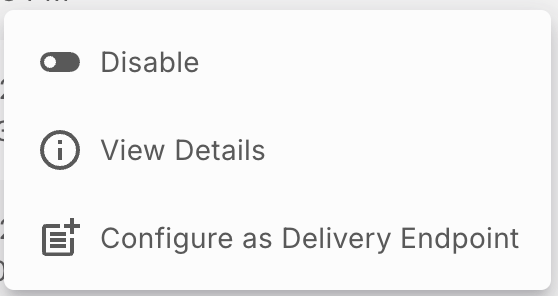
An Allowlist URL can be converted anytime to a Delivery Webhook, once it is successfully verified by following the below steps while adding Allowlist URL/SQS.
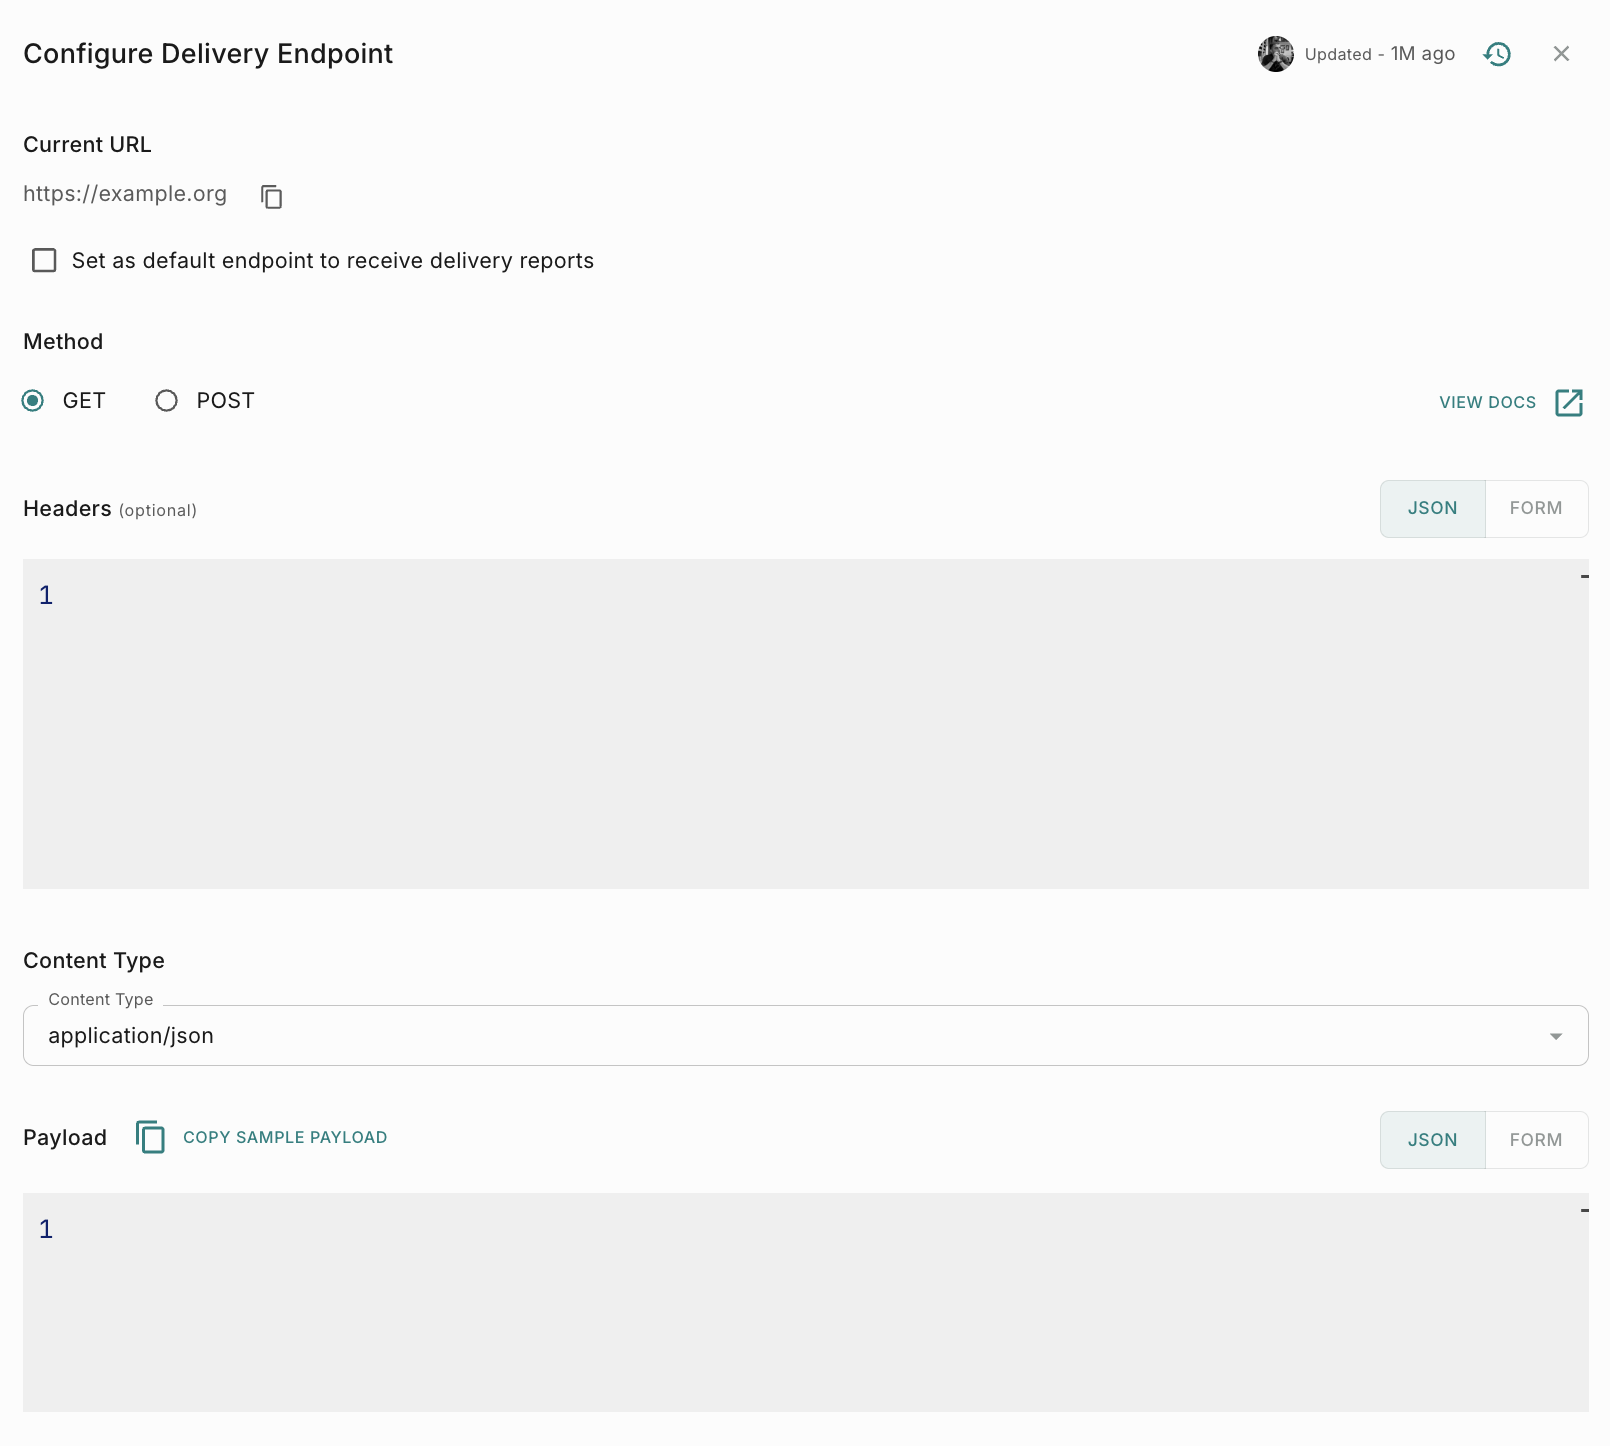
The first Delivery Endpoint you create will be considered as ‘Default’ and you will start receiving your delivery reports in that URL. At any point of time, there will be only one default Allowlist URL. If you want to receive delivery reports in other URLs other than default URLs, you need to specify it in the payload as explained in the next section.
If you didn’t include any parameters in the payload, Fyno will send the following default parameters.
IMPORTANT NOTE: Custom fields (custom_id, custom1, custom2, and custom3) can now be used independently of delivery webhooks (Allowlist URLs).
What changed:
Earlier, custom fields were only available when configuring delivery reports, which made it mandatory to set up an Allowlist URL. Now, custom fields are available in a separate section in the UI and can be configured without enabling delivery callbacks. What this means:
- You can use custom_id, custom1, and custom2 even if you are not using delivery webhooks.
- Allowlist configuration is no longer required to use these fields.
- These fields will still be captured and made available in campaign reports and analytics downloads. Supported fields for reporting:
- custom_id: Supported
- custom1: Supported
- custom2: Supported
- custom3: Not supported for reporting (only available when configuring delivery callbacks)
Note: Support for custom3 in reporting may be added in future.
IMPORTANT NOTE: Custom fields (custom_id, custom1, and custom2) can now be used independently of delivery webhooks (Allowlist URLs). What changed: Earlier, custom fields were only available when configuring delivery reports, which made it mandatory to set up an Allowlist URL. Now, custom fields are available in a separate section in the UI and can be configured without enabling delivery callbacks. What this means:
- You can use custom_id, custom1, and custom2 even if you are not using delivery webhooks.
- Allowlist configuration is no longer required to use these fields.
- These fields will still be captured and made available in campaign reports and analytics downloads. Supported fields for reporting:
- custom_id: Supported
- custom1: Supported
- custom2: Supported
- custom3: Not supported for reporting (only available when configuring delivery callbacks)
Note: Support for custom3 in reporting may be added in future.
Default Parameters
Below is a list of all the parameters that Fyno can send you as data points. However, each one of these will need to be specified if you need them.
Once this is done, all the delivery statuses for every notification triggered will be automatically updated at this location.
3. Configure the Allowlist URL to receive delivery report
You can configure delivery callback when you are triggering through
- API
- Campaign
- Workflow
How to configure delivery callback through API
When you are triggering a notification event using API, you need to pass additional parameters in the payload
Sample Notification Event API with delivery callback details
- Unique identifier of your notification
- Length: 200 characters if string. No special characters allowed.
- Length: 20 digits if numeric
- Additional information to tag your notification
- Length: 50 characters. No special characters allowed.
- Example:
order-id
- Additional information to tag your notification
- Length: 50 characters. No special characters allowed.
- Example:
category
- Additional information to tag your notification
- Length: 50 characters. No special characters allowed.
- Example:
message-id
- true: enable delivery status over callback.
- false: disable delivery status over callback
- The default value is true if custom_id is specified.
- Specify one or more allowlisted URL names (up to 3) where you want to receive delivery reports.
- If no URL name(s) are specified here, the system will use your default URL (if one exists).
- If no URL name(s) are specified here AND no default URL is set, delivery reports cannot be sent.
- Example:
["DynamicWebhookSite", "Mixpanel"] - Example:
DynamicWebhookSite
How to configure delivery callback in Campaign
To enable receiving delivery reports from Fyno, select the checkbox ‘Receive delivery report from Fyno to my allowlisted endpoint(s)’. This enables the callbacks for the channels and essentially sends back the delivery updates about each notification triggered. On checking this box, 3 additional placeholder details will need to be configured.
- Specify one or more allowlisted URL names (up to 3) where you want to receive delivery reports.
- If no URL name(s) are specified here, the system will use your default URL (if one exists).
- If no URL name(s) are specified here AND no default URL is set, delivery reports cannot be sent.
- Example:
["DynamicWebhookSite", "Mixpanel"] - Example:
DynamicWebhookSite
- Unique identifier of your notification
- Length: 200 characters if string. No special characters allowed.
- Length: 20 digits if numeric
- Additional information to tag your notification
- Length: 50 characters. No special characters allowed.
- Example:
campaign-name
- Additional information to tag your notification
- Length: 50 characters. No special characters allowed.
- Example:
category
- Additional information to tag your notification
- Length: 50 characters. No special characters allowed.
- Example:
message-id
More values can be added in the callback. For a list of additional available values, please see: Callback Response
How to configure delivery callback in Workflow
This option allows you to receive Delivery reports of each notification triggered in any URL you have allowlisted in Fyno. It can be done in 2 ways.
- From Allowlist - Selecting Delivery Report Endpoint(s) from Verified Allowlist URLs (Maximum 3 can be selected).
- Custom - Selecting Delivery Report Endpoint from payload or a simplified custom variable. (Only 1 can be selected).
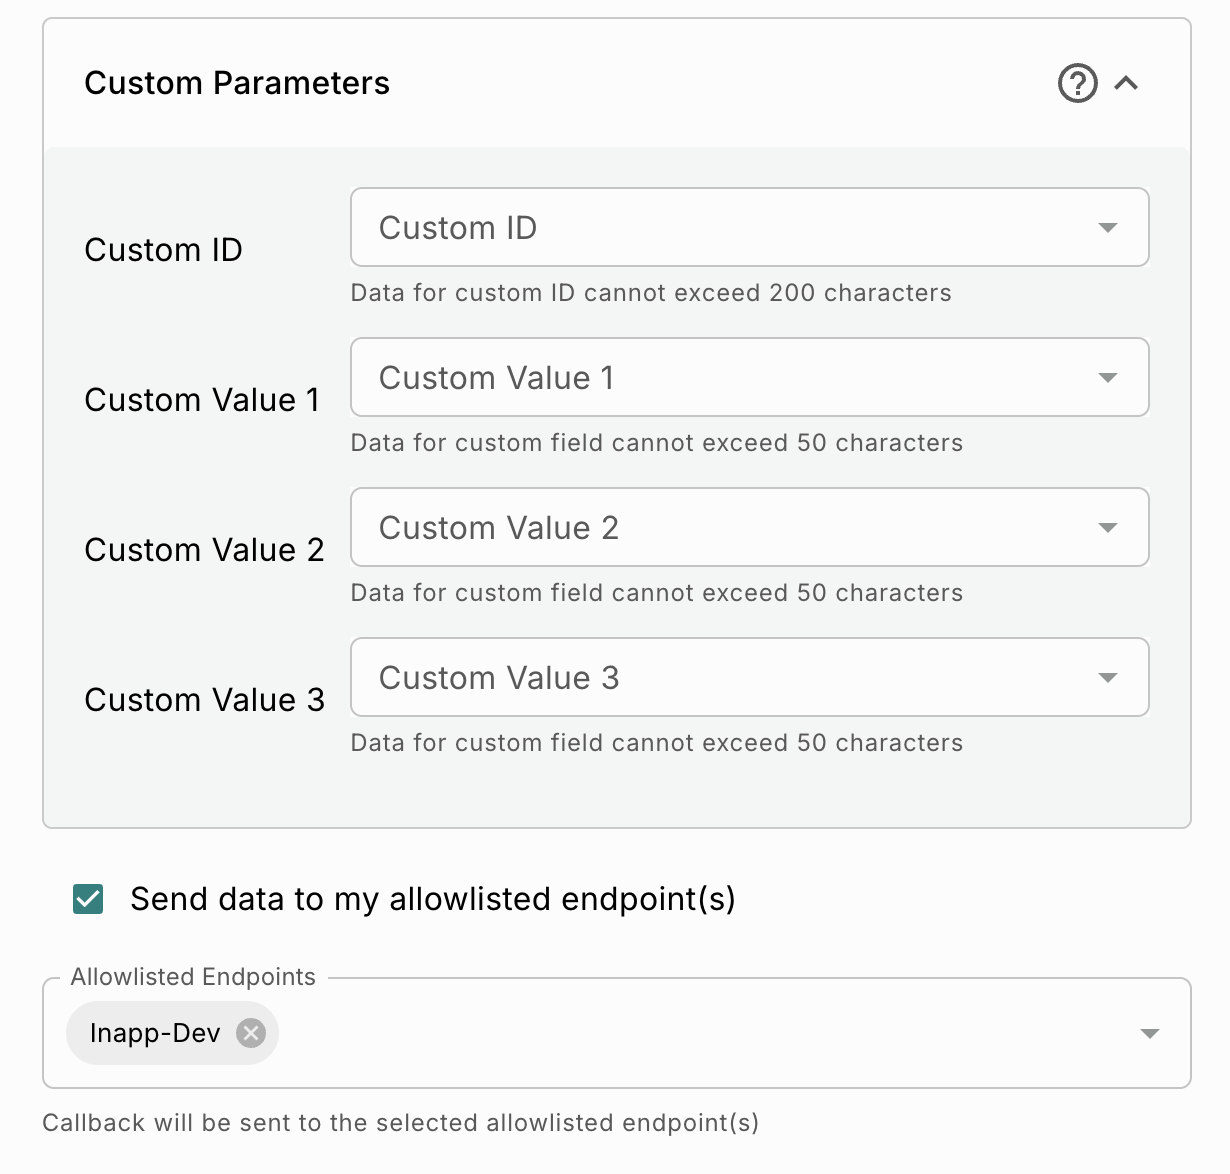
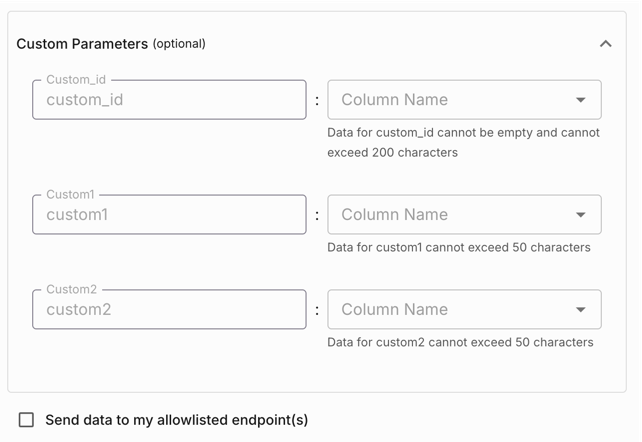
- You can also configure custom parameters to be sent along with delivery reports. The supported fields are: custom_id, custom1, custom2, and custom3. These can be passed via the workflow payload or mapped using variables, and will be included in the delivery callback for downstream tracking and reporting.
Once the Delivery Endpoint URL(s) is selected, 3 additional placeholder details need to be configured.
- Unique identifier of your notification
- Unique identifier of your notification
- Length: 200 characters if string
- Length: 20 digits if numeric
- Additional information to tag your notification
- Length: 50 characters
- Example:
order-id
- Additional information to tag your notification
- Length: 50 characters
- Example:
category
- Additional information to tag your notification
- Length: 50 characters
- Example:
message-id
More values can be added in the callback. For a list of additional available values, click here.
Testing Callback Delivery from Playground
First, allowlist your endpoint(s), then configure delivery callbacks. After completing these steps, validate the setup on the /notification-events/playground/ page.
This helps ensure that:
- Your endpoint is reachable
- The payload structure is correct
- Custom parameters (
custom_id,custom1,custom2, etc.) are being sent as expected
Steps to Test
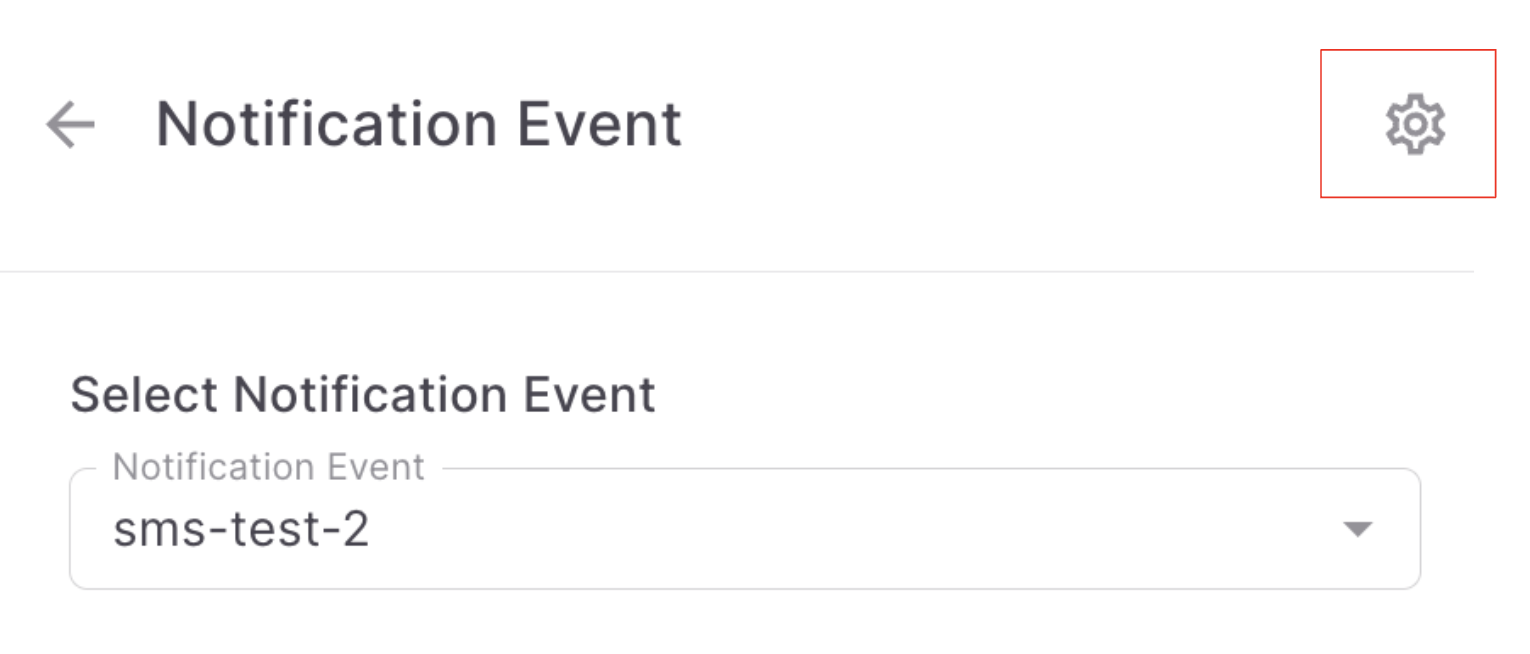
- Navigate to a specific notification event, then access the Notification Events Playground page from there.
- Trigger a test notification event.
Before sending the test event, ensure that:
- You are working with the intended event (for example, OTP or Marketing) and that the correct version (test or live) is selected
- The Receive delivery report from Fyno to my allowlisted endpoint(s) option is enabled
- Send the test event.
What to Verify
- The callback is received at your allowlisted endpoint
The payload includes:
- Default delivery report fields
- Any configured custom parameters (
custom_id,custom1,custom2, etc.)
Troubleshooting Tips
If no callback is received:
- Verify that the allowlisted endpoint configuration is correct (method, content type, headers, and payload)
- Check that the payload key mappings are correctly defined so the required data is sent to your endpoint
Callback Response
The Delivery Webhook will be sent using:
- Method: POST | GET
- Content-Type :
application/x-www-form-urlencoded|application/json|multipart/form-data - Data: Default Parameters + Additional Parameters
Sample Webhook Configuration and Response
Sample configuration for the additional parameters (JSON) in Webhooks Delivery status section
Once this is successfully configured, here is a sample of the Callback Response you would receive.