Integrations Overview
Integrations, as the name suggests, help you seamlessly integrate any provider via the channel (SMS, Email, Push, etc) of your choice.
Fyno has simplified this further by smoothening the process of integrating your providers, with this detailed set-up guide below.
Channels
Channels are where it all starts, where you decide what the method of communication is that you want, to get in touch with your end users or customers, and Fyno has it all. We understand that in this ever-evolving world, having just one way of reaching out is not enough anymore.
Based on the channel you select, we have a provider-based integration guide in the next sections.
Providers
Simply put, providers are the companies or services through which the services for SMS, Email, Push, etc are rendered to you currently.
You can have one or more providers, depending on your business requirement and business model.
In this section, we will be covering the process of adding the providers that Fyno has already integrated. Your providers are listed under the “Channel” they provide a service under.
In case you do not see your provider listed, please reach out to us at support@fyno.io. We will do our best to help you!
Integration ID
Once a provider is added successfully to the Provider’s listing page, click on the created provider that you have added, to find that provider’s integration ID.
This is auto-assigned by Fyno and cannot be edited or changed.
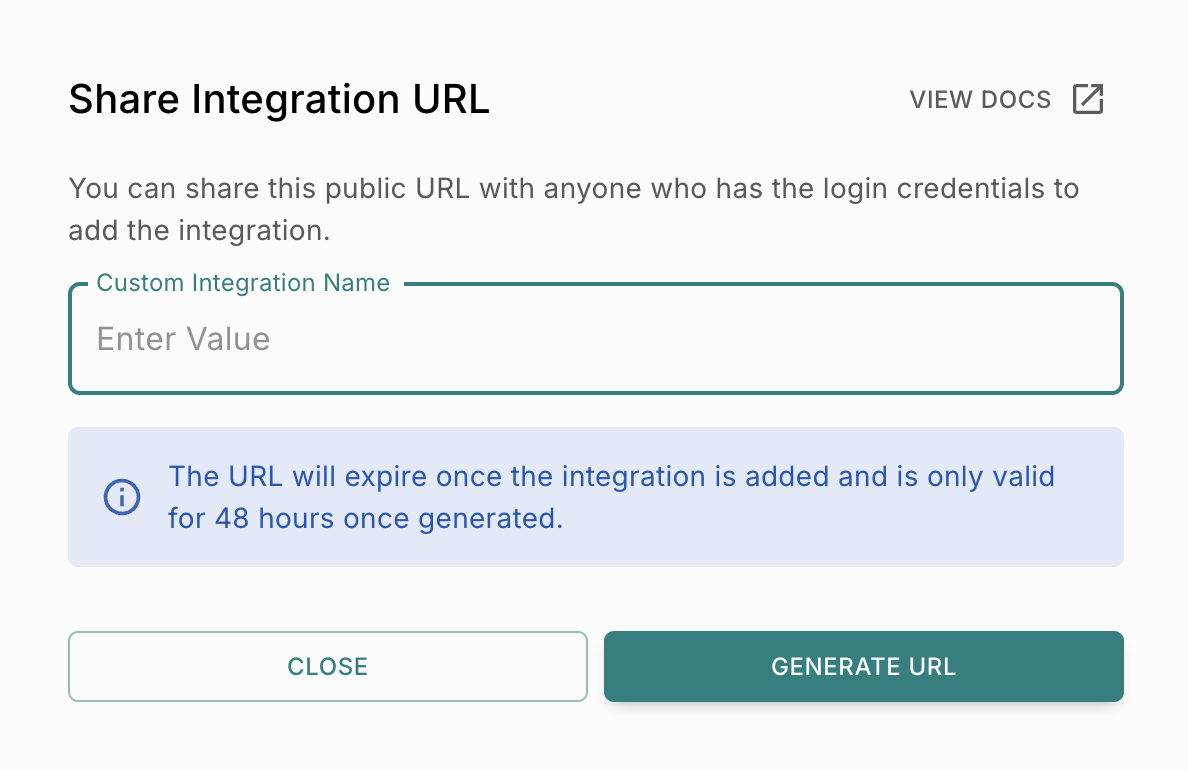
Public Integration Link
If you do not have the credentials required to complete an integration setup yourself, Fyno allows you to generate a public integration link and share it with another user who has access to the required credentials.
Using this link, the external user can complete the integration setup without needing access to your Fyno account. Once the setup is completed successfully, the integration will automatically reflect in your Fyno workspace.
Generate a Public Integration Link

Additional Information
- Once a public URL has been generated, the integration will appear after someone adds the required details.
- You can use COPY URL to share the generated public integration link.
- If the URL expires, the integration status will display URL expired. Use RE-GENERATE URL to create a new public link. Re-generating a URL invalidates the previously generated link.
- You can delete a public integration link at any time from the Public Integration Link section. Deleting the integration account invalidates the generated public URL.
- You can use the VIEW DOCS option to access detailed setup guidance.