

Tracking and Exporting Sent Notification Logs
Sent logs are where we help you track each and every notification sent from Fyno. They give you a detailed view of what happened to each of your requests, so you can analyze your sent notifications and continuously improve your communication strategy.
This guide covers the logs visible on the Fyno platform, how to filter them, and what each column contains. To open your logs, select Sent Logs from the left navigation menu.
The exact period depends on your workspace’s Data Retention setting. To review older notifications, request a report.
Logs
The logs visible on the Sent Logs page give you a chronological overview of the latest interaction activity occurring on your Fyno account.
When you review your logs, the primary indicator is the Status indicator. This flag marks exactly where your request stands within the system lifecycle:
Filtering by Status is especially useful when investigating failed or delayed notifications. For how statuses behave on each channel, see the Status Guide.
Using the logs table
Understanding the Log Schema Columns
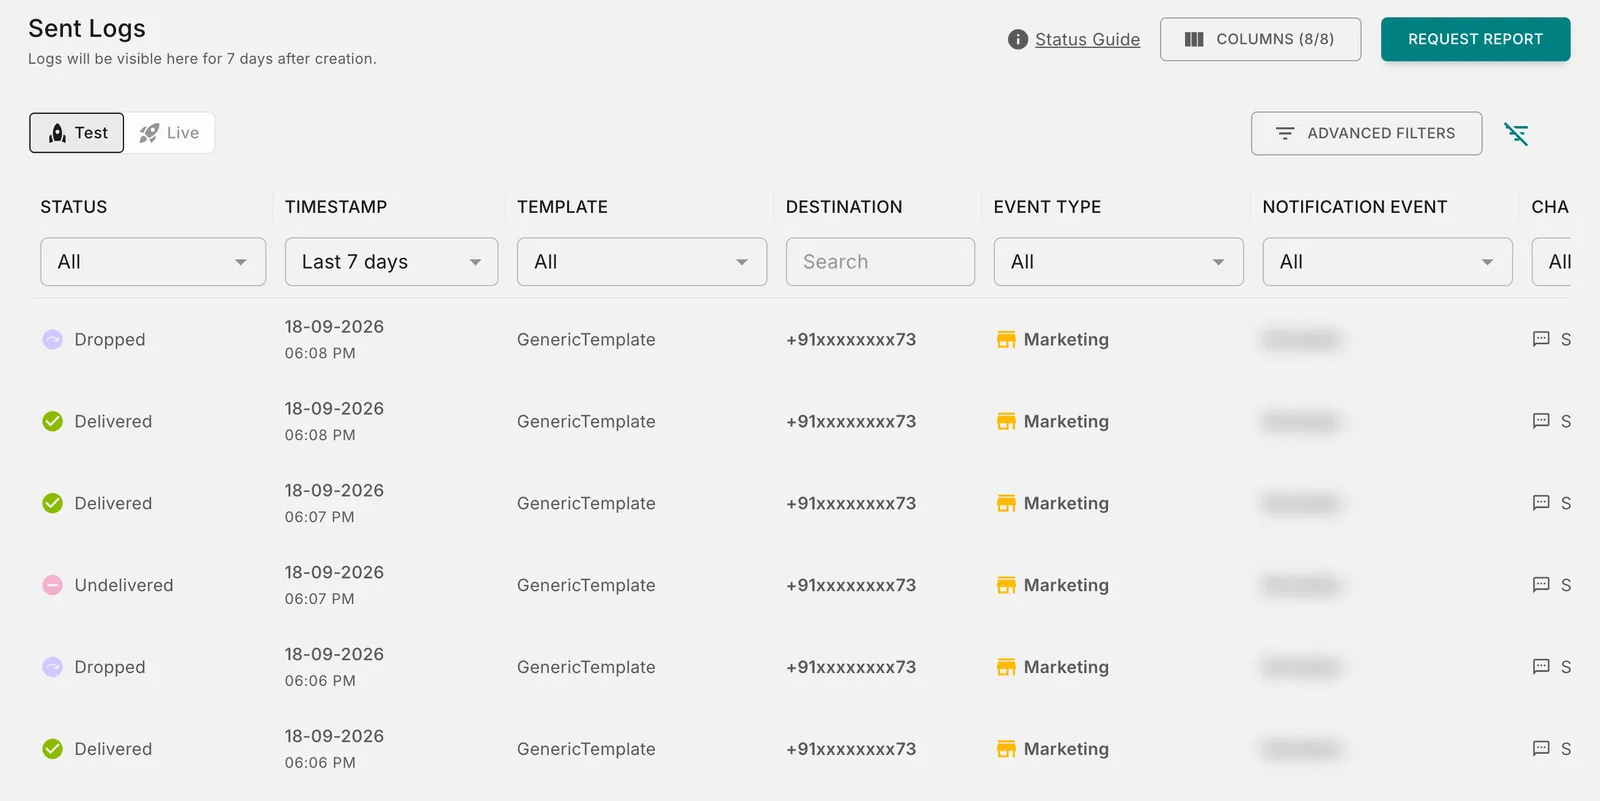
Each column in the logs table contains the following data, along with the filters you can use to narrow down results:
Search
Use the Search bar to look up a specific Message ID or Request ID to quickly locate an individual notification for debugging.
DND Period Logs report
To check which notifications went out during your Do Not Disturb (DND) window, request a DND Period Logs report. For how to generate it, which messages it includes, and how the DND window is selected, see the DND Period Logs section in Report Extraction.
Test & Live Versions
The Sent Logs page keeps Test and Live data separate, so notifications you send while testing never inflate your live production figures.
- Check the environment. Switch to Test or Live, whichever the notification was sent from.
- Check the date. If the notification is older than your retention period, request a report instead.