

Core Concepts of Notification Events
A notification event is the combination of templates, service providers or route (single or omni-channel).
**Notification Events = Template + (Providers or Route) **
What does it do?
A notification event is what sends your configured message to the end user.
How do they work?
Notification Event Options Menu
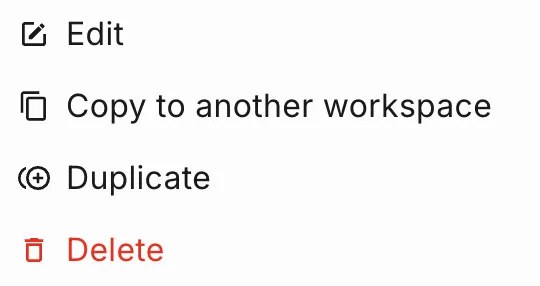
Each notification event in the notification event list includes a More Options menu (⋮), which provides quick access to common notification event management actions. These actions allow you to update notification event information, review configuration details, create copies, request deletion, or publish changes without leaving the notification event list.
The available actions are:
- Edit – Update the notification event name or change its assigned group.
- View Details – View the notification event’s metadata, dependencies, and where it is used across the workspace.
- Duplicate – Create a copy of the notification event.
- Copy to Another Workspace – Copy the notification event to a different workspace.
- Delete – Delete the notification event.
- Go Live – Publish the current Test version of the notification event to the Live environment.
Edit Notification Event
The Edit action allows you to modify the notification event’s basic information without affecting its configuration.
You can:
- Rename the notification event.
- Change the group to which the notification event belongs.
This action is useful for reorganizing or renaming notification events while preserving their existing configuration.
Delete Notification Event
The Delete action removes the notification event from the workspace.
If approval requests are enabled, the deletion is submitted as an approval request instead of being performed immediately.
Before the notification event is deleted, the system displays a list of campaigns and workflows that currently use the notification event. Reviewing this information helps you understand the impact of deleting the notification event before confirming the action.
View Details
The View Details page displays where a notification event is used and what resources it depends on. It lists the campaigns and workflows that reference the notification event, along with the templates and Omni-Channel routes used by it, helping you understand its usage and dependencies before making changes or publishing updates.
This page is particularly useful for understanding where a notification event is used, identifying its dependencies, and comparing the Test and Live versions before deployment.
Information Displayed
The page includes the following information:
- Name – Displays the notification event name.
- Group Tag – Identifies the group to which the notification event belongs, such as Internal Alerts or Onboarding.
- Environment – Indicates whether the displayed information relates to the Test or Live version of the notification event.
- Last Updated – Shows when the selected environment was most recently modified, helping identify the latest published or draft version.
- Used In – Lists all campaigns and workflows that use the notification event, allowing you to assess the impact of modifying or deleting it.
- Depends On – Lists the templates and Omni-Channel routes referenced by the notification event, helping you understand its dependencies before making changes, publishing, or deleting it.
Environment Selection
The environment selector allows you to switch between the two available versions of a notification event without leaving the details page.
- Test displays the draft version used for development, testing, and validation before publication.
- Live displays the version currently available to end users.
Copy to Another Workspace
The Copy to Another Workspace action lets you copy a notification event from the current workspace to another workspace. This is useful when you want to reuse an existing notification event across multiple workspaces without recreating it manually.
Before you begin
- Ensure that all dependencies required by the notification event are available in the destination workspace.
- This includes the relevant templates, components, and any other referenced resources.
- If these dependencies are not available, the copied notification event may require additional configuration before it can function correctly.
After the copy is complete, the notification event is available in the destination workspace and can be managed independently of the original.
How to create a notification event?
You will need to choose the template along with the channels to create a successful notification event. A detailed walk-through is provided in the next section.
Notification events can be copied from your workspace to other workspaces you own. The copy process is only available in workspaces where you have the Owner role.
Steps to copy notification events to another workspace
1. Prepare your destination workspace
It is important to note that when copying notification events, only the notification event-related data will be copied to the destination workspace. Any dependencies must be created or copied manually in the destination workspace.
2. Copy your notification event(s) to another workspace
3. Post copy checklist
How versioning works
Let’s say we are copying a notification event from Workspace A to Workspace B. There are two versioning scenarios to keep in mind.
If the notification event does not exist in Workspace B, then the version created by the copy process will always be v1 (Test).
If the notification event already exists in Workspace B, then the copy process will create a new standalone version (neither test nor live). For example, if the version in Workspace B is v1 (Test), then the process will create a new version called v2. You can select this version from the version dropdown beside the notification event name and click “Save” to change the version to v2 (Test), or click the “Go Live” button to promote it to v2 (Live). This ensures that changes to existing versions in the destination workspace are not overwritten and gives you control over when to save or promote the copied notification event.