Gupshup
Before we get started, you will need an active WhatsApp number as well as templates pre-configured in your Gupshup.io account
Find the Provider
Navigate to the Integrations page. Under “WhatsApp” section, click on the “Gupshup” button.
Configure the Integration
In the pop-up that appears, fill in:

- Custom name: Provide a name that would help you identify the configured account in Fyno’s portal.
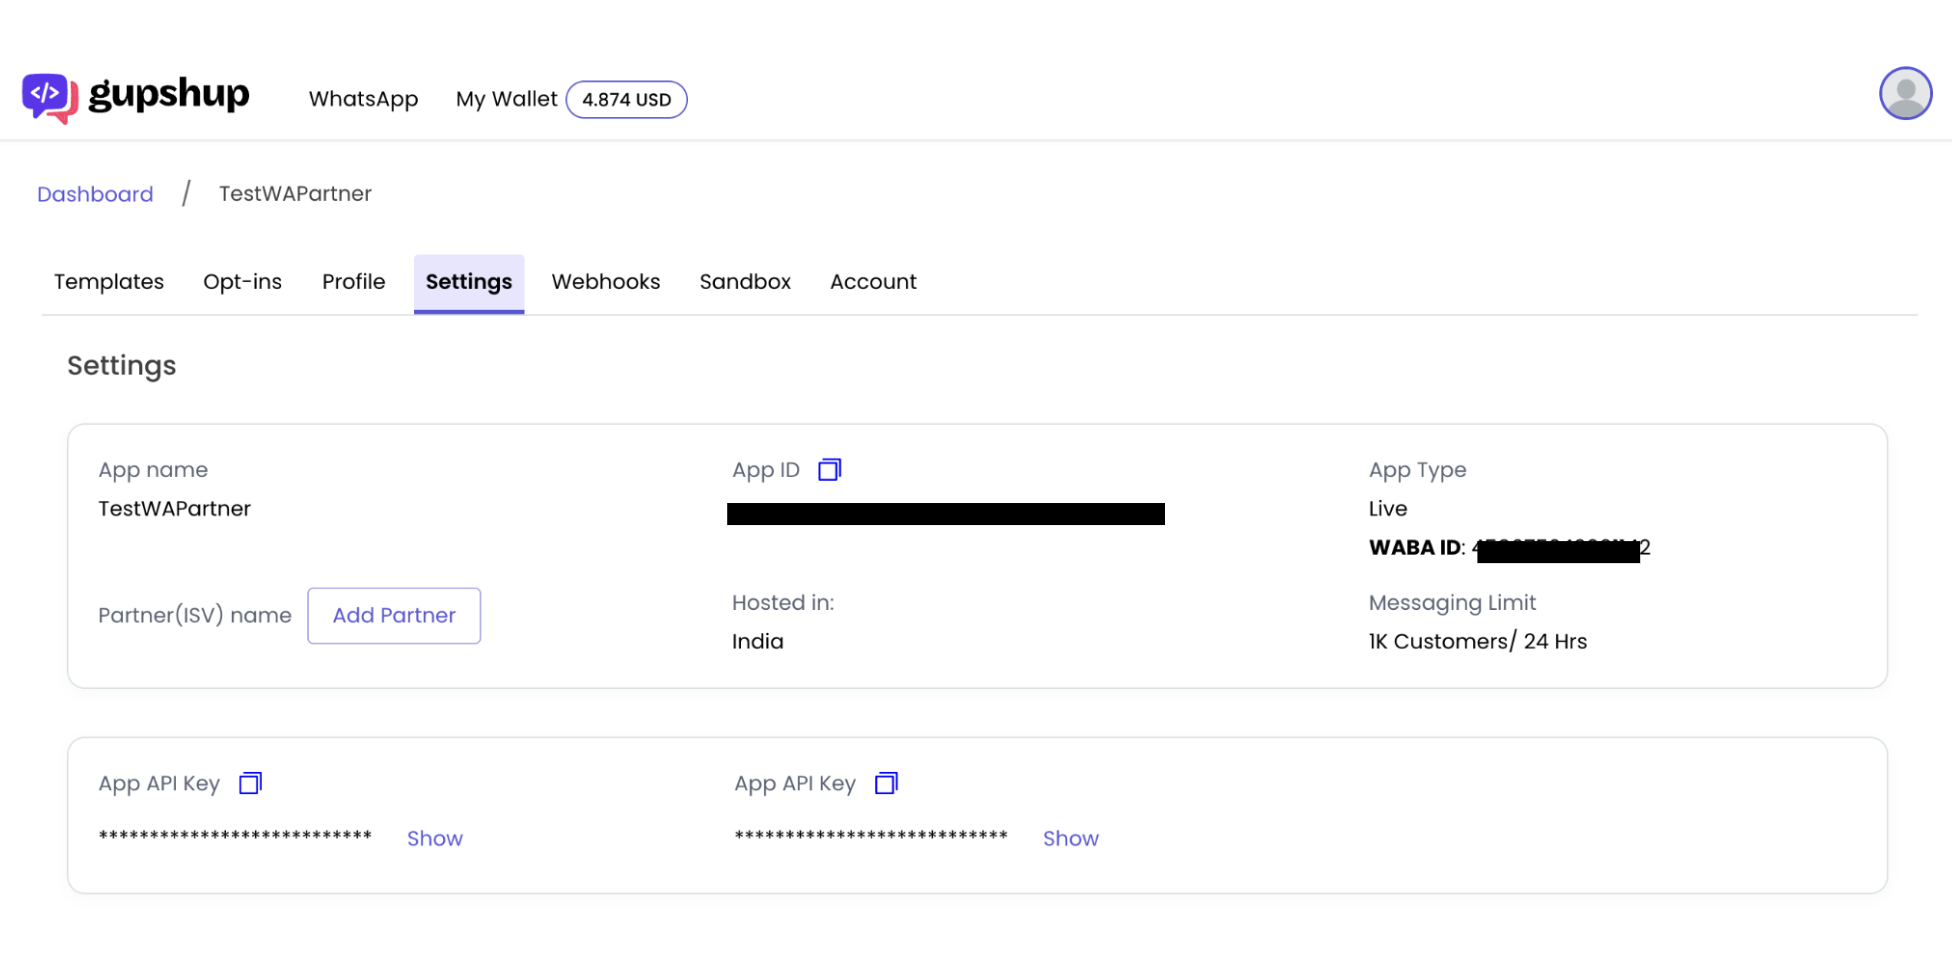
- API Key - You will get API key from settings.
- Bot Name - You will get Bot Name from settings. App name is the Bot name
- App ID - You will get App ID from settings.
- From phone No - Enter the registered Business Number that you would like to use and enter the same without the ”+” symbol.
Message Delivery Status
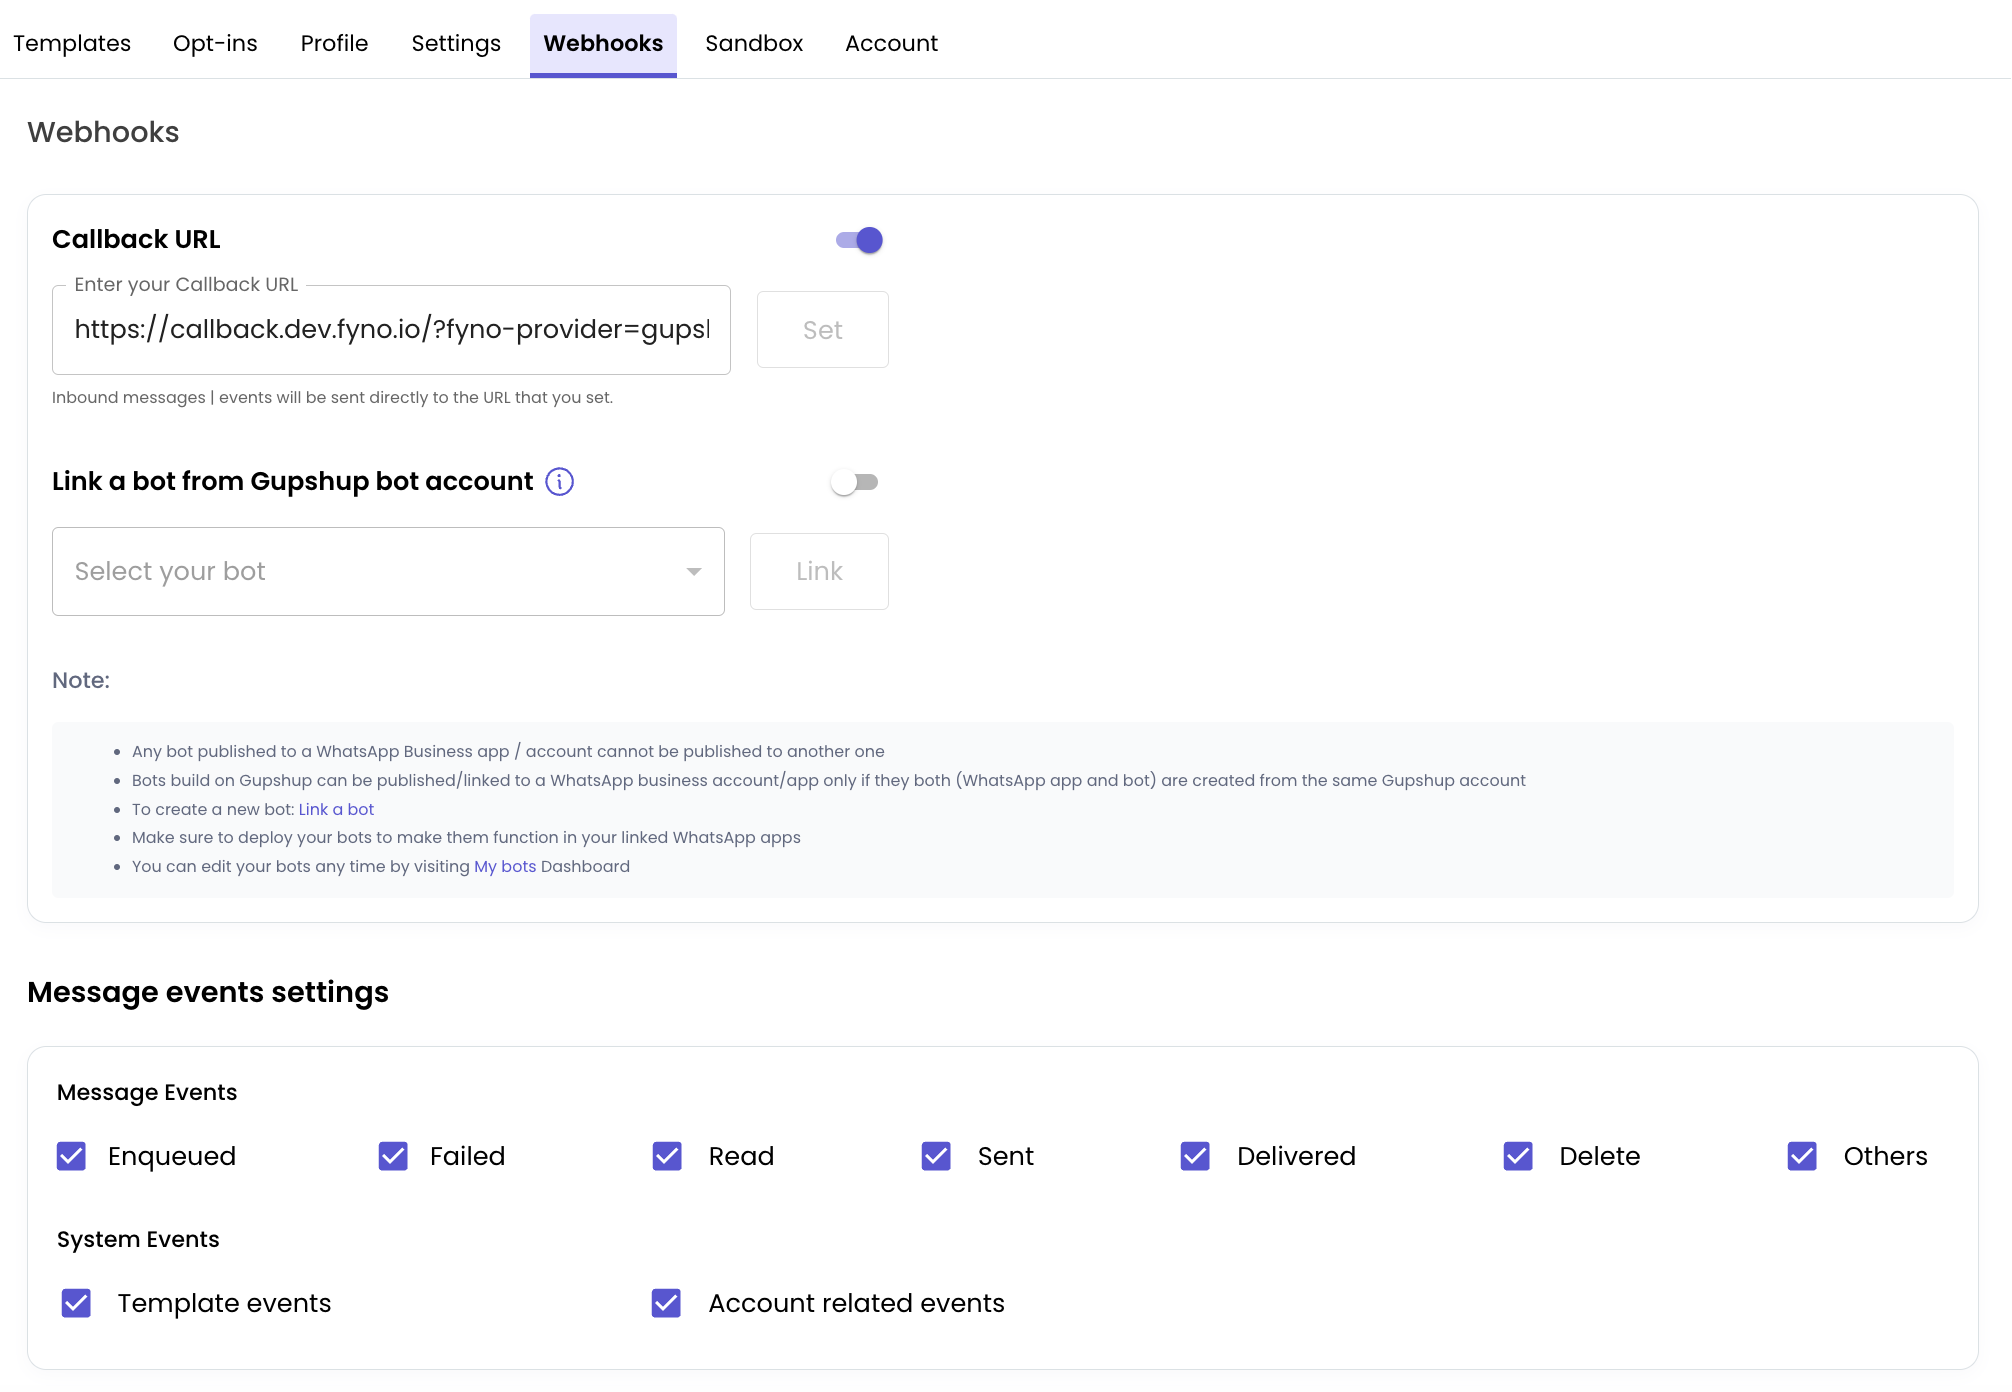
While Fyno has the capacity to track the notification delivery status, Gupshup requires a manual update of the Fyno Callback Endpoint in order to receive these reports. To update the Callback manually follow these steps:
