

Voice Templates
When you add the Voice channel to a template, the Create your Voice Template screen opens. First choose the Type of call, then configure it. Because Fyno works with many voice providers, some types also need setup in your provider’s platform. See Provider-specific setup.
Create a voice template
IVR
Call Connect
Text to Speech
IVR
The IVR configured on your integration page is used to run the call.
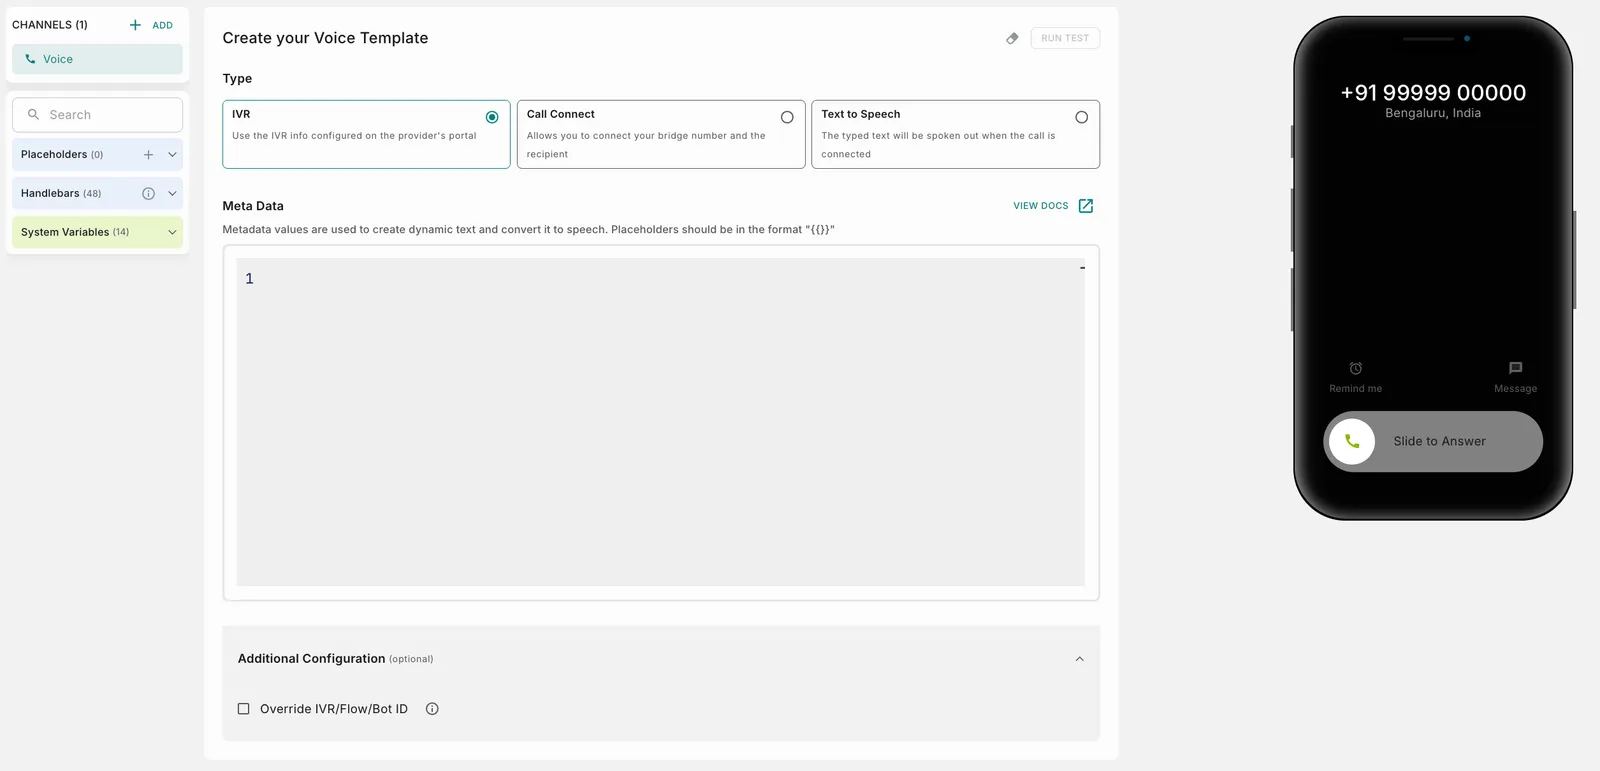
Add the metadata
In Meta Data, enter the metadata you want to share with the provider when this call is triggered, as JSON. Metadata values are used to create dynamic text and convert it to speech. Placeholders must be inside double quotes, in the format "{{ }}". For example:
Click View Docs in the editor for more details.
Provider-specific setup
Each provider processes voice data differently. Configure your provider as shown below.
Kaleyra
Exotel
IVR
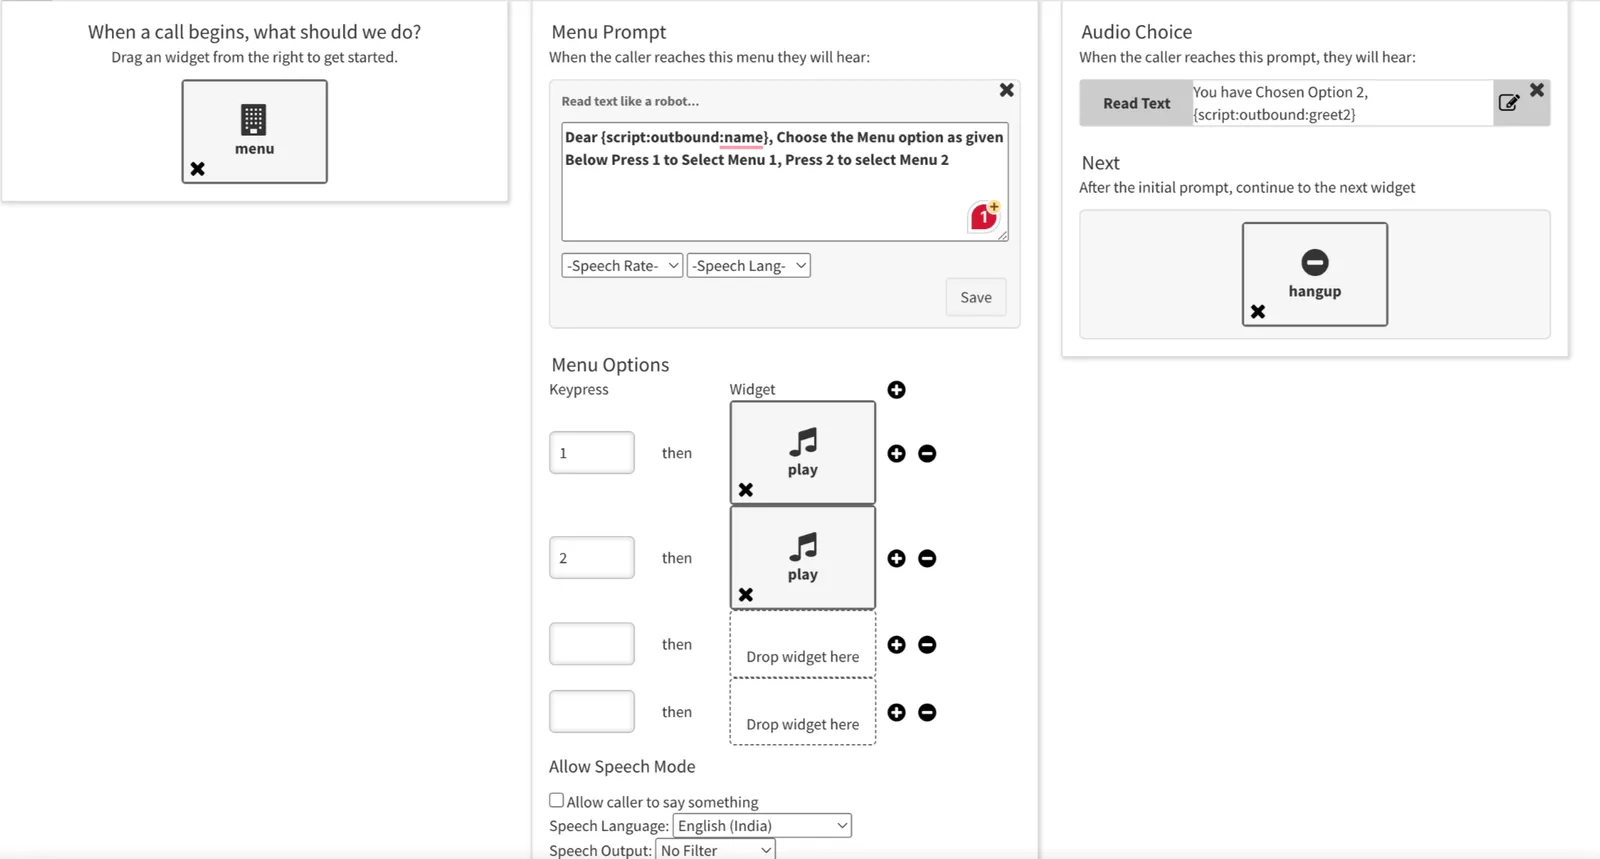
Metadata values are used in text-to-speech widgets to create dynamic text and convert it to speech. In Kaleyra Voice, use {script:outbound:metadata-key-name} to access a metadata value.
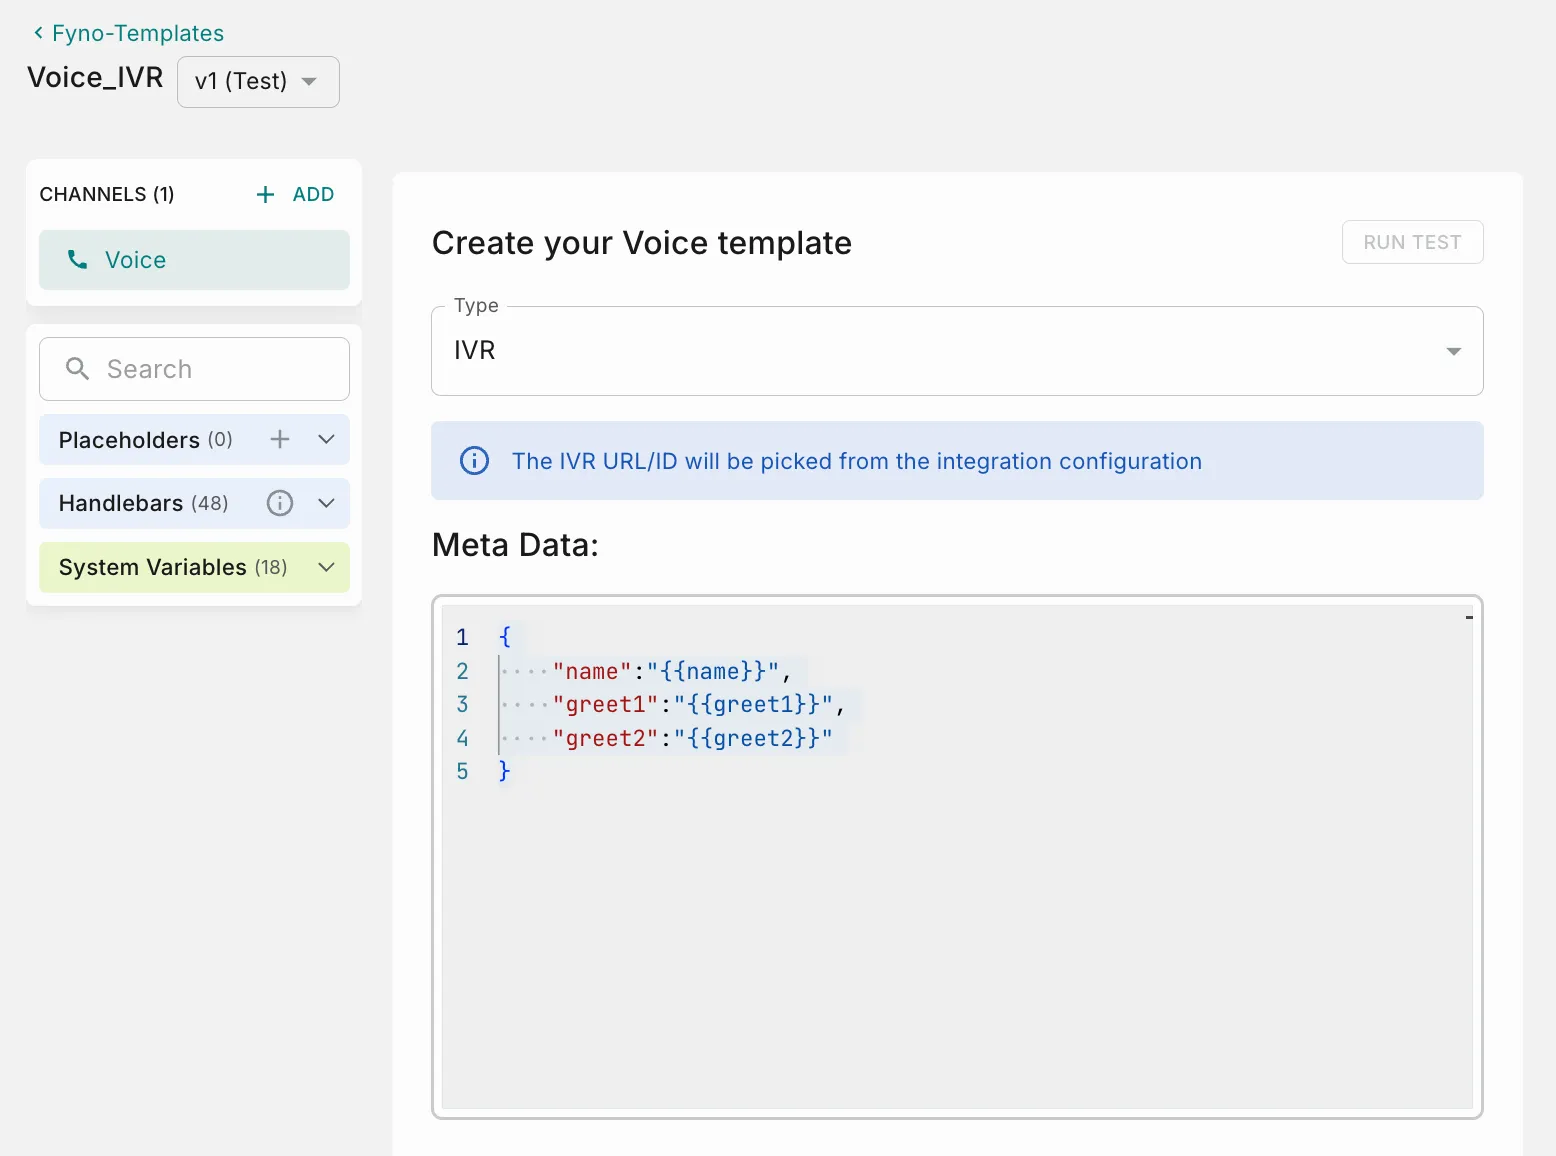
For example, to configure a menu with 2 options and 3 placeholders, script:outbound:name, script:outbound:greet1 and script:outbound:greet2, set it up in Kaleyra as shown below.
In Fyno, add the matching metadata as shown below.
Call Connect
No IVR or call flow is needed. Configure the From Phone Number in Fyno and pass the recipient in the to object of the payload. See Call Connect.
Text to Speech
Fyno prepares the dynamic content and passes it to Kaleyra using OBD (outbound dialing) calls. Type the content you want read out, and it is played on the OBD call. The content plays with a delay of 5 to 10 seconds, depending on its length.
How to add dynamic content
You can add dynamic content to your templates using one of the four options below:
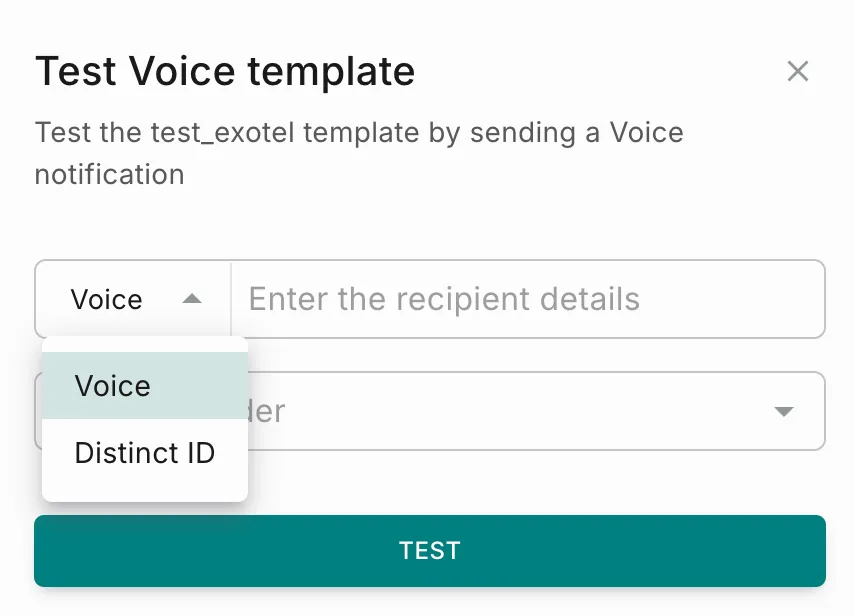
How to test a voice template
Use this feature to test a template thoroughly before including it in any Notification Event. This ensures early detection and resolution of any potential issues, for a seamless user experience.
Save and go live
Click Save to save the template as a Test version. You can save different versions of the template this way. Use Go Live when you are ready to move your template to the Live version.
If your workspace has a maker-checker workflow enabled for template management, Go Live needs an additional approval step. Choose from your designated approvers, who review and authorize the template changes. See Approval flow for the steps.