Approval Request
Overview
Approval Requests help teams review and control changes before they impact live traffic in Fyno. Instead of applying sensitive updates immediately, Fyno introduces an approval step where designated approvers review the change and decide whether it should proceed.
This adds an extra layer of safety, ensuring that critical changes are auditable, reviewed, and approved before going live.
Why Use Approval Requests
Approval Requests help teams:
- Prevent accidental or unauthorised changes.
- Ensure critical updates are reviewed by the right stakeholders.
- Maintain consistency and accountability across teams.
- Reduce risk when making changes that affect live users.
Approval Requests are especially useful for teams working in shared environments where multiple users can create or modify live configurations.
Flow Comparison: Approval Requests OFF vs ON
When Approval Requests Are OFF
- You make a change (for example, update a template).
- You click Go Live.
- The change is applied immediately.
- Live traffic is affected right away.
When Approval Requests Are ON
- You make a change.
- You click Go Live.
- An Approval Request is created.
- Approvers review the request.
- The change is applied only after approval.
This ensures that changes are reviewed before they impact production.
NOTE: Approval Requests are turned OFF by default.
Approval Requests must be explicitly enabled for each supported feature where you want review and control.
Supported Features
Approval Requests can be enabled individually for the following features:
- External Templates:
- sms
- Notification Events
- Workflows
- Routes
- Components
- Campaigns
- and more
You can enable approvals for one, many, or all of these features independently.
How Approval Requests Work
Approval Requests follow a consistent lifecycle across all supported features.
- A user makes a change to a feature where approvals are enabled and clicks Go Live.
- Instead of going live immediately, an Approval Request is created.
- The user selects approvers and submits the request.
- Selected approvers review the request and either approve or reject it.
- Once the required number of approvals is met, or if any approver rejects:
- The request is completed.
- Fyno applies the outcome based on the request configuration (auto go-live or manual publish).
Where to Manage Approval Requests
Approval Requests are managed across two key pages:
- Approval Requests – manage approval settings and approval requests.
- Team Settings – manage approvers and approval roles.
Approval Requests Page
On the dedicated Approval Requests page, you can manage approval settings and view all approval requests in their respective states. All approval activity is tracked on this page.
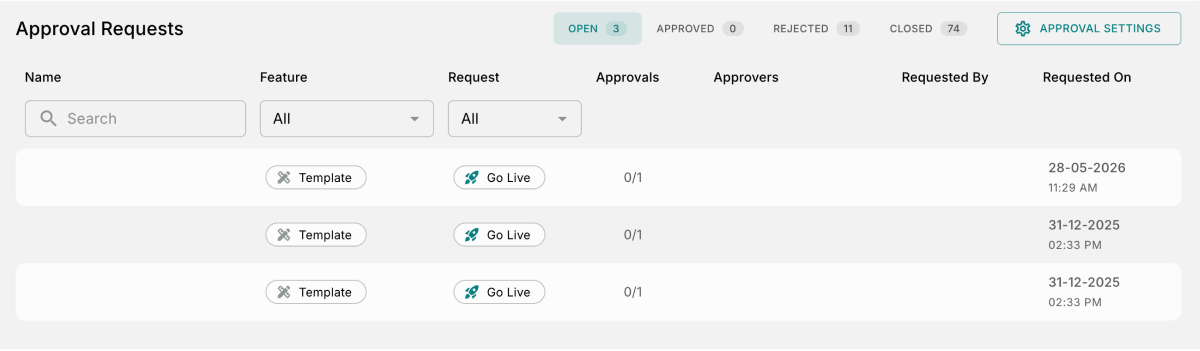 This page allows approvers to:
- View all approval requests.
- Review request details.
- Track request status.
- Approve, reject, or cancel requests.
Team Settings Page
The Team Settings page is used to manage approvers and approval roles.
This page allows users to:
- View all team members along with their respective roles.
- Assign or remove approval permissions for users.
- See who is assigned as an approver.
Users with approval permissions automatically appear in the Approval Settings page as available approvers.
Approval Settings
Approval Settings define which modules require approval and how many approvals are needed before changes can proceed.
 Admins use Approval Settings to:
- View available approvers.
- Enable approvals for specific features.
- Define how many approvals are required.
Approval rules take effect only after they are saved.
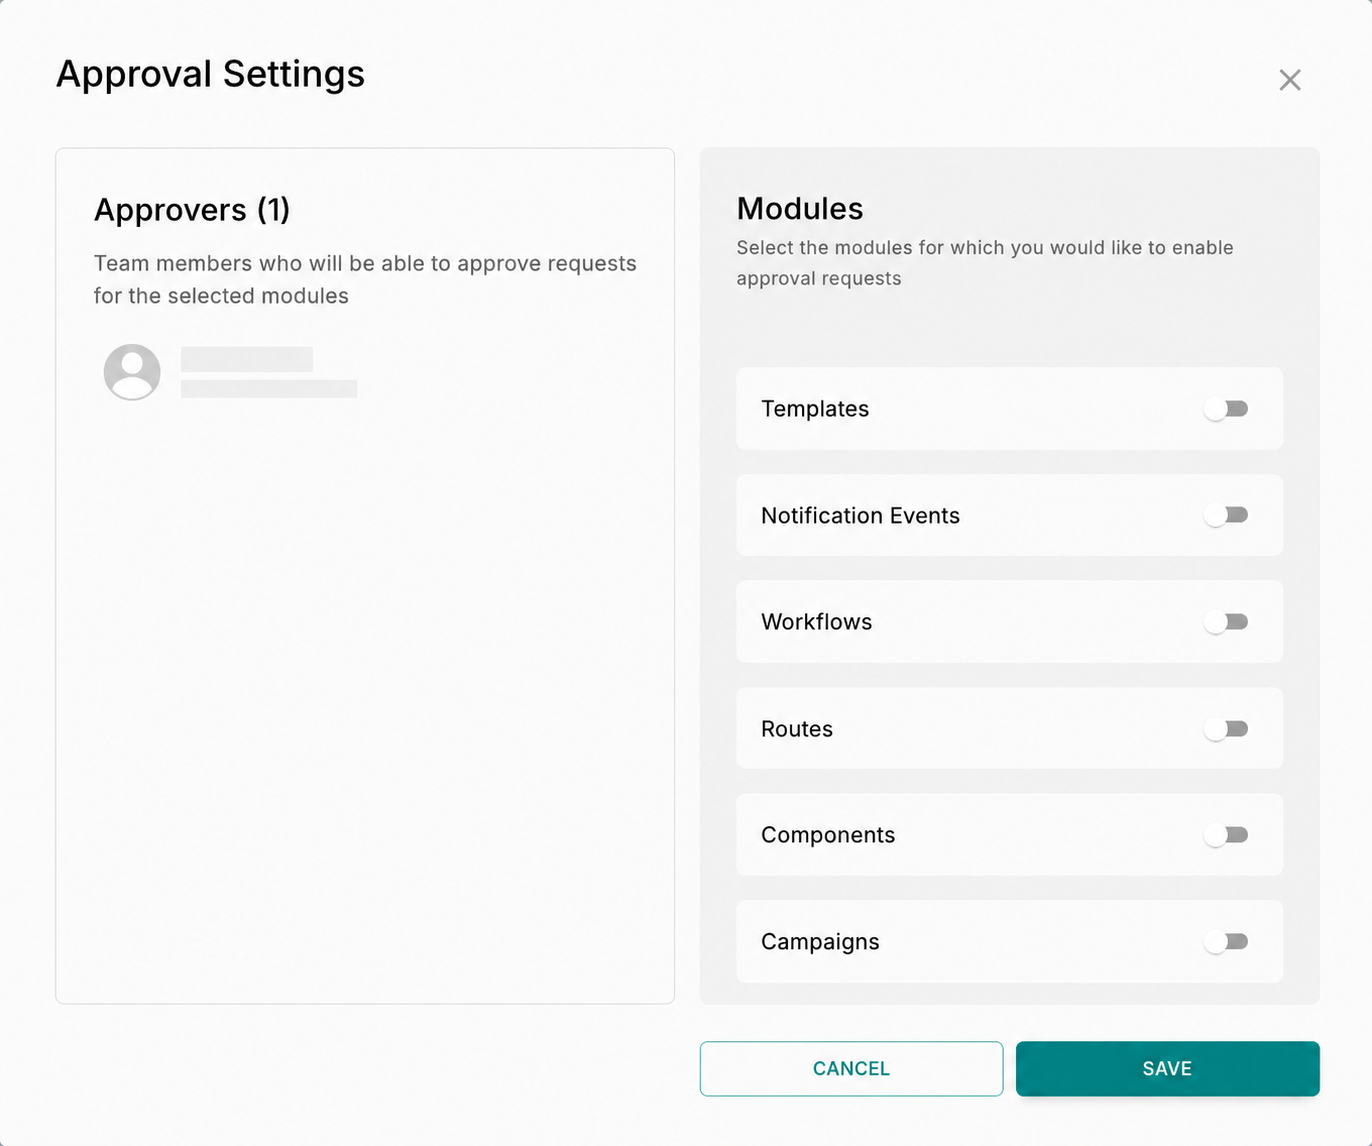
Approval Settings Dialog
The Approval Settings dialog contains two main sections.
Approvers
This section displays all users who currently have approval permissions assigned from the Team Settings page. These users can approve requests for enabled modules.
NOTE: Approvers can only be added or removed from the Team Settings page.
Modules
Use this section to decide which features require approval.
Approvals Required
This setting defines how many approvals are needed for a request to be approved.
Important Behavior
-
You can send a request to more approvers than the minimum.
-
Any subset meeting the minimum can approve the request.
-
Only one rejection is required to reject a request.
 Example:
 -
Minimum approvals set to 2.
-
Request sent to 5 approvers.
-
Any 2 approvals → request approved.
-
Any 1 rejection → request rejected.
NOTE: The maximum approval count available depends on the number of approvers configured in Team Settings.
Saving Changes
NOTE: Approval rules apply only after saving.
Request Status Tabs
Search and Filters
Acting on a Request
When reviewing a request, approvers can perform the following actions.
Approve

- Confirms the change is acceptable.
- Counts toward the required approvals.
- Does not automatically publish unless specified during request creation.
Reject

- Approval request is rejected immediately.
- Changes do not go live.
Cancel
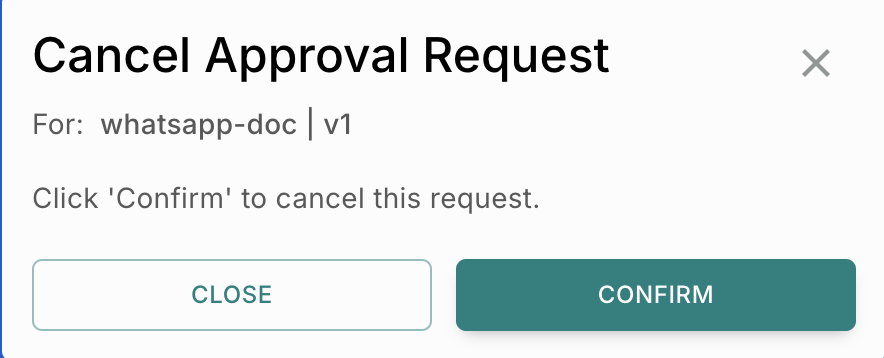
- Available to the request creator.
- Withdraws the request before completion.
What Happens After Approval
Approval does not always mean the change goes live immediately.
Two Possible Outcomes
Go Live on Approval Enabled
- The change is automatically published once approvals are complete.
Go Live on Approval Disabled
- The request is approved.
- The change remains unpublished.
- Optional: The requester can manually make it go live after approval.
This behavior is controlled while creating the approval request.
Example: Template Approval Request Flow
The following example walks through an end-to-end approval flow using Templates.
Step 1: Enable Approvals
- Admin assigns approval permissions to team members from Team Settings.
- Admin enables approvals for Templates.
- Minimum approvals set to 2.
Step 2: Create a Change
- A user edits a template.
- Click Go Live.
- Approval Requests are enabled, so the template does not go live immediately.
Step 3: Create Approval Request
- User selects approvers.
- Adds a message explaining the change.
- Chooses whether the template should go live automatically on approval.
- Submit the request.
Step 4: Review by Approvers
- The request can be approved by the selected approvers, and at least 2 approvals are required.
- If any one approver rejects the request, it is rejected immediately.
Step 5: Outcome
If approved:
- Template goes live automatically only if “Auto Go Live” was enabled.
If rejected:
- The template remains unchanged.
- Request is marked as rejected.
IMPORTANT NOTE
- Multiple approvers can approve an item, but only one approver is required to reject it.
- Cancel your request any time before the action is taken.
- If any one approver rejects, the item moves to the Rejected state.
Summary
Approval Requests give teams control over how and when changes go live. By enabling approvals only when needed, choosing the right approvers, and setting the right approval thresholds, teams can reduce risk without slowing down their work.
Approval Requests are OFF by default, but when enabled, they ensure every critical change is reviewed, intentional, and auditable.