

Creating an Omnichannel Route
You build Omnichannel Routes in Fyno’s Omnichannel Route Builder by placing channels and controls on a canvas and connecting them.
Create an Omnichannel Route
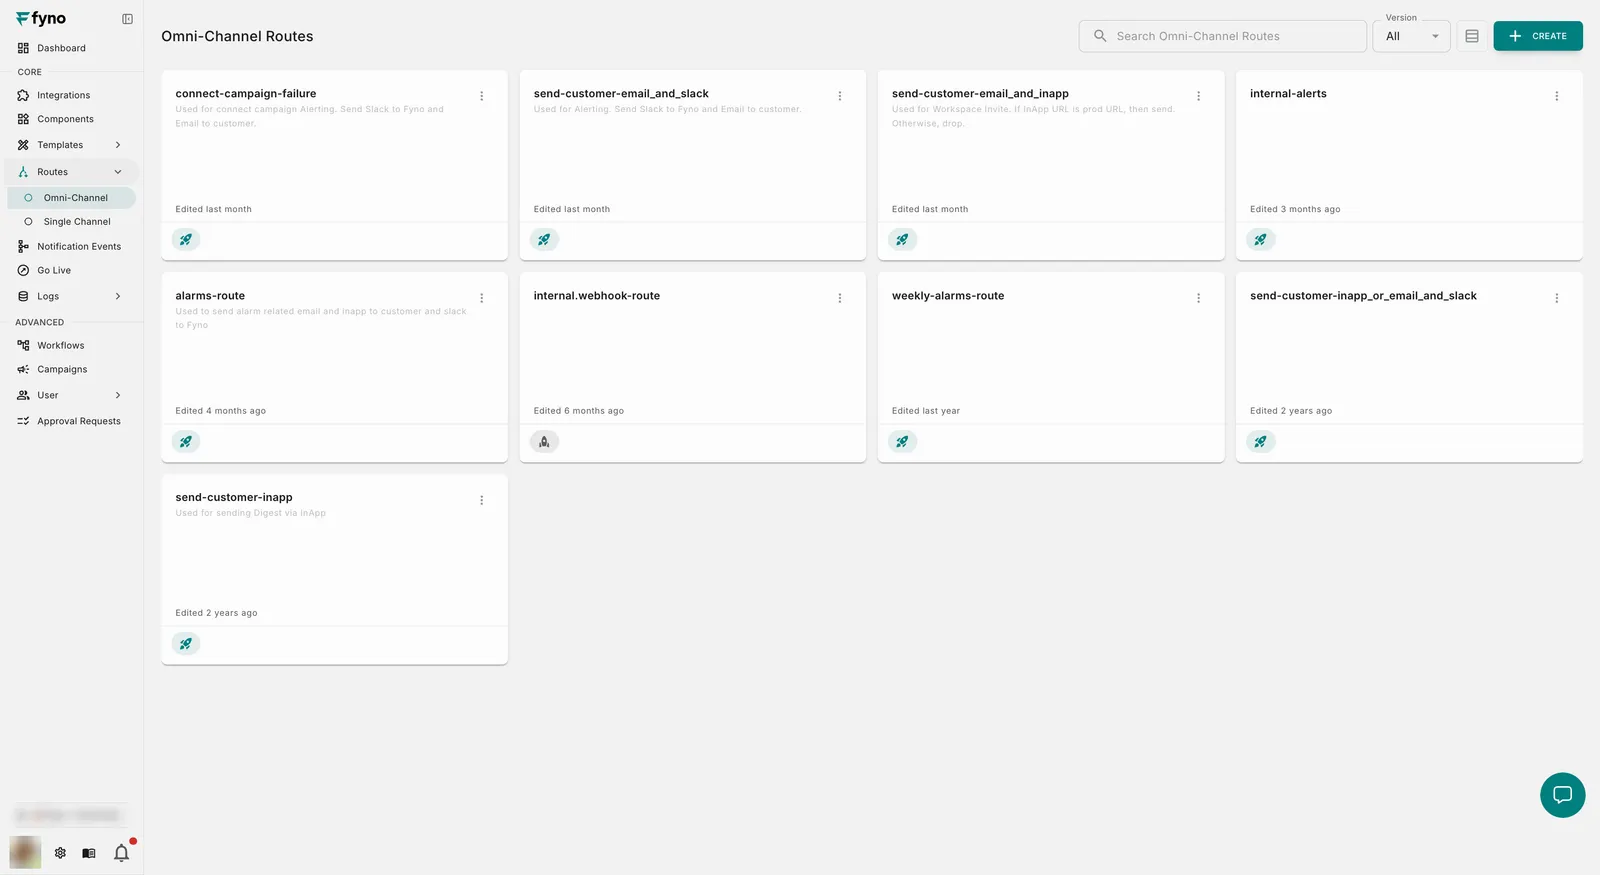
Click Routes in the left navigation and select the Omni-Channel tab. This tab lists your existing omnichannel routes, with each route’s description and when it was last edited. Use the search bar and the Version filter to find a route.
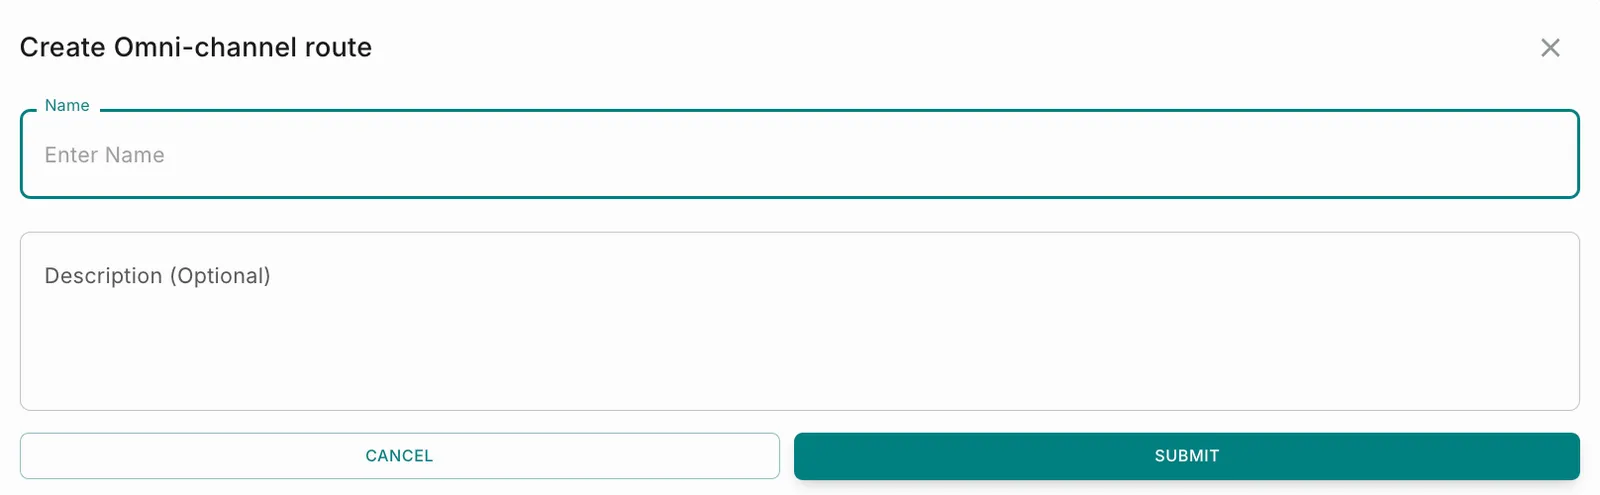
In the Create Omni-channel route dialog, enter a Name for the route and, optionally, a Description. Click Submit.
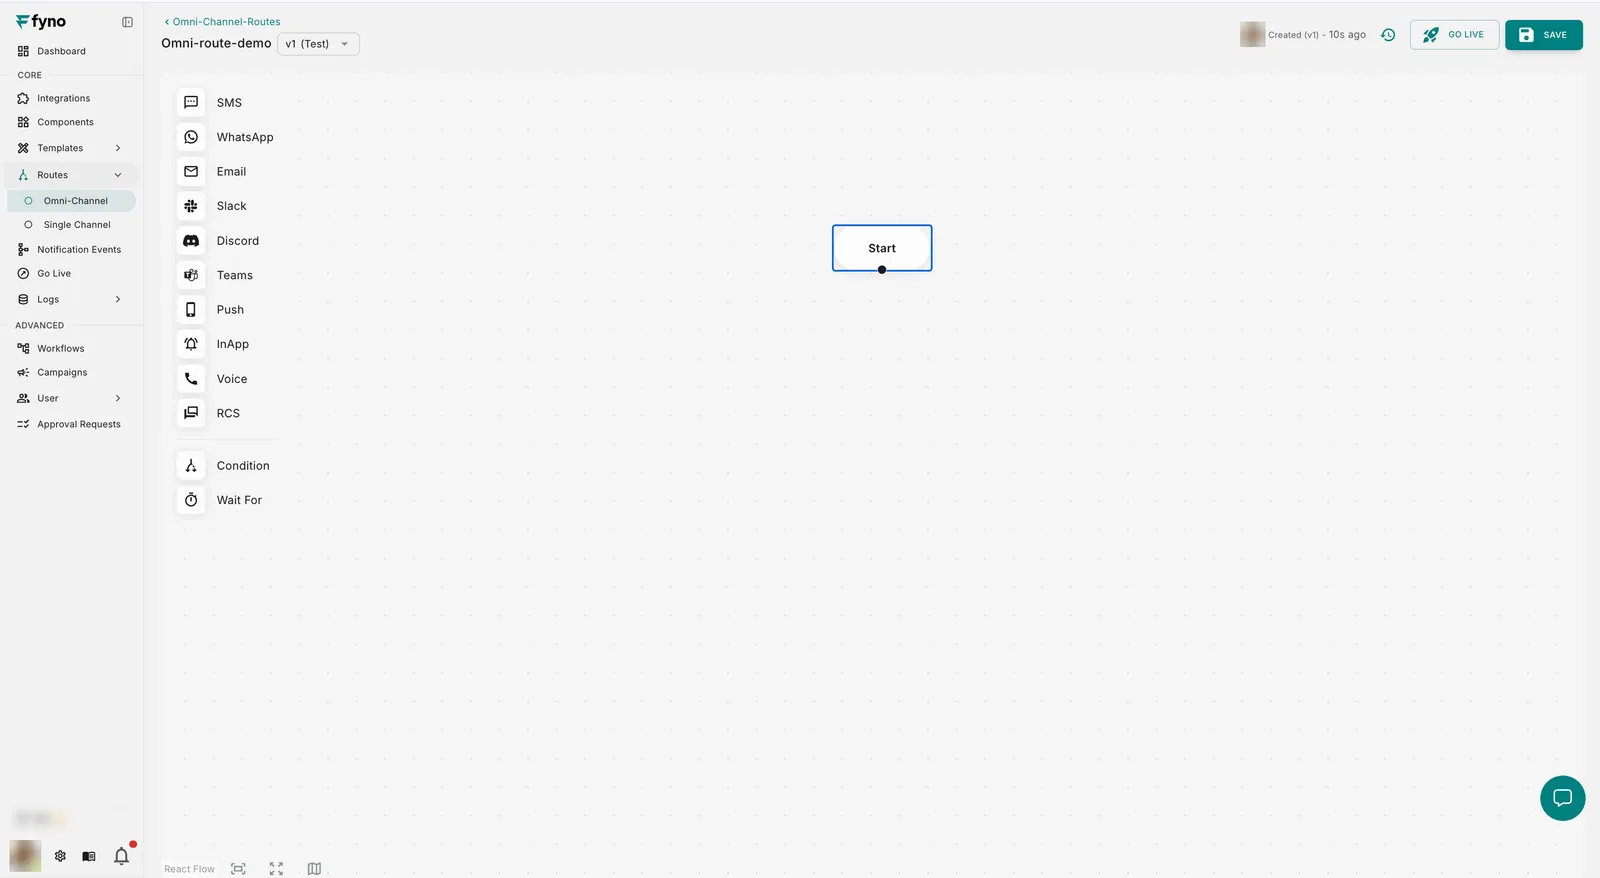
The route builder opens with your route at v1 (Test) and a Start node on the canvas. The channels and controls are on the left.
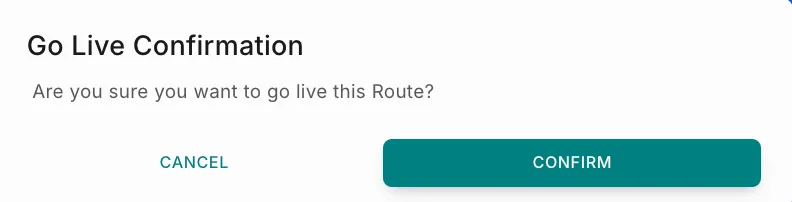
When the route is ready, click Go Live, then click Confirm in the Go Live Confirmation dialog.
If approvals are turned on for your workspace, clicking Go Live asks you to request approval instead. See Approval Requests for how this works.
The builder has proximity connectors: a channel or control you drop on the canvas automatically connects to the closest one that has a free connection node.
Channels
The top section on the left lists the channels: SMS, WhatsApp, Email, Slack, Discord, Teams, Push, InApp, Voice and RCS.
Click a channel, or drag and drop it onto the canvas, to configure it:
- Provider/Route (required): Choose from the providers you have added in Integrations for that channel, or from the single channel routes you have created for it. If no integration is configured for the channel, the list is empty.
- Success Criteria (optional): Define which statuses count as success, and how long to wait for them.
- Wait For and Unit: How long the route waits for a status after sending.
- for: The statuses that count as success. You can select more than one, and receiving any one of them counts as success. The statuses available depend on the channel. For SMS, they are Delivered, Clicked, Invalid-Sub, Failed, Rejected, Undelivered, Dropped and No Report.
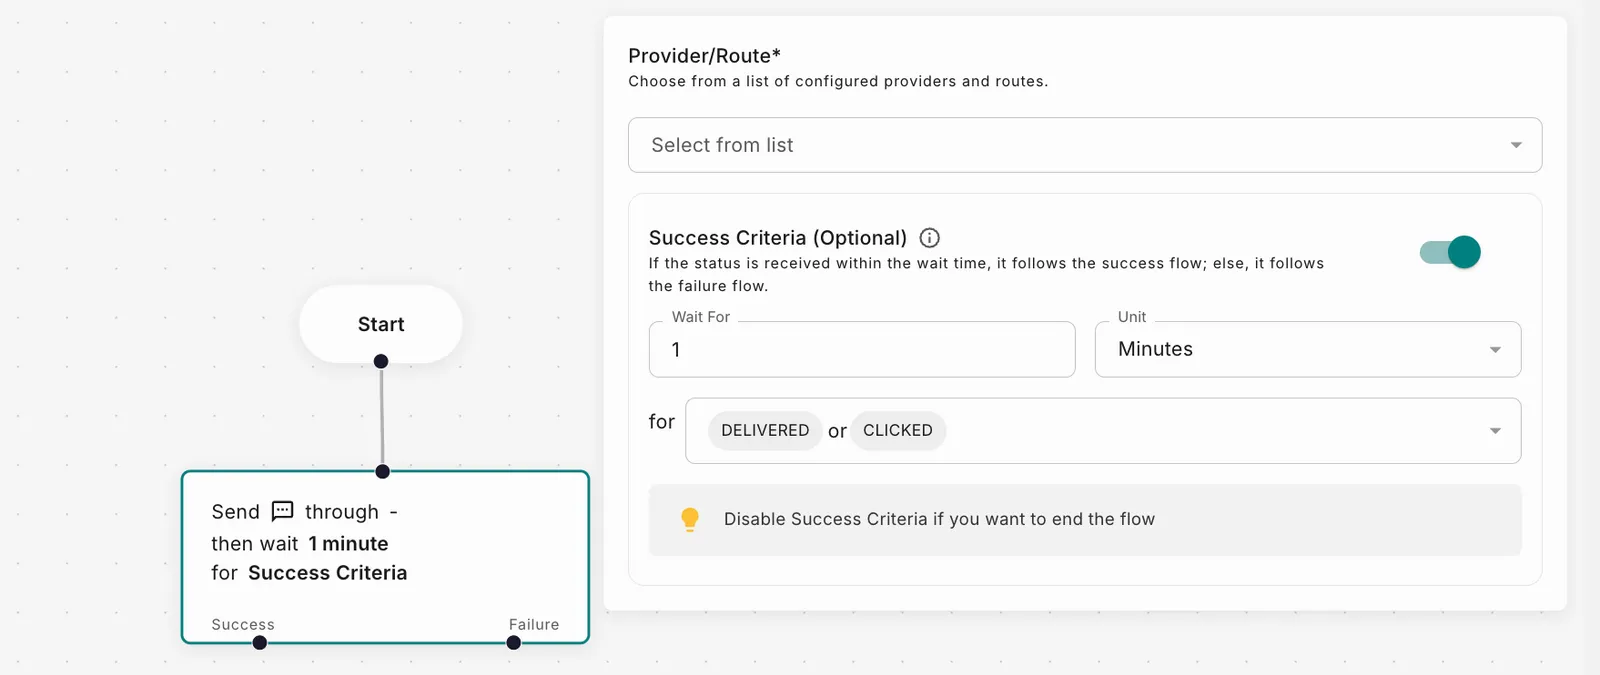
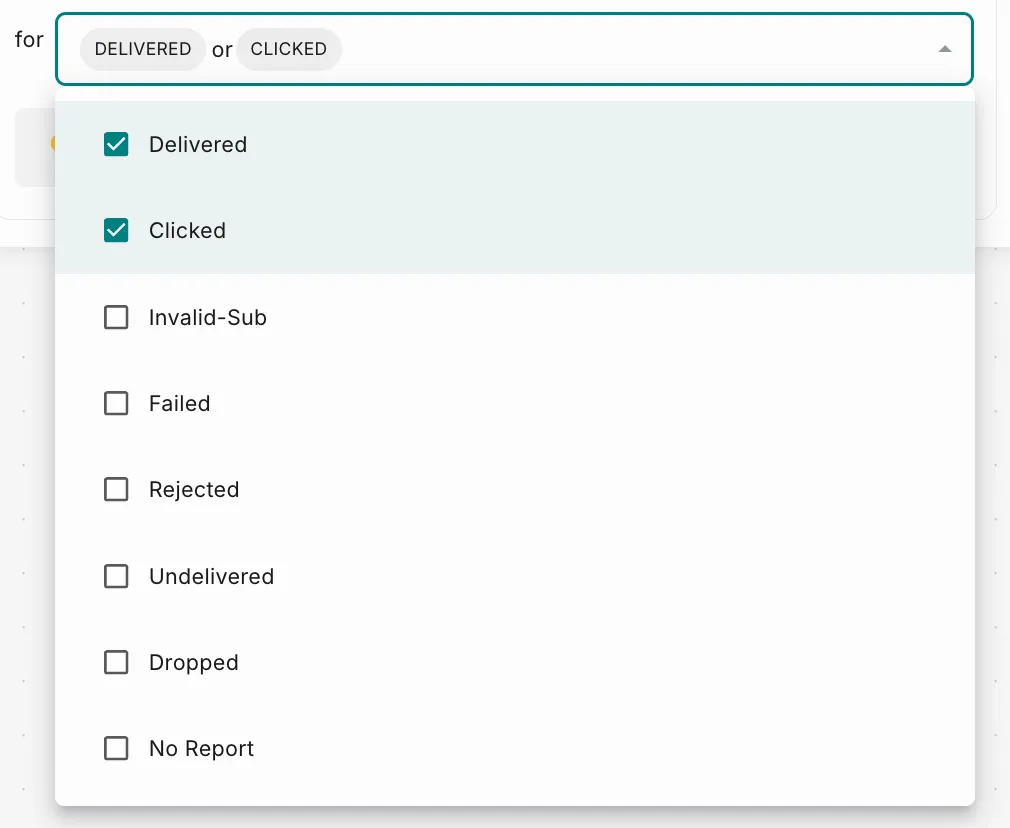
For example, to treat an SMS as successful when it is delivered or clicked within 1 minute of being sent:
- Turn on Success Criteria.
- Set Wait For to
1and Unit to Minutes. - Select the statuses Delivered and Clicked.
The route then waits up to 1 minute for either status. If one is received, the route follows the success flow. If neither is received within 1 minute, it follows the failure flow.
Once configured, the node summarizes its setup: Send SMS through [provider], then wait 1 minute for Success Criteria.
Status-based routing
Every channel node with Success Criteria turned on has two outputs, Success and Failure:
- Success: The flow connected here runs when the notification satisfies the Success Criteria within the wait time.
- Failure: The flow connected here runs when the notification does not satisfy the Success Criteria within the wait time.
Controls
Controls shape the direction your route takes. There are two controls.
Condition
A Condition runs different actions depending on whether the condition is met. It has two outputs, True and False. For example, to choose the channel based on user type: if the user is a Power User, send WhatsApp, otherwise send SMS.
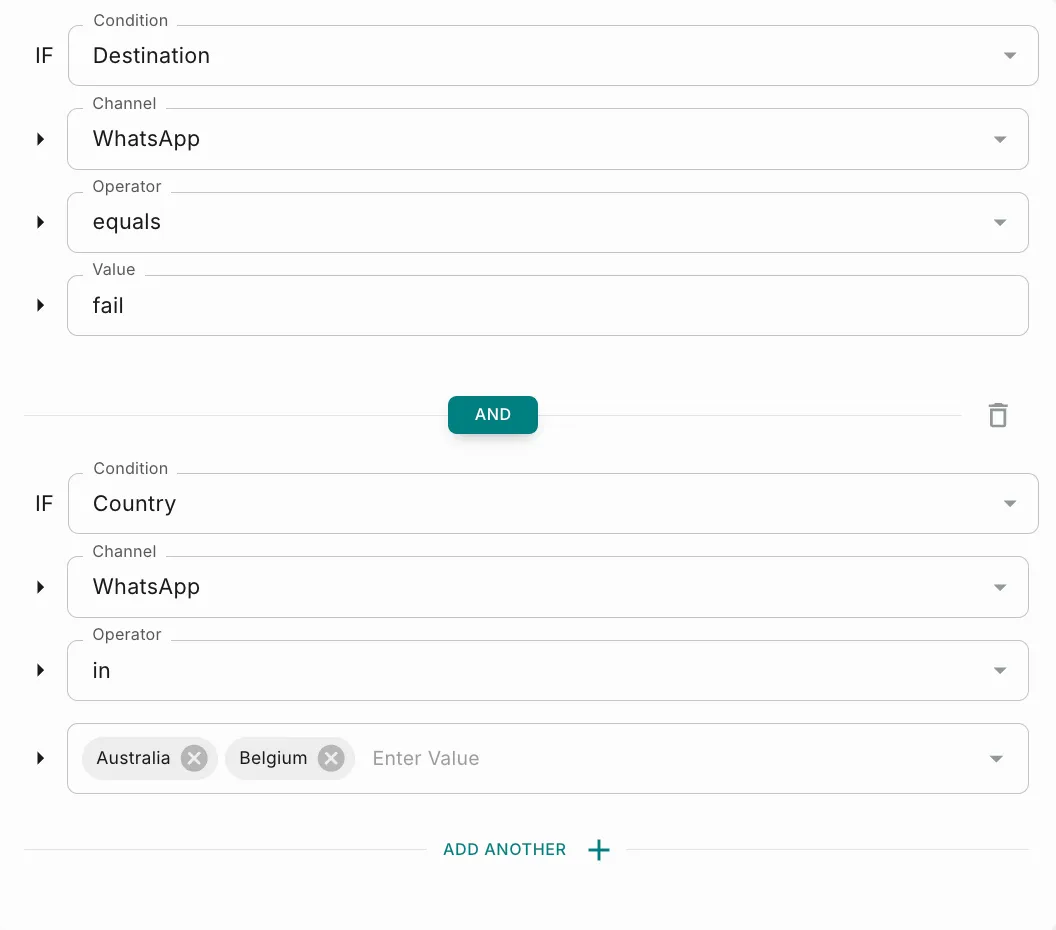
To set up a condition, fill in:
- Condition: What to check: Destination, Variable or Country.
- Channel: The channel the check applies to.
- Operator: How to compare. The operators available are:
- Greater Than
- Less Than
- Greater Than or Equal
- Less Than or Equal
- Equals
- Starts With
- Ends With
- Contains
- In
- Is
- Is Empty
- Not In List
- Value: The value to compare against.
Click Add Another to add more conditions, and choose whether to combine them with AND or OR. Click the delete icon to remove a condition.
Wait For
Wait For adds a delay to the route, so you can stack your notifications without bombarding users across all channels at once. Set:
- Enter Time: The length of the delay.
- Unit: The unit of time for the delay.
A delay can be at most 24 hours, which means you can enter:
- Up to 1440 minutes
- Up to 86400 seconds
Example: channels and controls together
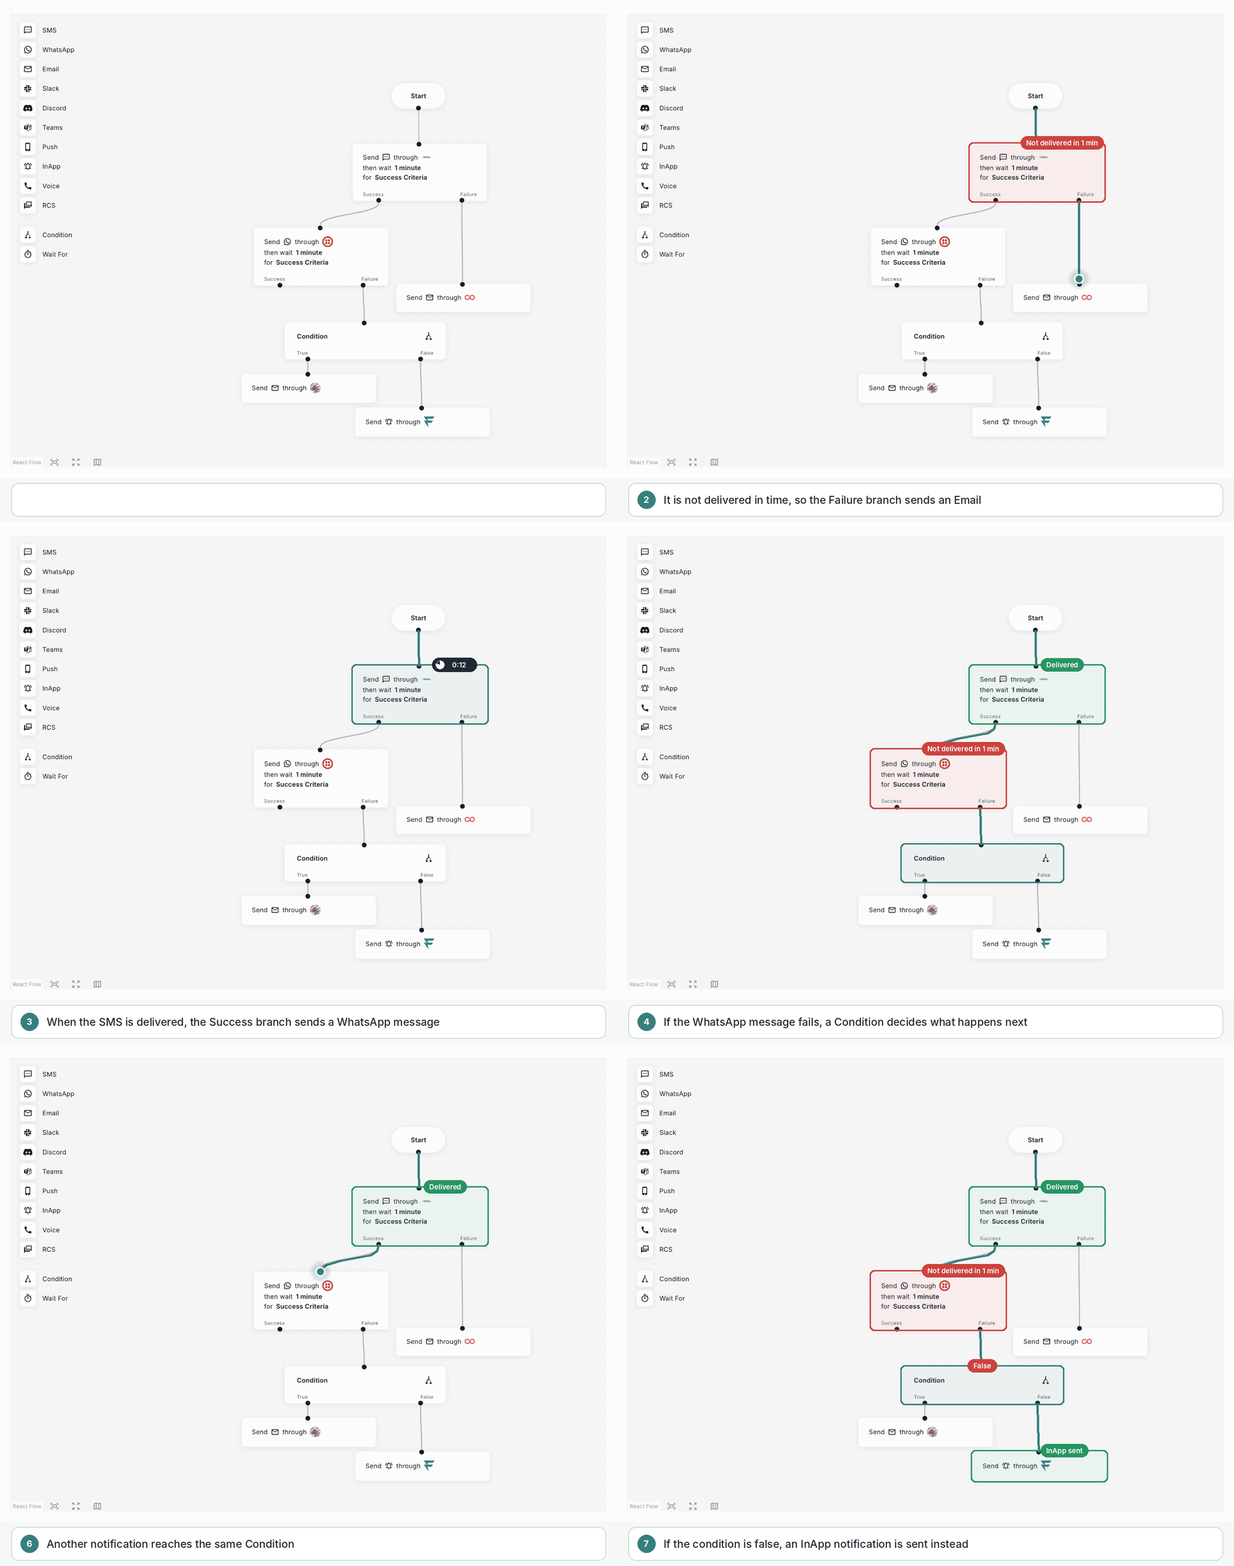
In the route below, an SMS is sent first, with a 1-minute wait for its Success Criteria. On success, a WhatsApp message is sent. On failure, an Email is sent. If the WhatsApp message fails, a Condition decides the next step: if it is true, an Email is sent, and if it is false, an InApp notification is sent.
Understanding how an Omnichannel Route works
For example, say you have three channels, WhatsApp, Email and Push, and the objective of the route is to make sure the user reads your notification.
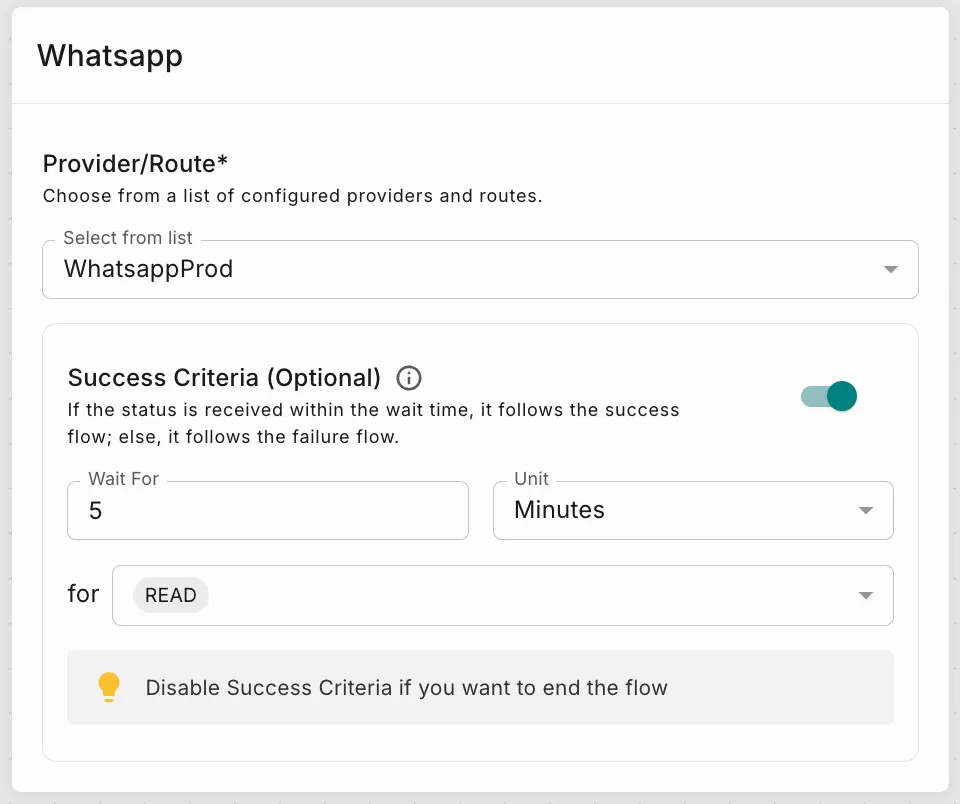
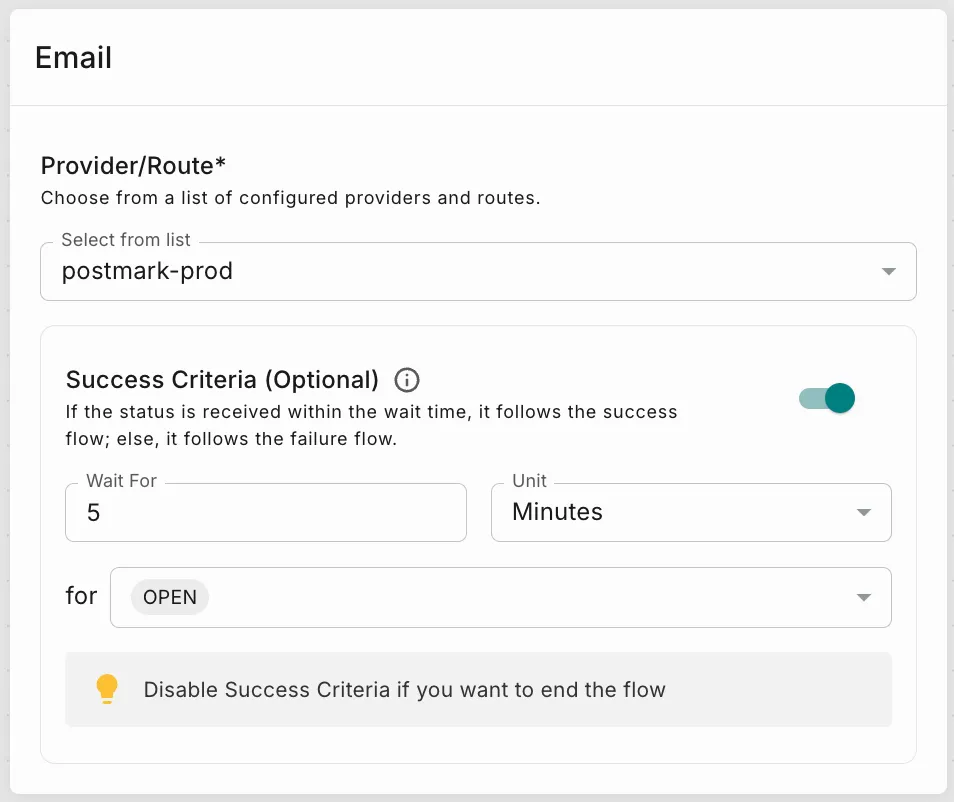
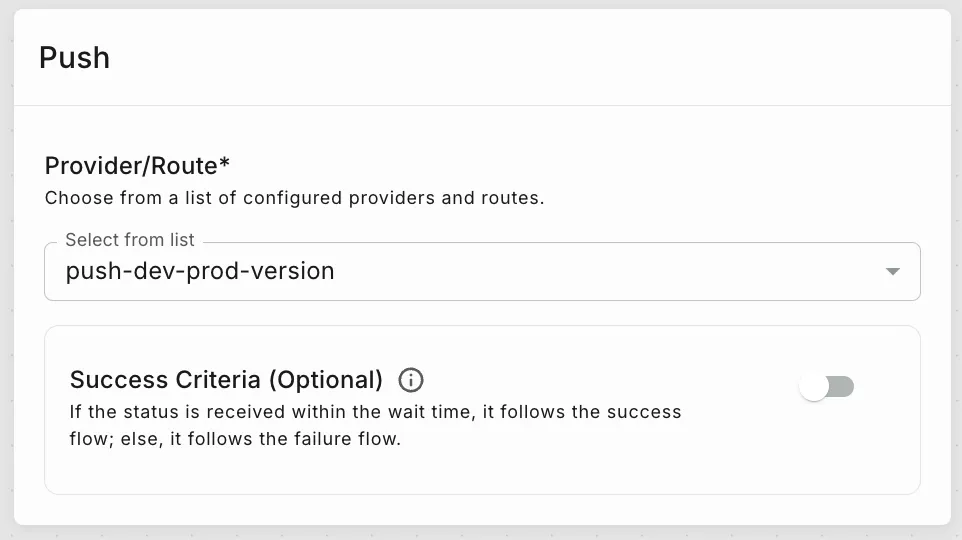
In the Omnichannel Route Builder, this route looks like this:
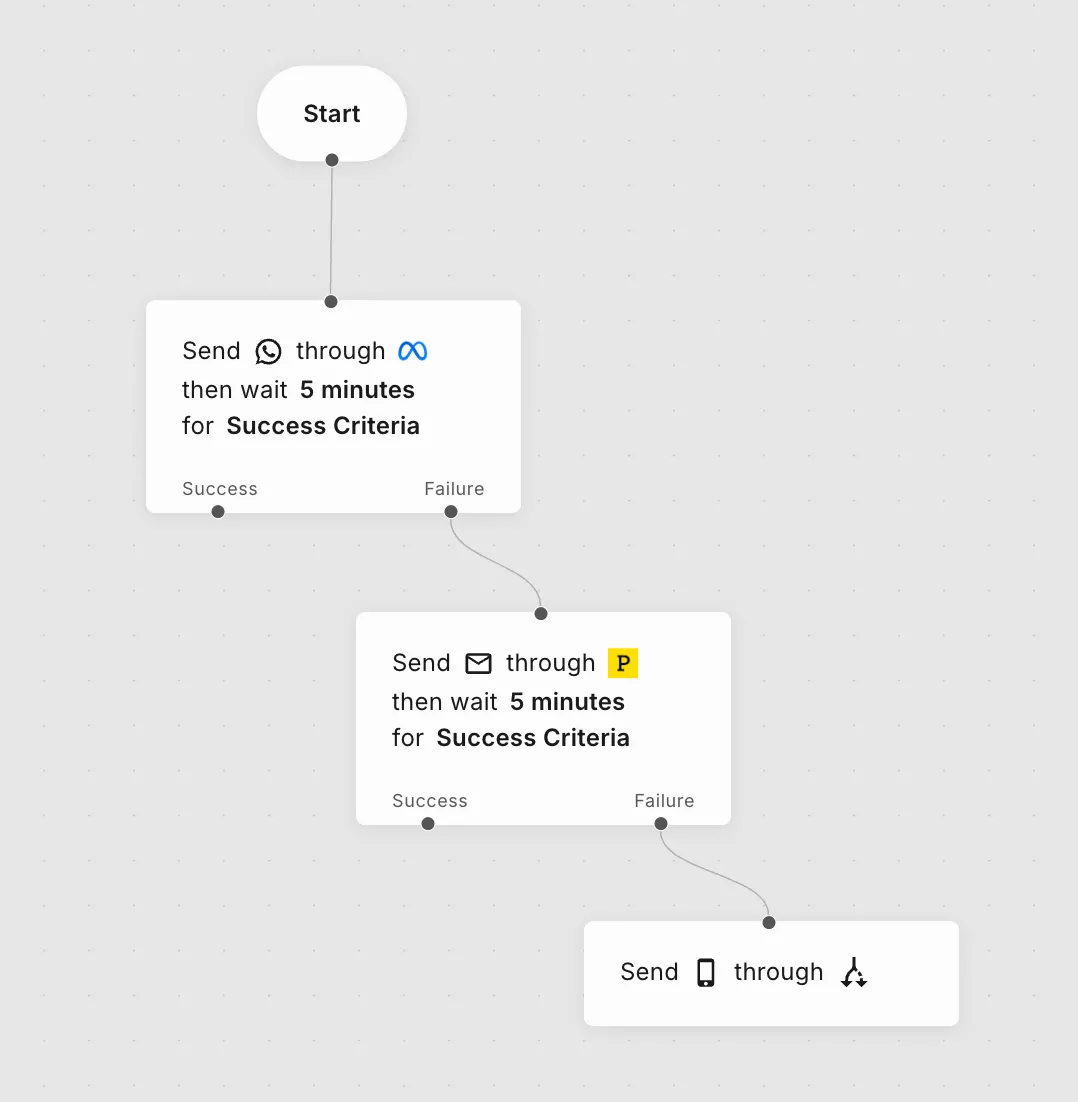
When a destination is missing
If a user’s destination for a channel is missing, that step is automatically treated as a failure, and the step connected to its Failure output runs.
For example, take a route configured like this:
- Send an SMS.
- On success, send an Email.
- On failure, send a WhatsApp message.
If the user has no SMS destination, the SMS step is treated as a failure, so the WhatsApp message is sent.