For AI agents: a documentation index is available at the root level at /llms.txt and /llms-full.txt. Append /llms.txt to any URL for a page-level index, or .md for the markdown version of any page.
LoginTalk to us
DocumentationSDKsConnectAPI Reference
    • Home
    • Release Notes
  • Getting Started
    • Quickstart
    • Dashboard
    • Alarms
    • Versioning
  • Core Features
    • Integrations
      • SMS
      • RCS
        • Gupshup Enterprise
        • MSG91
        • Sinch
        • ValueFirst
        • Wisely
      • WhatsApp
      • Email
      • Chat
      • Push
      • Voice
      • In-App
      • Web Push
      • DLT
      • Verification
    • Templates
    • Routes
    • Notification Events
    • Requests/Go Live
    • Logs
  • Advanced Features
    • Workflows
    • Campaigns
    • User Profiles
    • Approval Request
  • Settings
    • Profile Settings
    • Workspaces
    • Workspace Settings
LogoLogo
LoginTalk to us
Core FeaturesIntegrationsRCS

RCS Sinch Integration

Was this page helpful?
Previous

RCS Valuefirst Integration

Next
Built with

Before getting started, ensure you have a Sinch account with RCS enabled.

Note: All required integration details will be provided by the Sinch team upon request. The API credentials used here are different from your Sinch account login credentials.

1

Find the Provider

Navigate to the Integrations page. Under the RCS section, click on the Sinch option.

2

Configure the Integration

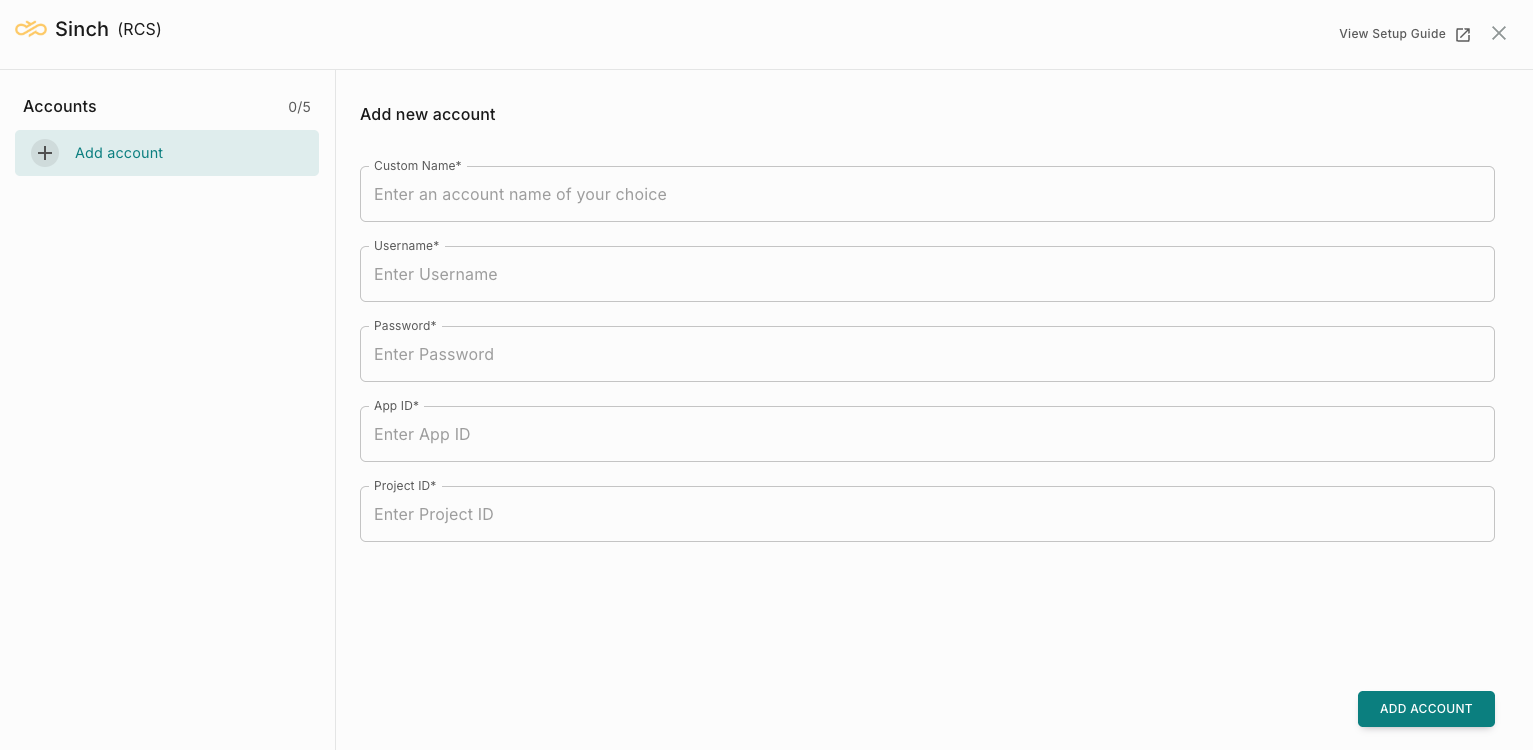
In the pop-up, fill in the following details:

  • Custom name: Provide a name to help you identify this account within the platform.
  • Username: API username provided by Sinch.
  • Password: API password provided by Sinch.
  • App ID: The application ID shared by Sinch for your RCS setup.
  • Project ID: The project ID associated with your Sinch account.
3

Update Account and Run Test

  • Update Account: You can edit and update your details here.

Note: Fields that are greyed out cannot be modified.

  • Run Test: Use this option to test the integration and verify that the saved configuration is correct.
4

Complete the Integration

Click on Add Account once all required fields are filled in. Your Sinch RCS account will now be successfully configured.