Web Push Templates
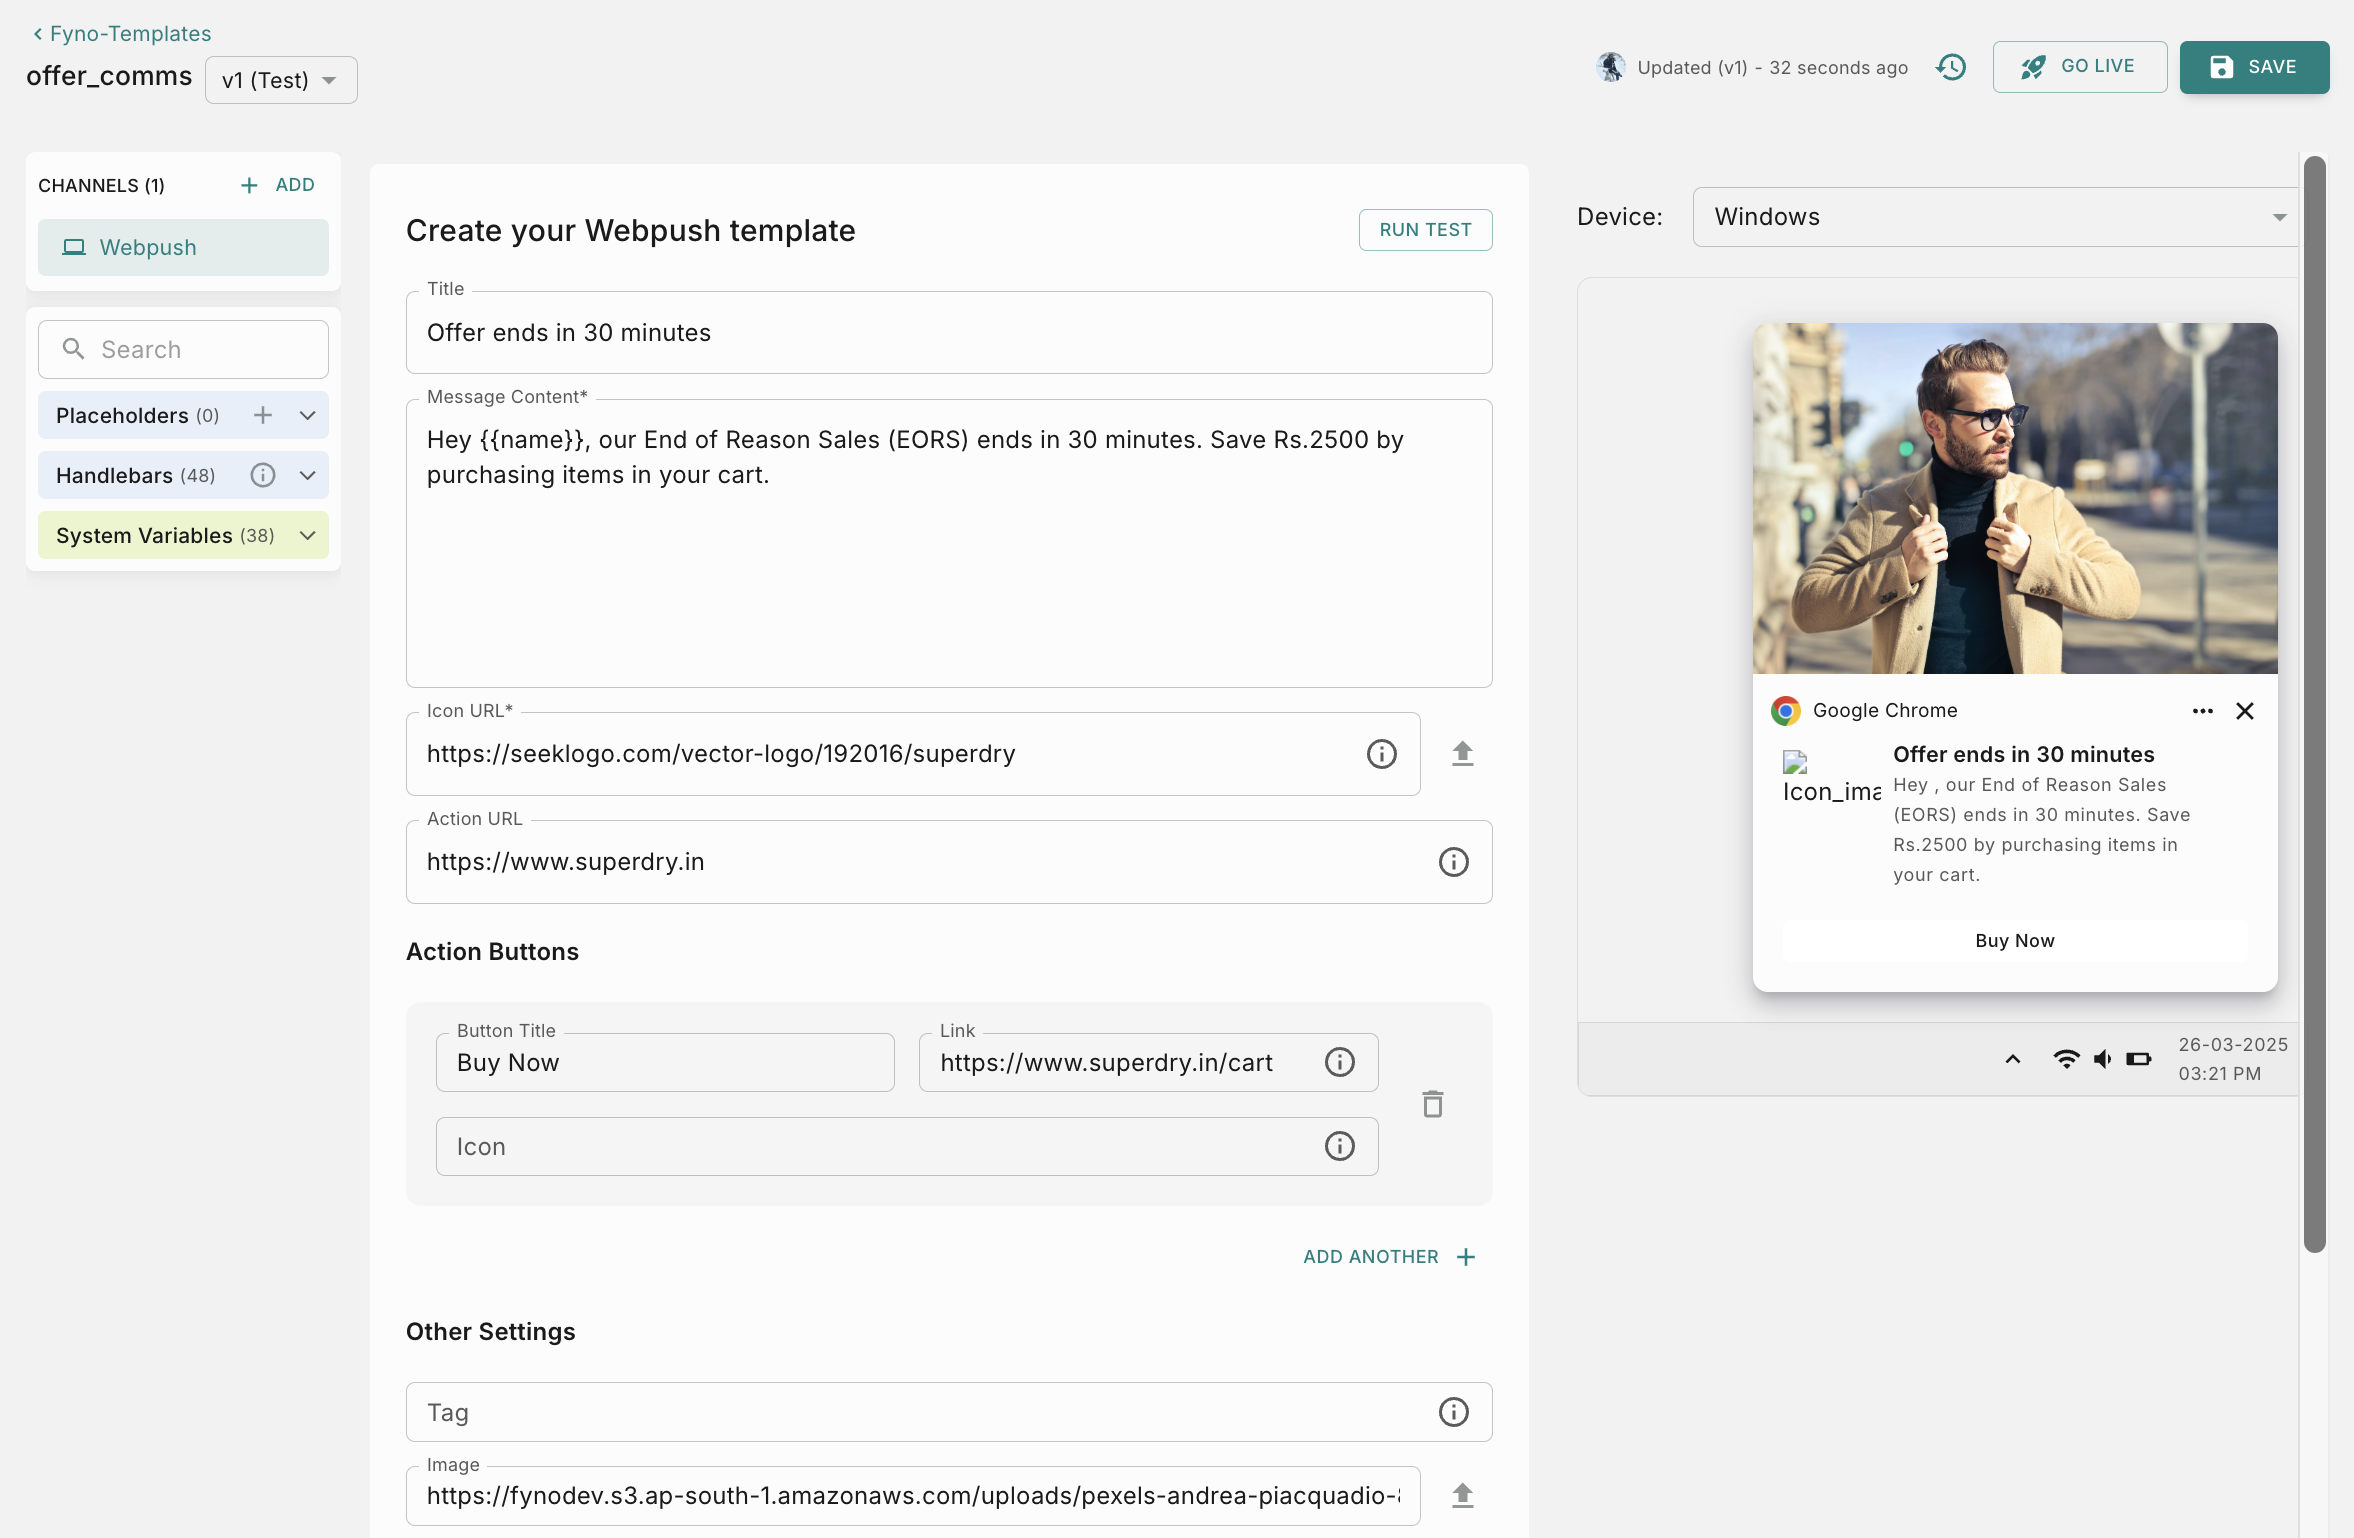
Fyno’s web push templates allow you to create templates for both desktop and mobile web across Windows and MacOS devices.
-
Title: This is the title for your template. While it’s optional, it aids in summarizing and providing context to the template.
-
Message Content: This constitutes the body of the template, where the primary content is placed. It’s a mandatory field that must be filled out.
-
Icon URL: This is the icon you wish to display on the notification.This is primarily used for displaying brand logos. You can either provide a URL or upload an image for this purpose. The recommended size of the icon is 1:1 ratio. This is a mandatory field.
-
Action URL: This is the link that clicking the notification will redirect to. You can enter a valid HTTP/HTTPS URL or a route beginning with ”/” if you intend to route users within the same path.
-
Action Buttons: (Optional)
- Button Title- Provide a name for the button.
- Link - Along with the button, provide the link that clicking the button would lead to. You can either enter a valid HTTP/HTTPS URL or a route starting with “/” if you want to route them within the same path. For example, you can specify either
https://www.myntra.com/cart?product-id=123or /cart?product-id=123. - Icon - Enter a value in the format of ‘/img/icon.png’. This icon will not be rendered in the preview but will render in the actual notification sent.
You can add upto 3 Action buttons
-
Tag: Only one notification with the same ID will be shown on the device. Use the same ID to update an existing notification instead of showing a new one. The character limit is set at 64 characters.
-
Image: Specify an image link for the image you wish to send along with the web push message. Alternatively, you can also upload an image. Supported file formats are JPG,JPEG, PNG. Recommended Size is less than 1 MB. Recommended ratio for the image is 2:3. The supported file formats are JPG, JPEG, and PNG for desktop and mobile web.
-
Time to Live: It defines how long the push message is preserved for delivery if the device is offline or due to OEM device restrictions.The default is 259,200 seconds.
-
Additional Data: This is an additional field that can be used to send some extra information along with the notification and used to render something on the device.
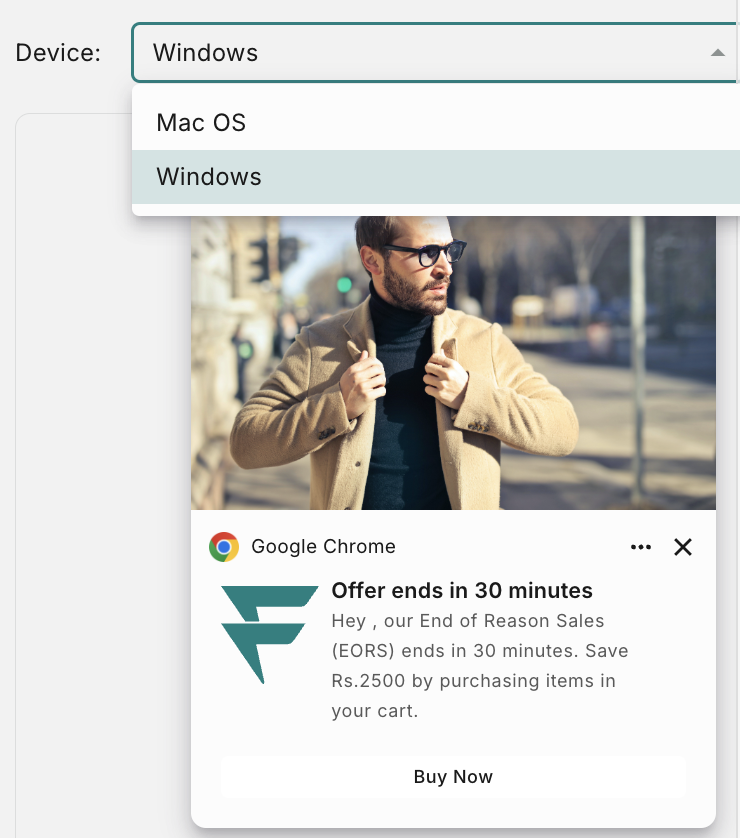
Preview
On the right hand side, you can see the Web Push Preview. It can be viewed at Device level. As of now, we support 2 devices.
- Mac OS
- Windows
How to add dynamic content in template?
You can add dynamic content in your templates using one of the 4 options mentioned below.
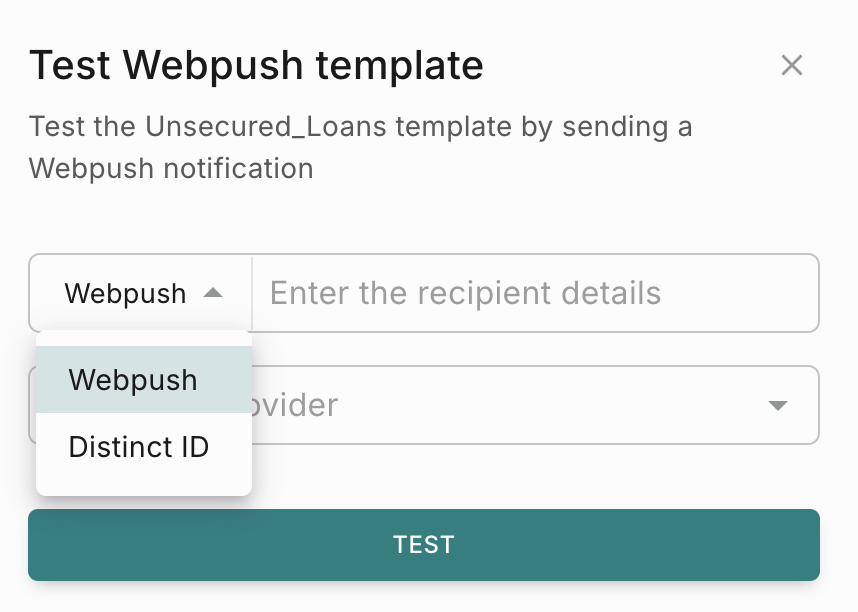
How to test WebPush template?
You can use this feature to conduct thorough testing of a template prior to its inclusion in any Notification Event. This ensures the early detection and resolution of any potential issues, ensuring a seamless user experience.
How to raise Approval requests
If your workspace has maker-checker workflow enabled for template management, the ‘Go Live’ action requires an additional approval step. You’ll need to choose from your designated approvers who will review and authorize the template changes.
You can read more about it here