Trigger a Workflow Using a Webhook
In this tutorial, we will look at
- How to configure a webhook trigger
- A real-time use case to explain how to trigger a workflow using webhook
- How to receive delivery reports for notifications triggered in a workflow
Navigate to the Workflow section from the left navigation panel.
If you have already created few workflows, you can see the list of all the Workflows you have created in card view. You can click ‘+Create’ to create a new workflow.
Once you click ‘+Create’, a workflow canvas opens.
Prerequisites
- Ensure relevant notification events which will be configured as part of Workflow is created. You can read more about it here
- Make sure you have the sample payload which will be triggered via webhook.
- Ensure at least 1 allowlist API is configured if you want to receive delivery reports. You can read about it here.
How to configure a Webhook
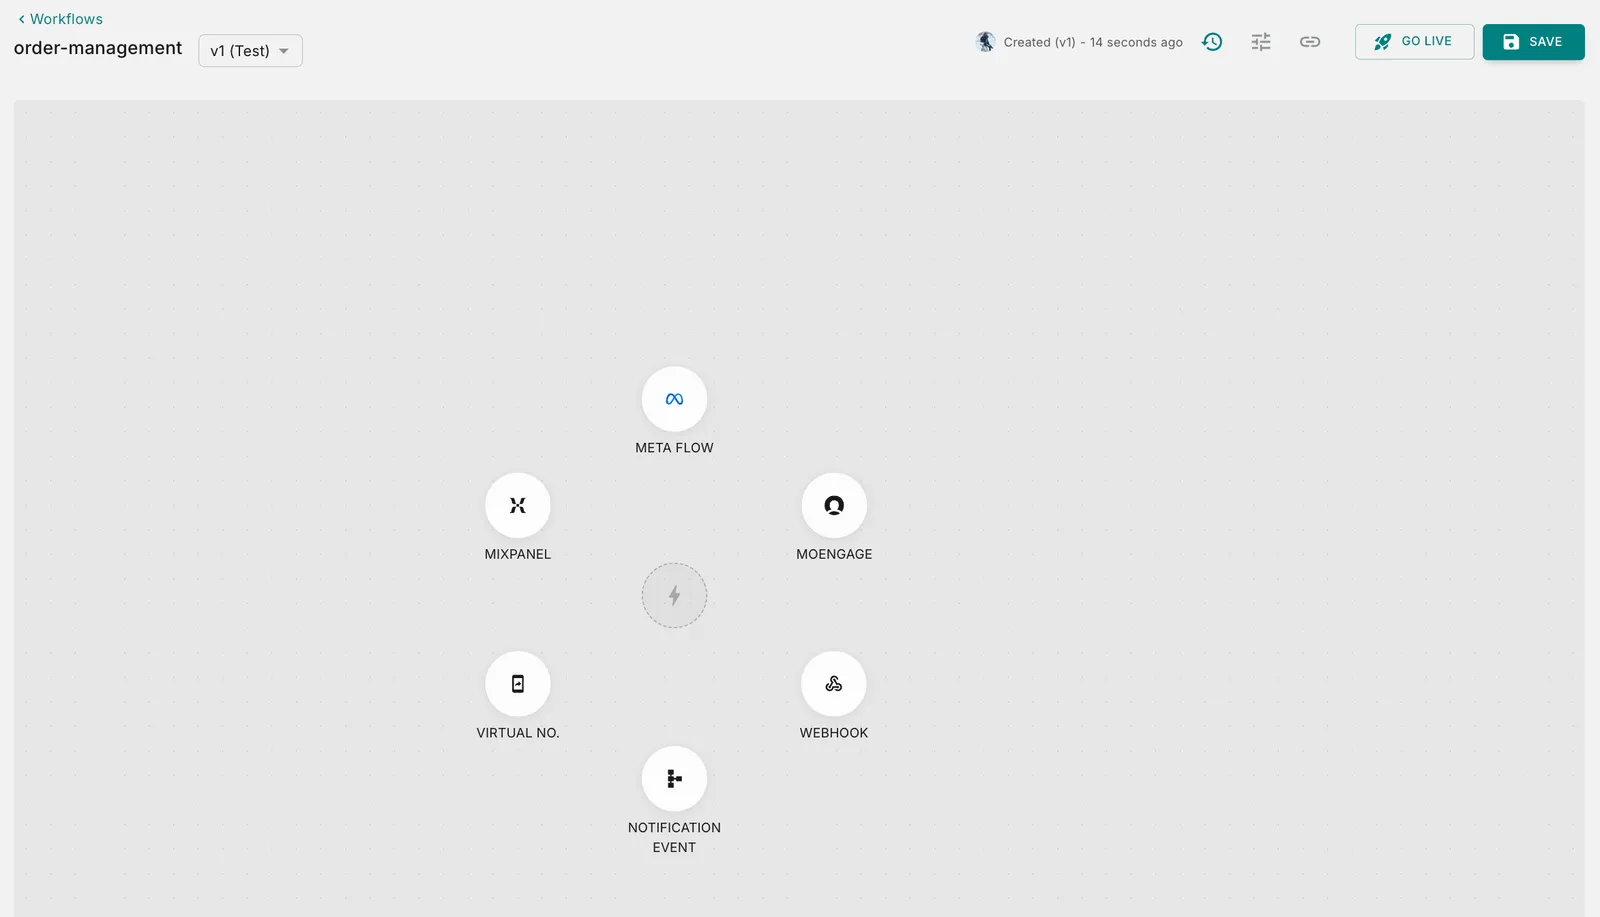
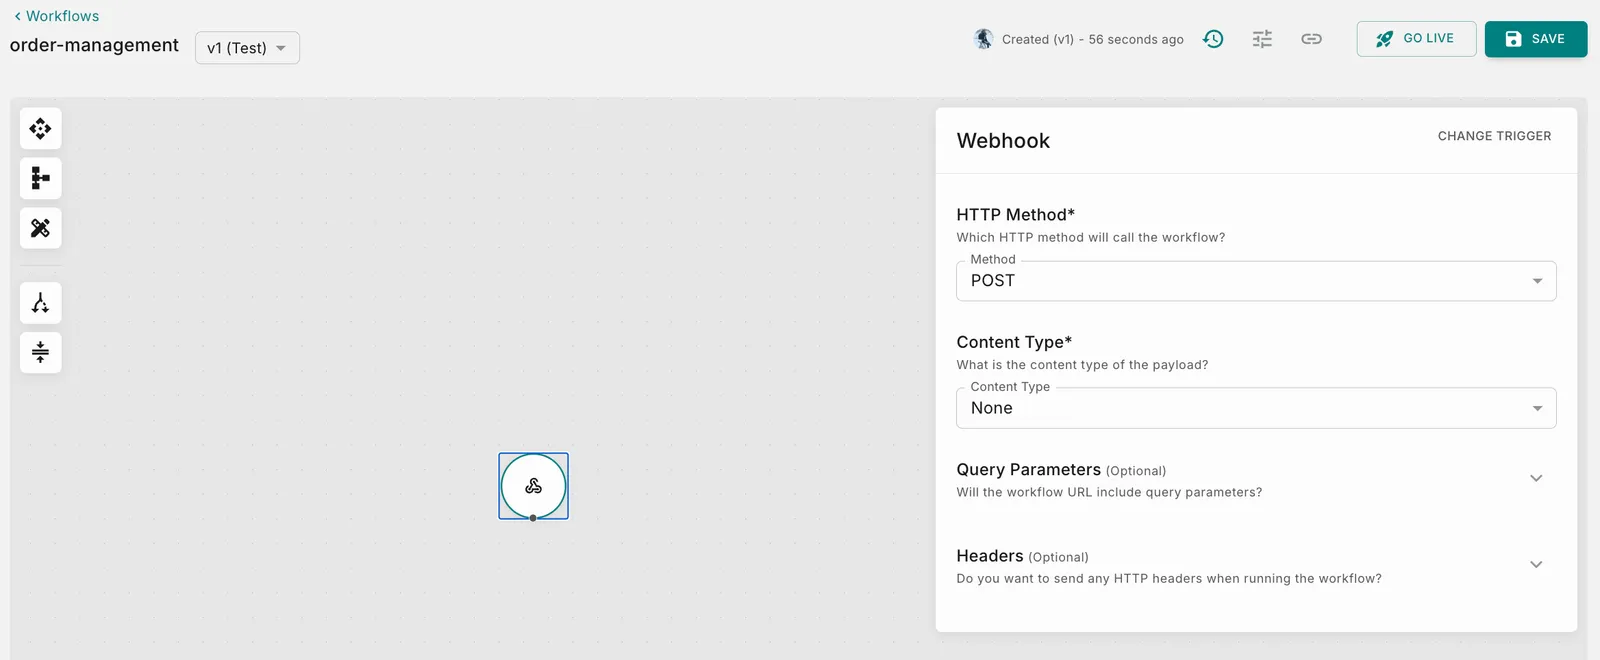
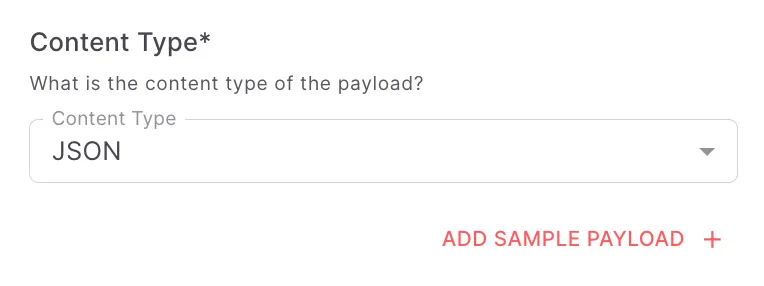
Content Type- If you select POST in the previous step, then you need to select the content type of the payload.
- None - No payload will be sent while triggering the workflow
- JSON - content will be set to application/json
- Form Data - content will be set to multipart/form-data
- URL Encoded Form - content will be set to application/x-www-form-urlencoded
- XML - content will be set to application/xml
- Text - content will be set to text/plain
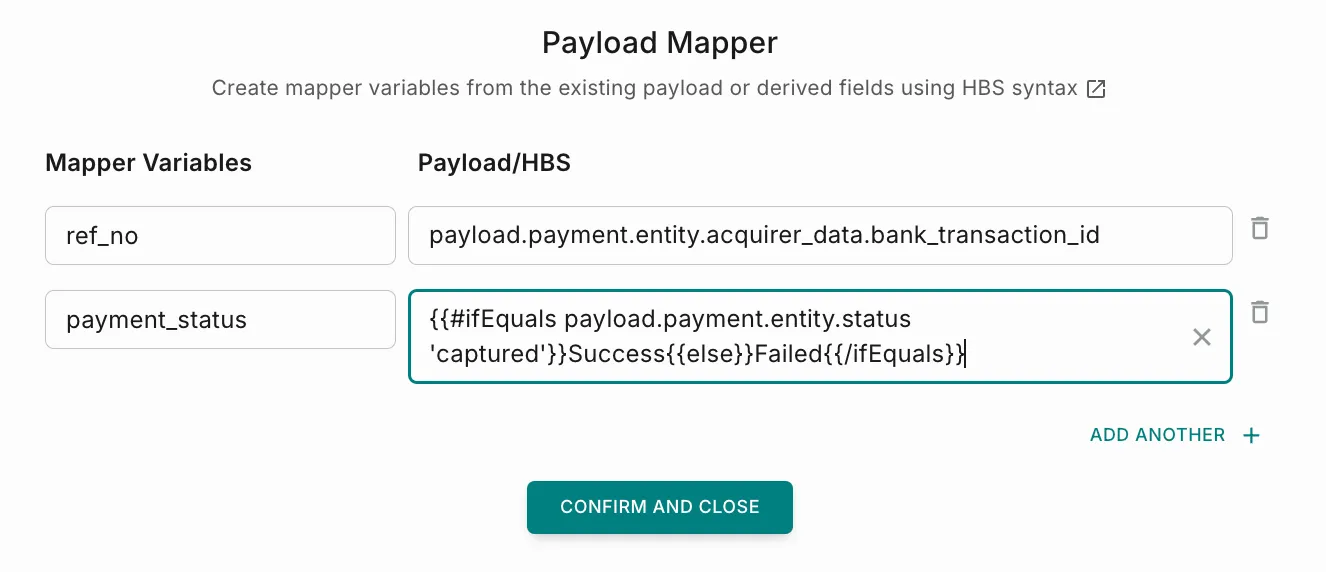
The Simplify popup will look as shown below.
- When directly mapping payload data, you can achieve it by linking, for example, ‘acquirer_data.authentication_reference_number’ to the variable ‘ref_no’.
- However, if you’re using Handlebars (HBS), the correct syntax involves using the payload data as ‘$input.body.status’ to map it to a variable like payment_status. Attempting to use just ‘payload.status’ will result in an error. To know more about Handlebars, please refer our documentation
How does Workflow Work?
Let’s illustrate this with our payment gateway example used by the ABC company. When ABC creates the Workflow in Fyno, they will configure their payment gateway to call the Workflow URL anytime a payment is processed.
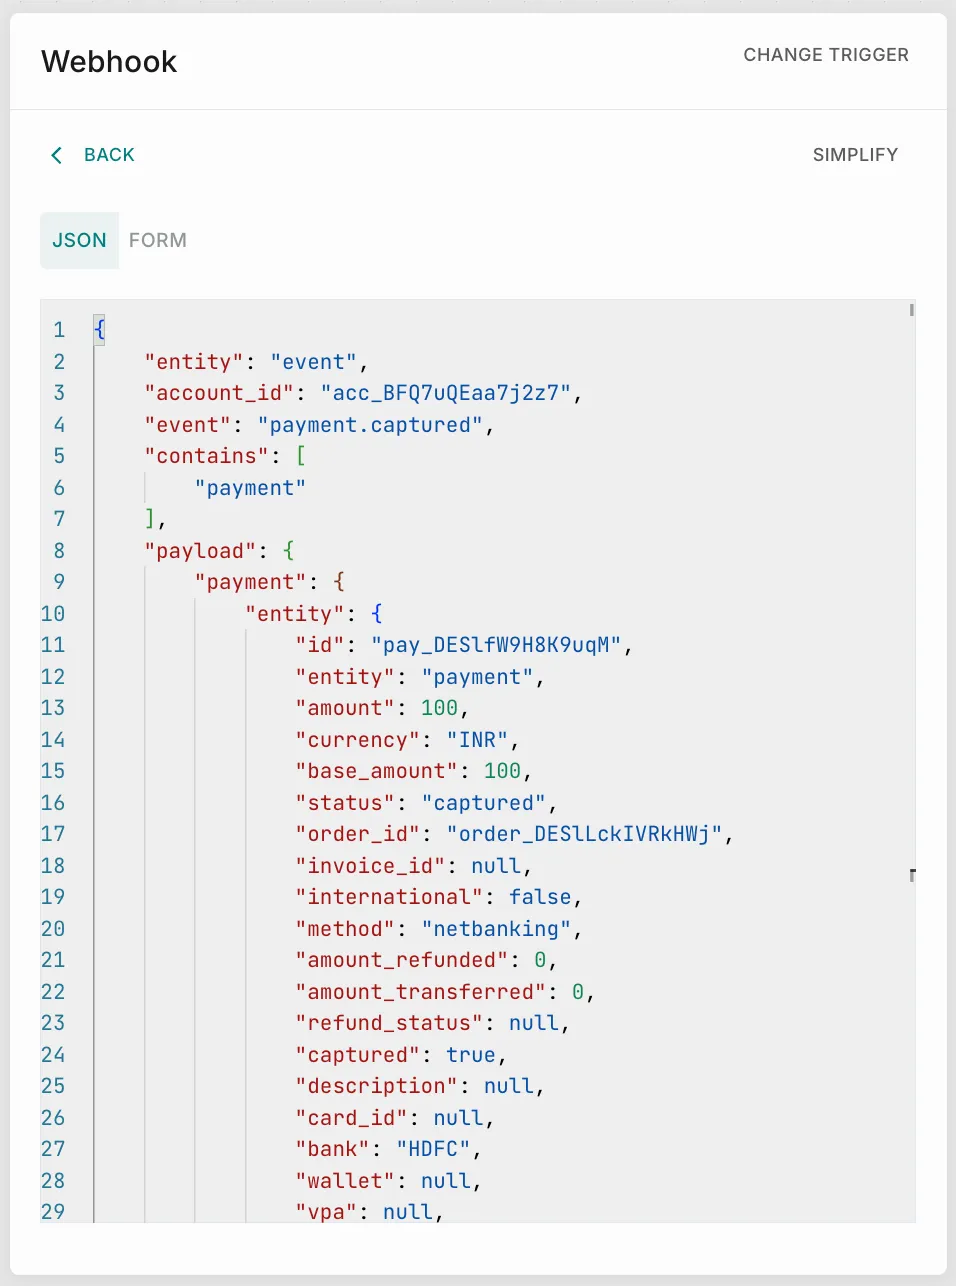
Let’s assume that the response sent by the payment gateway for a successful payment is the below JSON.
When a payment succeeds, the gateway will invoke the Workflow URL by including the above response as a payload.
The details that we configure in the trigger step should reflect the details used by the source calling the Workflow. So in our example, if the gateway is invoking the Webhook/Workflow URL as a POST request, this is how ABC will configure the trigger:
- HTTP method -
POST - Query string - empty (since the gateway does not add any query strings to the URL)
- Headers - empty (assuming that the gateway does not pass any headers in its response)
- Content type - JSON (since the payload is of type JSON)
- Payload - payment success JSON payload from the gateway
It is critical to note that the data configured in the trigger step is just a sample and only provides a means to build the rest of the Workflow, as you will see later. In other words, if the payment gateway provider adds a new attribute to the response, the Workflow will run as expected, even with the old payload. However, if you need to use this new attribute in the Workflow, updating the trigger step with the new payload is essential.
Once we save the initial component, the next step of the flow opens up. You have 2 options here:
- Action: Action allows you to take an action based on the payload. Notification Event and API call are the 2 options.
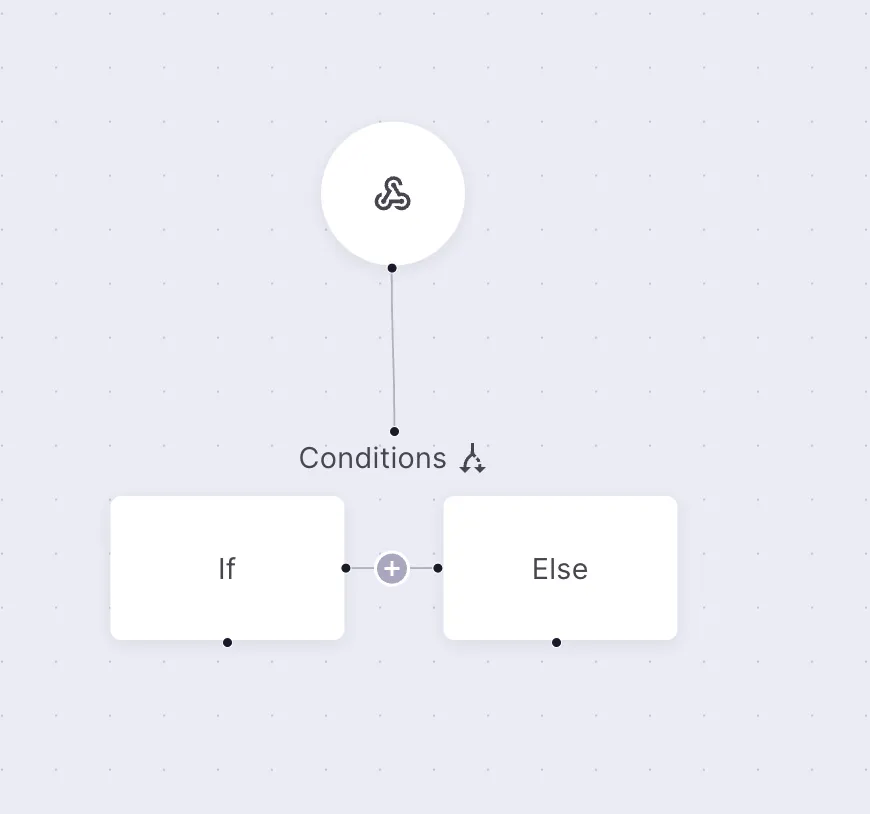
- Condition: Condition applies a condition to the details that were shared in the payload and helps further refine your query with a series of conditions. Conditions are added as If-else blocks.
Once a Trigger has been successfully set up and saved, you can drag and drop any action block or condition block.
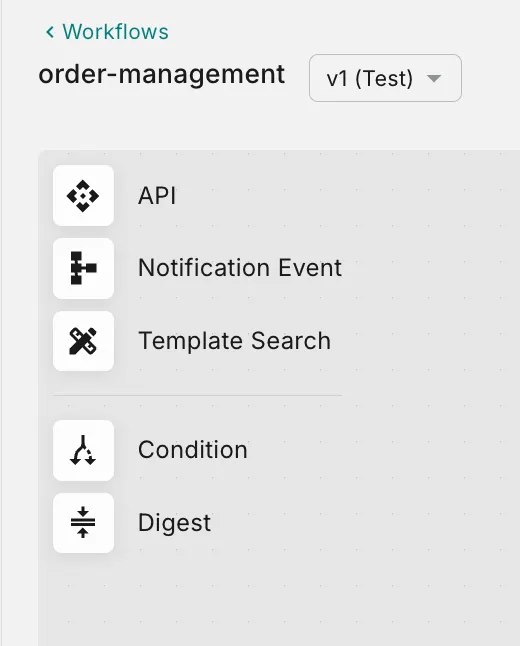
To understand each of these components, a deep dive into the same is needed, which will be covered in the next sections.
Action
An “Action” block can be added immediately after the trigger or based on the outcome of a Condition (explained below).
Notification Event
Trigger Notification Event refers to the notification events created within Fyno’s application and can be called as an action for the payload that was added in the previous step of the workflow.
On drag and drop of the Notification Event, you will see the:
-
Notification Event: Select a relevant Notification Event from the dropdown, specific to this Trigger.
-
Map Data: On selecting the notification event, you will see the Notification Event Mapping details. Basically, for the notification event that you have selected, you will need to specify details from the payload that is being received from the Trigger
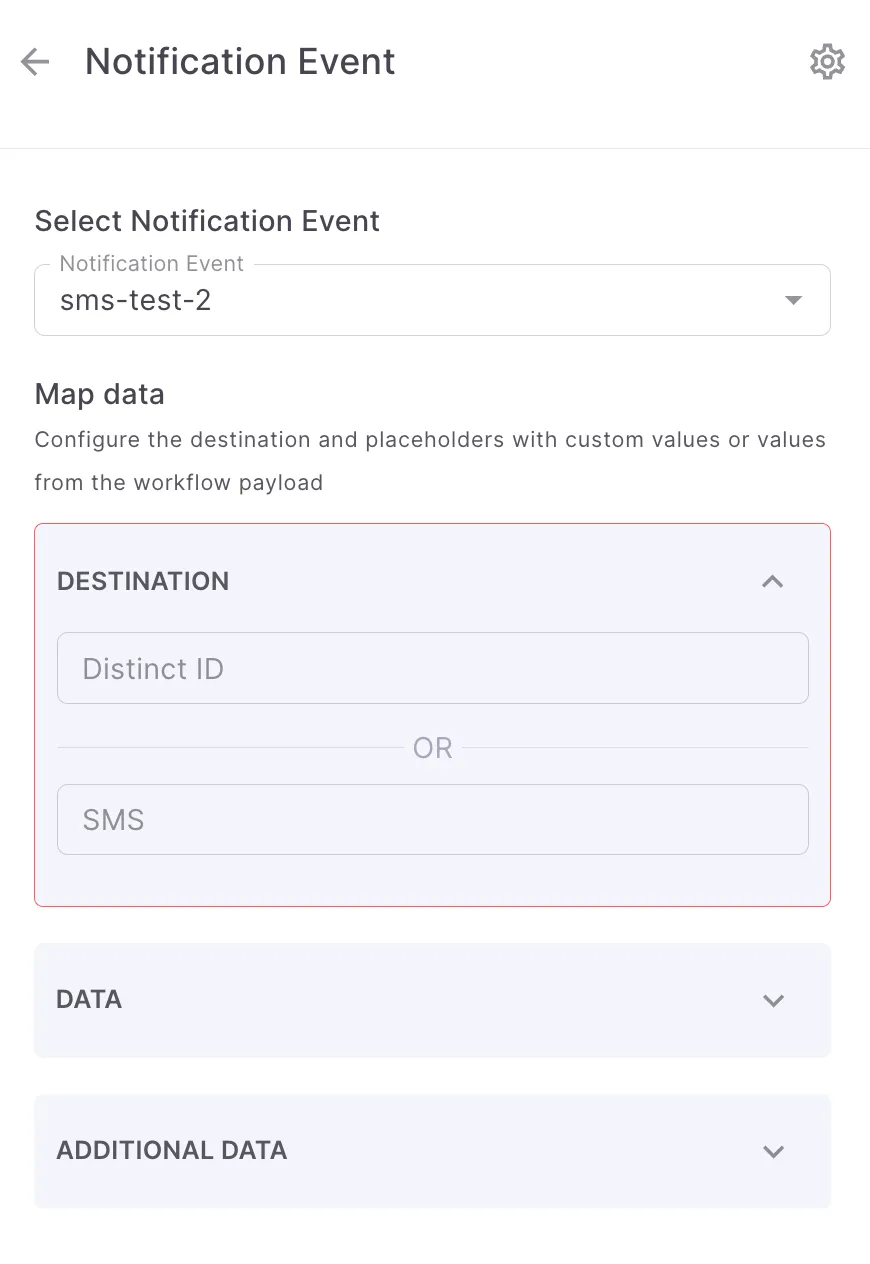
- Distinct Id: If you are using Fyno’s user profile, then select value for Distinct Id from the payload or a custom variable created using the Simplify option.
- Channels : All the channels configured as part of the template linked to the Notification Event selected will appear here. If you are not using Fyno’s user profile, map the channel level destinations from the payload data or custom variables created with Simplify. In this example, the template linked to the notification event ‘sms-test-2’ has only SMS as the channel. That’s why you see SMS under Map data.
-
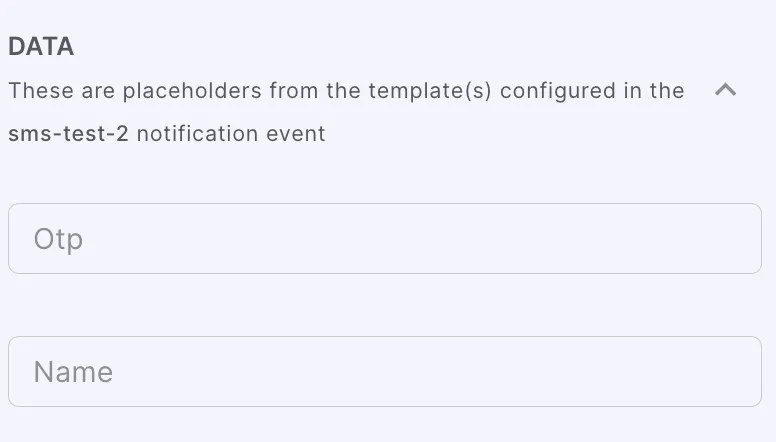
Data: In this section, you will see all the fields that you have specified as Placeholders (variable parameters/dynamic values) in the Template that is associated with the Notification Event that was selected. In case you do not see this field, this means that there are no Placeholders in the Template.
-
Additional Data: Additional data in the form of a payload can be specified here if required, in JSON format. This is an optional field. A typical use case for additional data is when you do not manually add placeholders during template creation. For instance, if your template contains the text
Hi {{name}}but you do not explicitly specifynameas a placeholder during template creation. Nevertheless, Fyno still identifies the name as a placeholder since it appears in the{{ }}syntax. In this scenario, you can include the value of the name in the **Additional Data’**section. To do this, specify the name as the key and select a corresponding value from the dropdown.
How to receive delivery reports?
Fyno allows you to forward delivery reports to your own system or integrate them with third-party analytics tools like Mixpanel and Amplitude. This feature enables you to track and analyze the success of your notification deliveries seamlessly.
You can read more about it here.
How to configure Idempotent Key?
Workflows now supports idempotency, ensuring you can safely retry requests without the risk of performing the same operation twice. This feature proves invaluable in scenarios where an API call gets interrupted in transit, leaving you without a response.
You can read more about it here.
How to configure overrides?
Fyno allows you to override pre-configured values within an Integration, enabling you to use different values for specific notifications in a Workflow. This flexibility is useful when you need to customize the sender information or other details based on the requirements of each notification.
You can read more about it here.
API
Fyno’s Workflow enables you to call external API’s and run the subsequent part of the workflow based on the response received from the API call. This feature makes workflows extremely powerful and flexible to handle various use cases.
The first step to calling an external API in an Workflow is to allowlist the API endpoint. To do this:
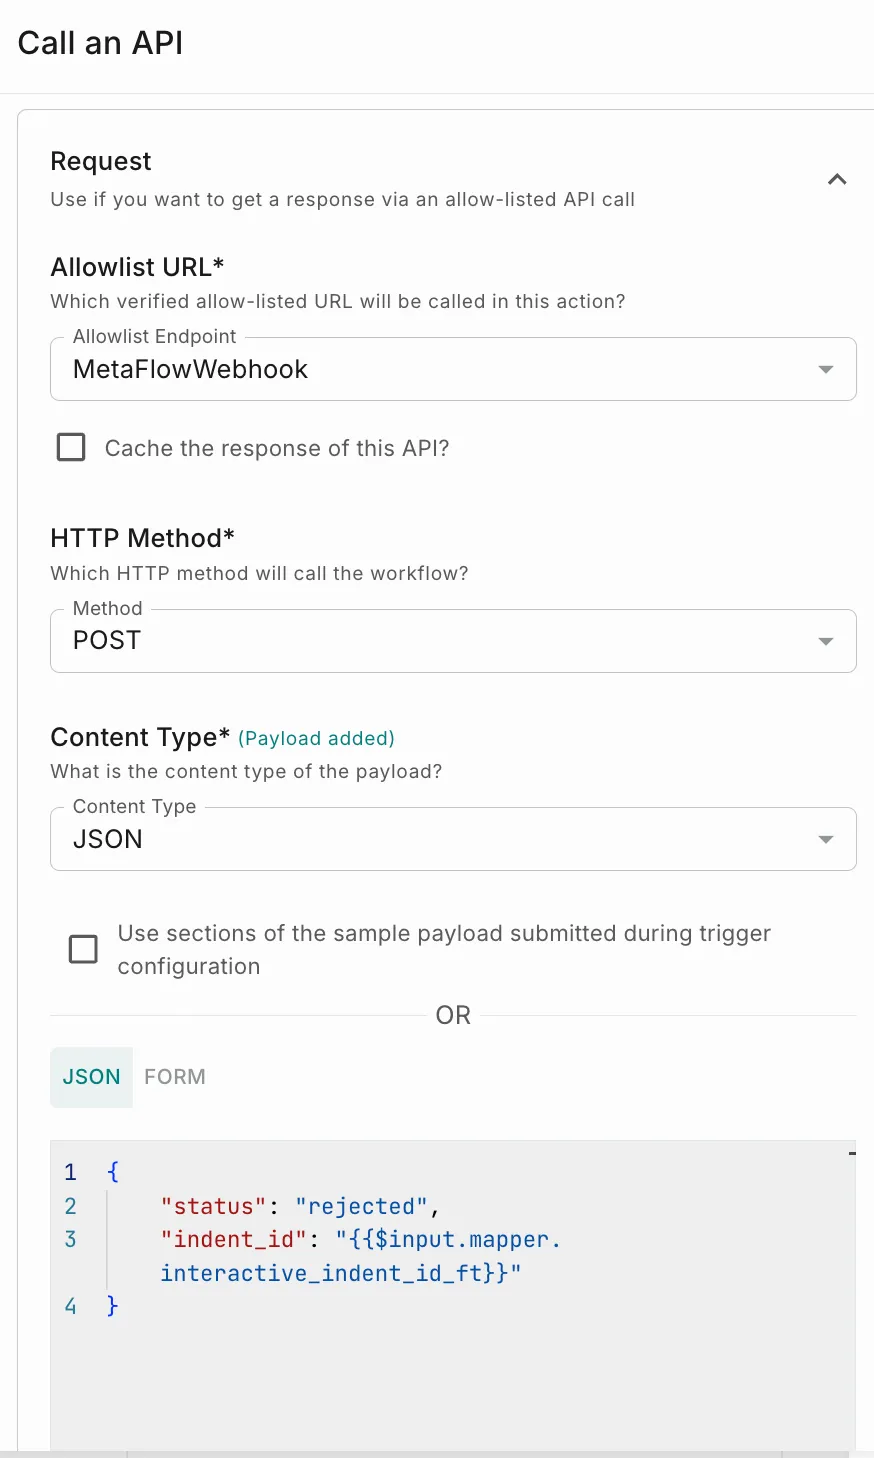
On drag & drop of the API component, you’ll see the following:
-
Allowlist URL Name: Select a URL from the allowlist
-
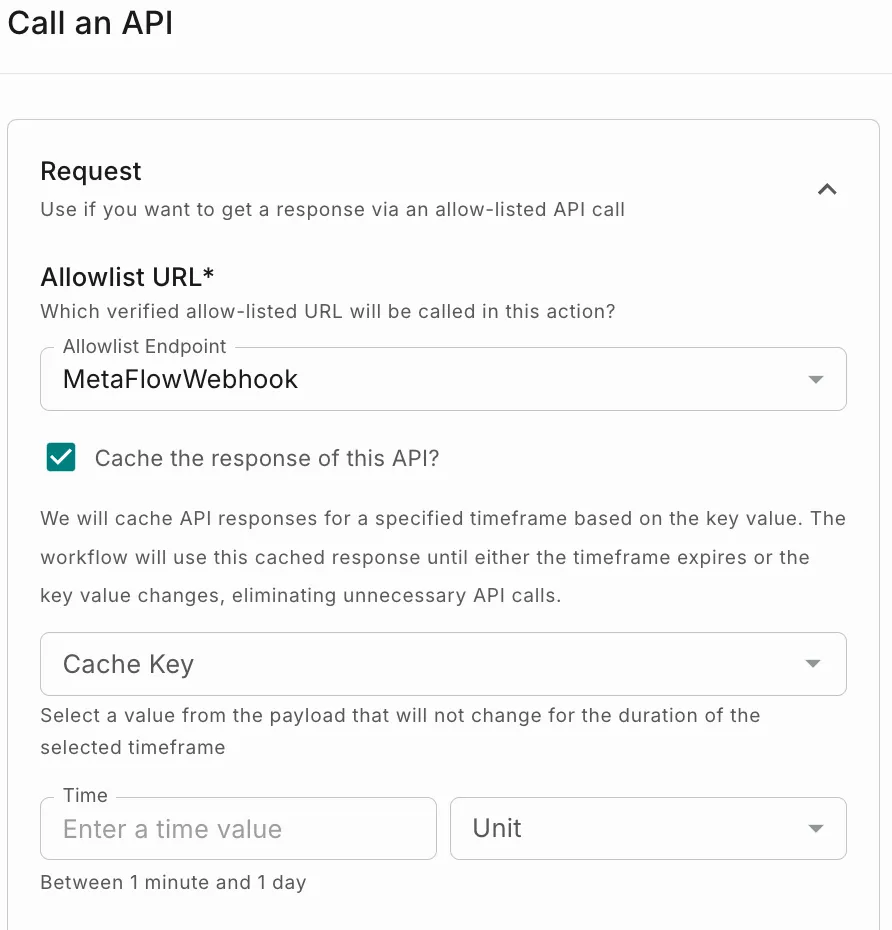
Cache response of this API?: - Its an optional field. We will cache API responses for a specified timeframe based on the key value. The workflow will use this cached response until either the timeframe expires or the key value changes, eliminating unnecessary API calls.
-
Method: Specify the method of input. It may be
- GET
- POST
-
Content Type- If you select POST in the previous step, then you need to select the content type of the payload.
- None - No payload will be sent while triggering the workflow
- JSON - content will be set to application/json
- Form Data - content will be set to multipart/form-data
- URL Encoded Form - content will be set to application/x-www-form-urlencoded
- XML - content will be set to application/xml
- Text - content will be set to text/plain
-
Sample Payload - If you have selected JSON or Form Data or URL Encoded Form, then you need to add sample payload as shown below.
Once you click ‘Add Payload’, a page will open as shown below.
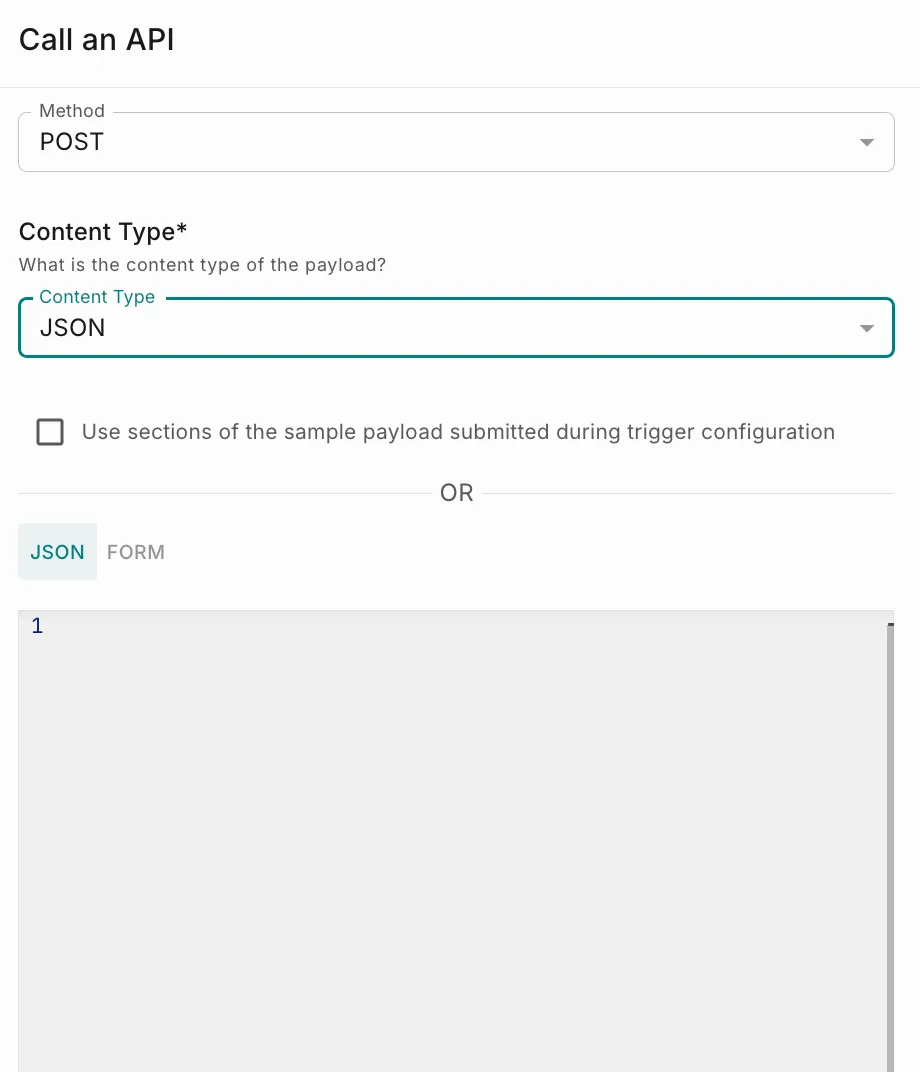
- You can either paste the payload in the json window (or)
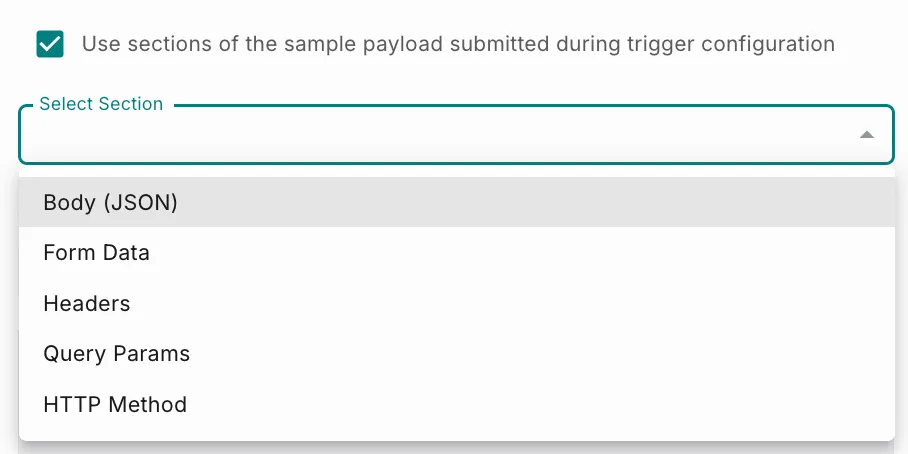
- You can select ‘Use sections of the sample payload submitted during trigger configuration’ checkbox. If you select this option, then you need to select one of the sections as shown below
-
Query Parameters - This is an optional field. This is primarily used with GET requests. They are appended to the URL path after a ? character. Example - /users?page=1&per_page=20
-
Headers- This is an optional field. In API requests, request headers are used to provide additional information for a server to process an API request. API headers typically have a key and a value. For example, a Cache-Control header might be structured like this: Cache-Control:no-store, no-cache, must-revalidate
-
Simplify - Using complex payloads for placeholder mapping can be challenging. Additionally, employing a payload variable repeatedly for conditional checks in Workflow is a cumbersome task. To streamline this process, we’ve introduced the ‘Simplify’ feature. This feature allows you to create custom variables, map payload fields to these variables, assign complex expressions to these variables using the payload fields and seamlessly use these new variables throughout the Workflow. You can click ‘Simplify’ on the top right hand side.
-
The Simplify popup will look as shown below.
- When directly mapping payload data, you can achieve it by linking, for example, ‘acquirer_data.authentication_reference_number’ to the variable ‘ref_no’.
- However, if you’re using Handlebars (HBS), the correct syntax involves using the payload data as ‘$input.body.status’ to map it to a variable like payment_status. Attempting to use just ‘payload.status’ will result in an error. To know more about Handlebars, please refer our documentation
email which contains the email address which you would like to use in the preceding notification event, then you can use a custom variable with value {{$http_response.data.email}} to configure the email in the notification event.Condition
The Condition feature within Workflow allows you to write all the conditional-based logical triggering that you would need to address different situations within a single workflow.
Conditions can be written for the parameters within the payload that are received from the initial Trigger and will help orchestrate the flow based on these parameters workflow canvas will look as shown below..
Variable
- Variable: Select the Variable name that you want to base the condition on.
- Operator: Select an operator that you want to define the condition with. It can be any of the following:
- Equals
- Note Equals
- Starts With
- Ends With
- Contains
- In
- Greater Than
- Less Than
- Greater than or Equal
- Less than or Equal
- Is
- Is Empty
- nin
- is boolean
- Value: Specify the value for the condition, based on which the “If-else” condition will be applied.
HTTP Status Code
You should select this option while creating a condition based on the HTTP status code of an API Call action. The status code can be anything, be it success (200, 201, 2xx etc.) or failure (4xx or 5xx). On selecting HTTP Status Code, field-specific data points will be seen as below:
-
Operator: Select an operator that you want to define the condition with. It can be any of the following:
- Equals
- Note Equals
- Starts With
- Ends With
- Contains
- In
- Greater Than
- Less Than
- Greater than or Equal
- Less than or Equal
- Is
- Is Empty
- nin
- is boolean
-
Value: Specify the value for the condition, based on which the “If-else” condition will be applied.
-
HTTP Response: You should select this option while creating a condition based on the HTTP response of an API Call action. The response can be a string or a JSON key. On selecting HTTP Response, field-specific data points will be seen as below:
-
HTTP Response: Specify the condition based on the response of the API call. For instance, if the response looks like
{status: "ok"}, then the value of the HTTP Response field will bestatus. If the response is nested like{status: {response: "ok"}}, the value of the field will bestatus.response. -
Operator: Select an operator that you want to define the condition with. It can be any of the following:
- Equals
- Note Equals
- Starts With
- Ends With
- Contains
- In
- Greater Than
- Less Than
- Greater than or Equal
- Less than or Equal
- Is
- Is Empty
- nin
- is boolean
-
Custom Value: Specify the value for the condition, based on which the “If-else” condition will be applied.
-
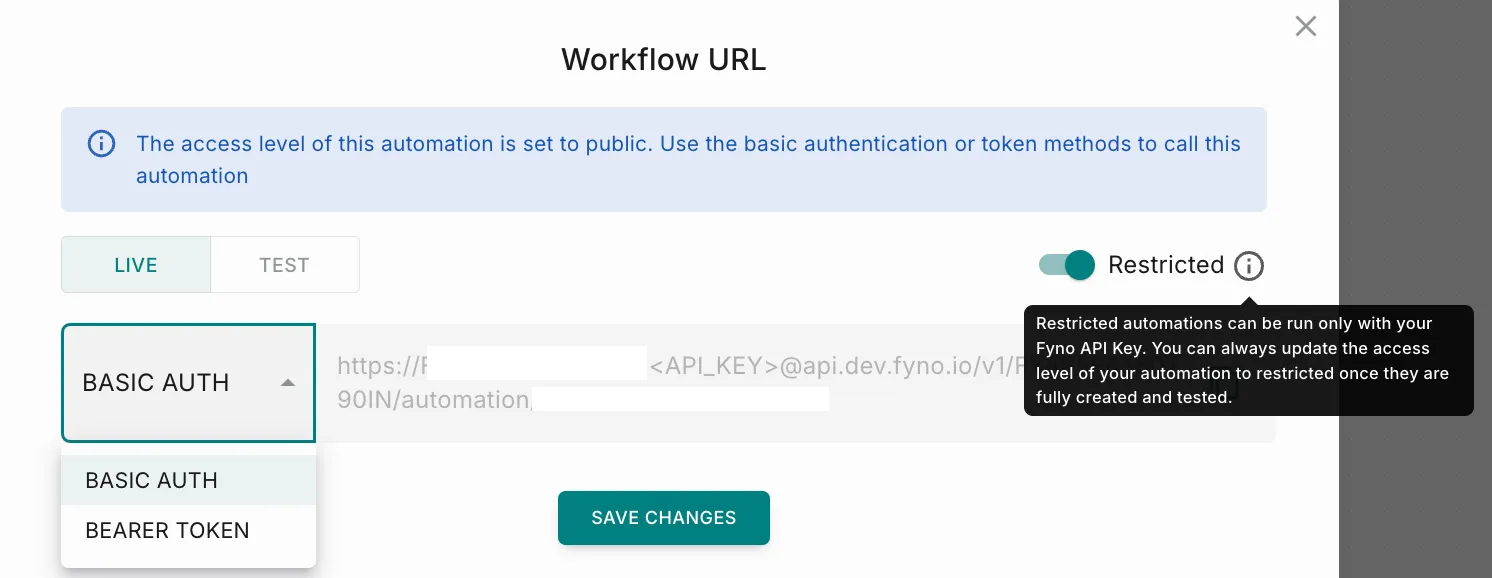
Workflow URL
Once you saved or Go Live your workflow, you will see a popup as shown below .
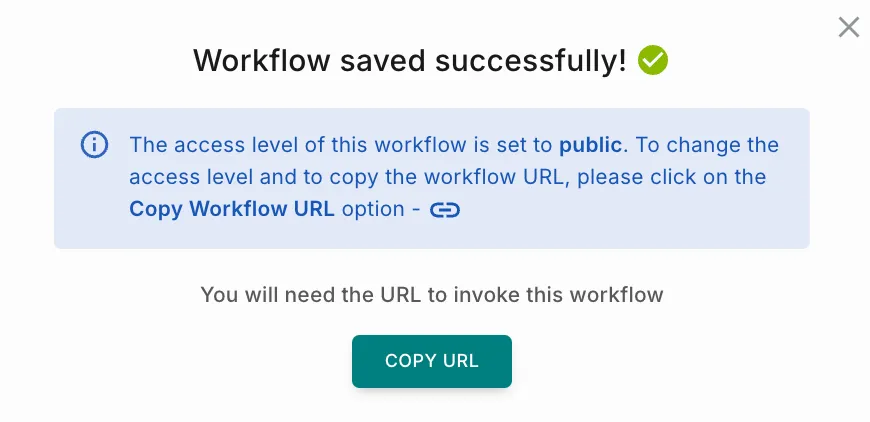
The URL is auto-generated when you create the workflow. You will need to use this URL to invoke this Workflow.
You can also access the Workflow URL by clicking the ‘Copy Workflow URL’ icon at the top right side next to ‘Go Live’ button.
We provide URLs for both Test and Live. Please copy both the URLs and configure it in your system or any third party tool where the webhook will be triggered.
Public
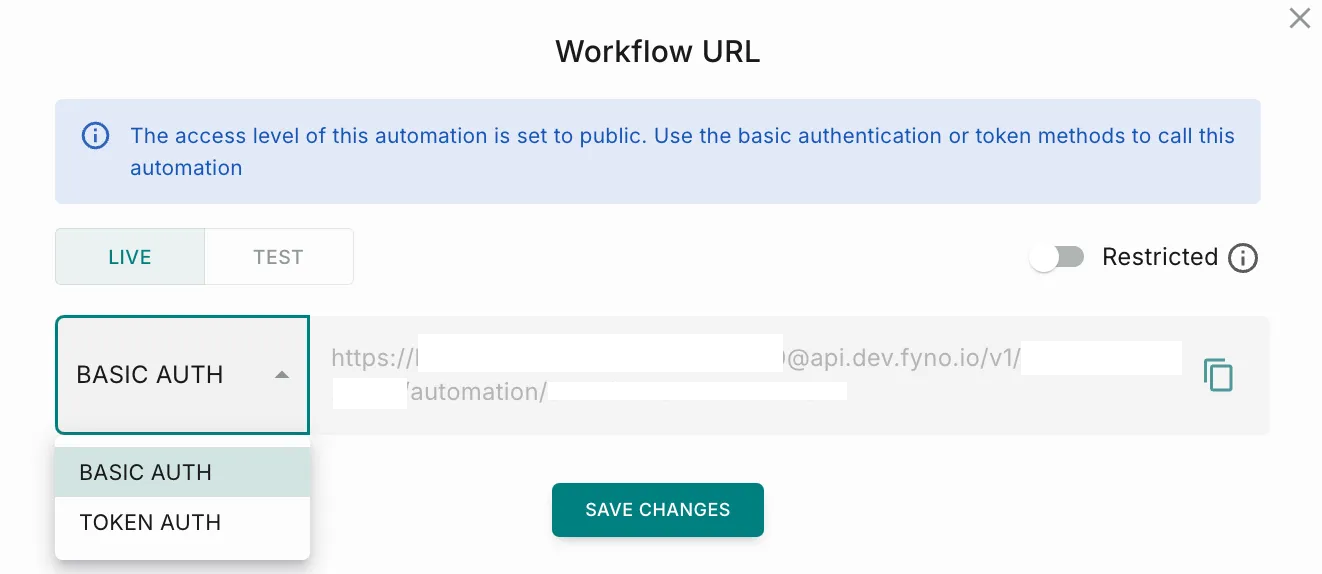
If you are using Public URL, you can select one of these 2 options.
-
Basic Auth - the URL consists of the combination of your workspace ID and the token which Fyno uses for authentication.
-
Token Auth - the URL includes a query parameter
token=<Fyno_generated_token>.
Restricted
If you want to use Restricted access, enable the Restricted Toggle as shown below. You can select one of these 2 options.
- Bearer Token - Pass your Fyno API Key as a bearer token in the authorization header.
{'Authorization': 'Bearer <YOUR_FYNO_API_KEY>'}. - Basic Auth - the URL consists of the combination of your workspace ID and API Key which Fyno uses for authentication.
Example:https://<WORKSPACE_ID>:<API_KEY>@api.fyno.io/v1/automation/XXXXXXX